Manage Category
The Category is a grouping of individual products together based on a similar subject or business focus.
- How to create a new category in flexiPIM?
- How to filter & search category in flexiPIM?
- How to sort category in flexiPIM?
- How to edit category in flexiPIM?
- How to check active & inactive category status in flexiPIM?
- How to delete a category image in flexiPIM?
- How to delete a category in flexiPIM?
How to create a new category in flexiPIM?
Step 1: Login with your credentials
Step 2: Hover over the sidebar on the left side to access the hamburger menu
Step 3: Click on 'Associations' to expand, then click 'Manage Category'
Step 4: The Right side page displays 'Create Category' Form
Step 5: Enter the required fields
Step 6: Click on the 'Save' button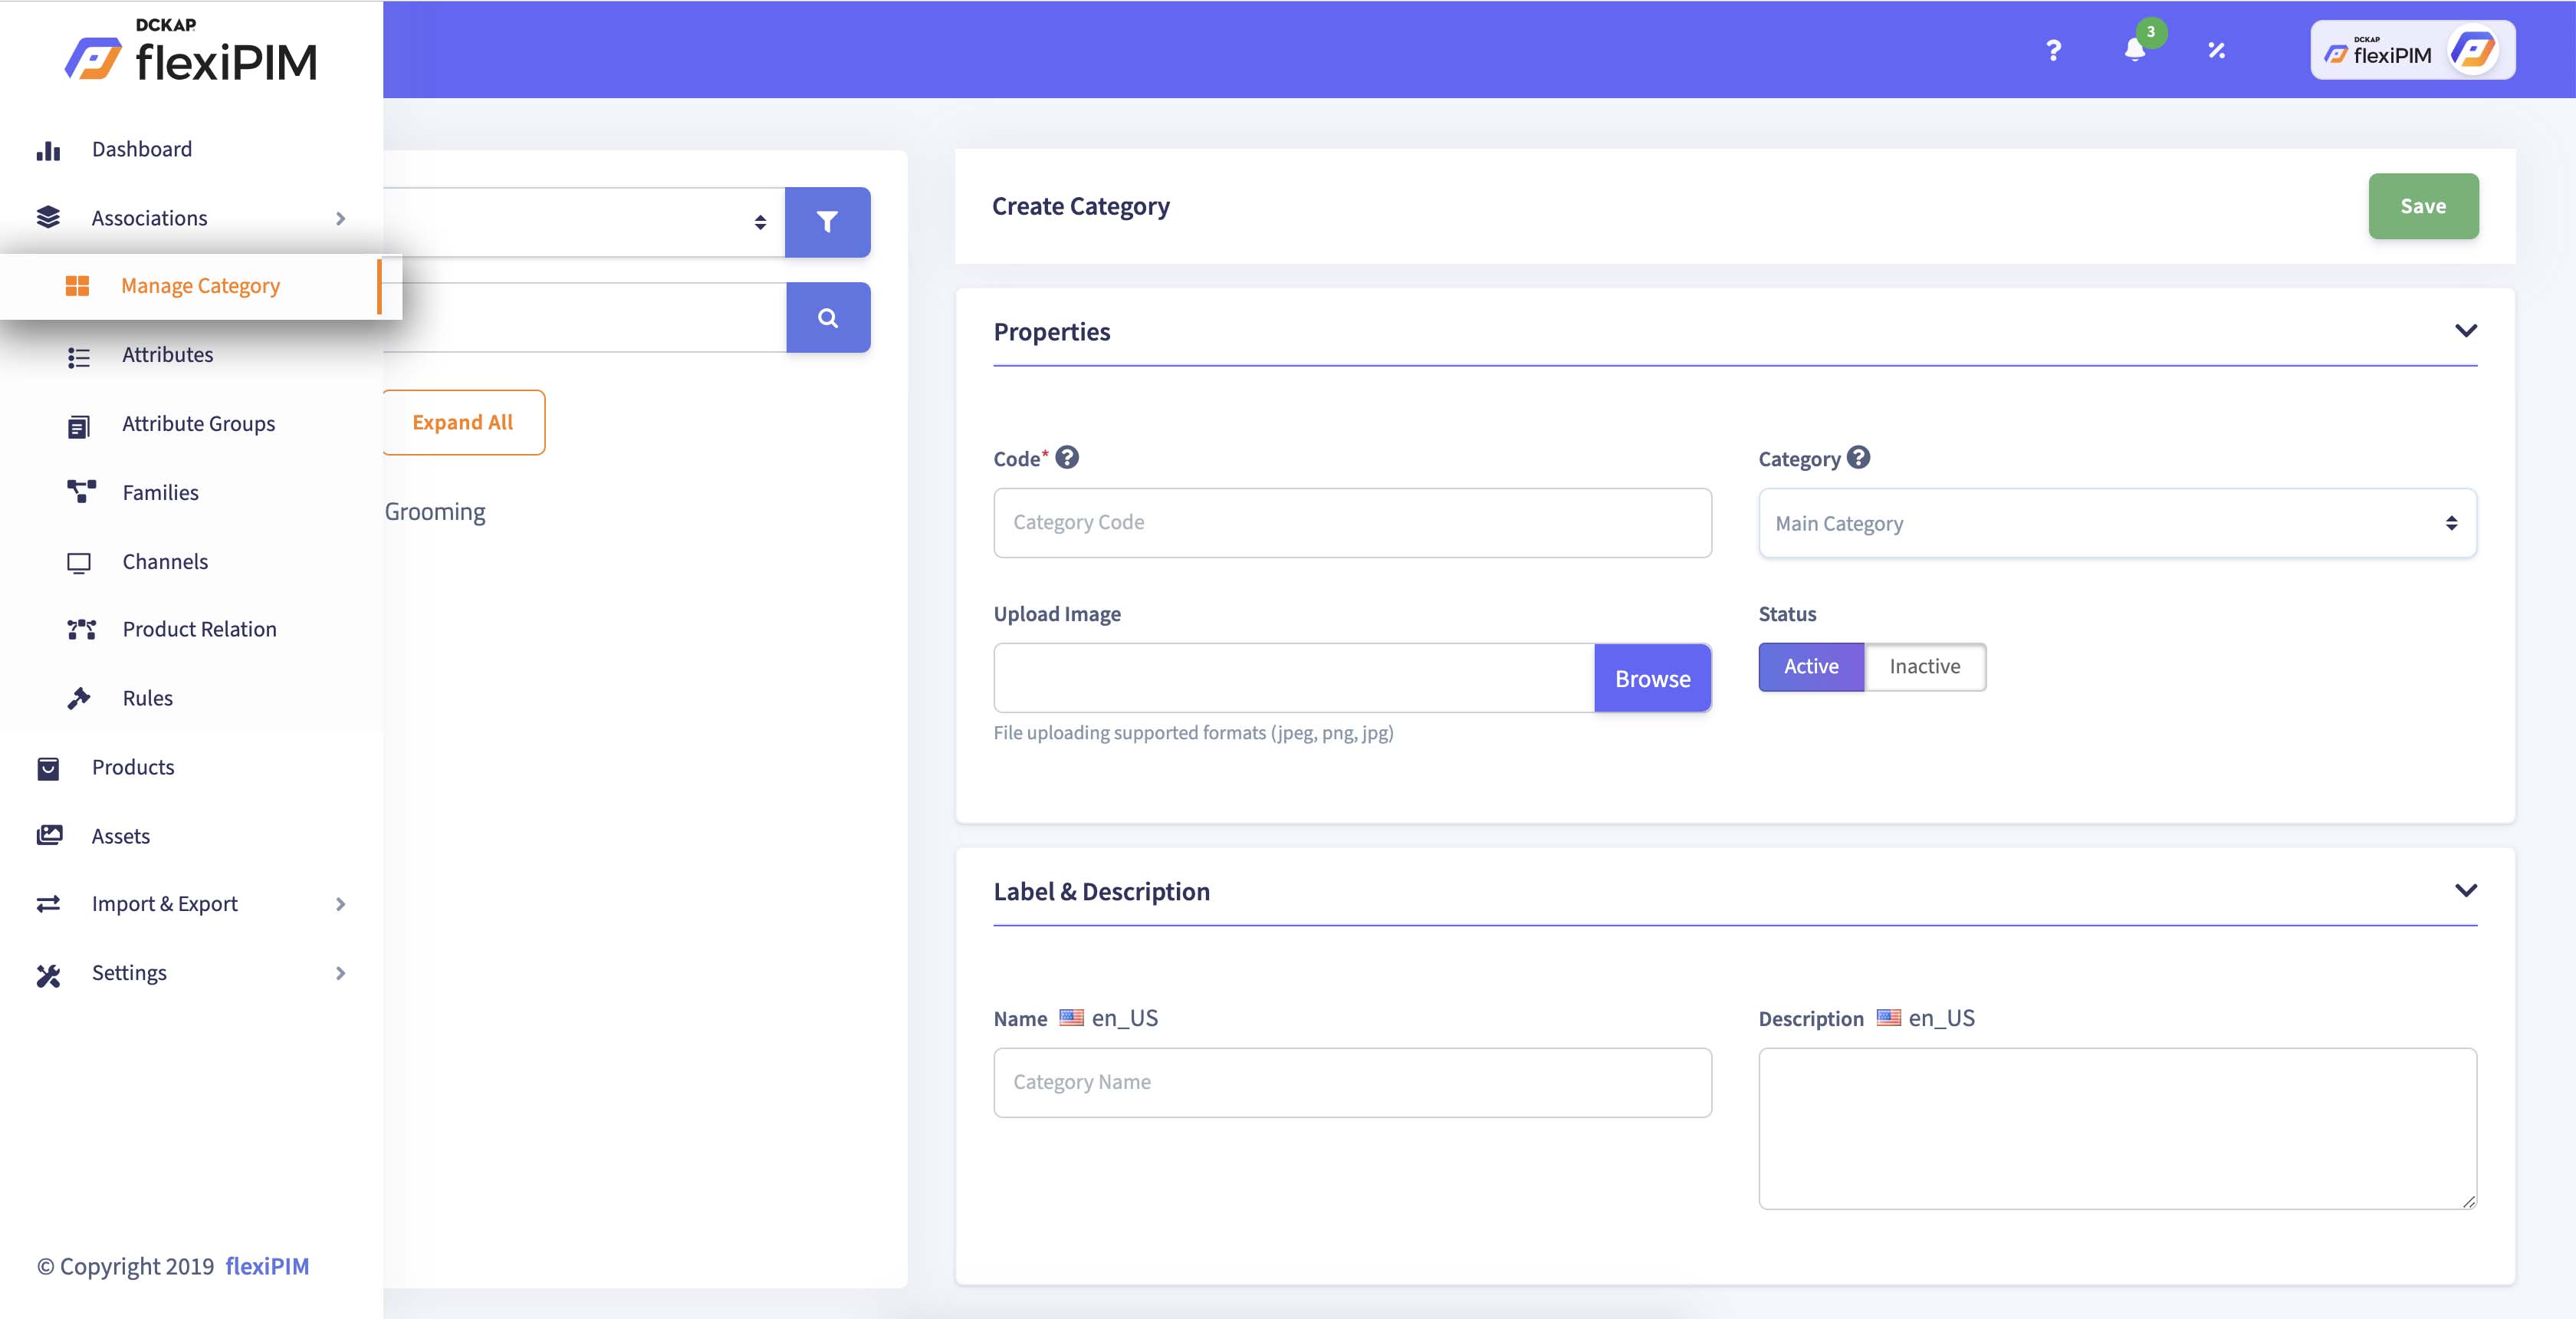
| Name | Description |
|---|---|
| Category | A category is used to classify products. It is always part of the main category tree and you can create a subcategory for a parent |
| Name | To create a name for the category - either parent or sub-category |
| Code | They are used to create a unique code for the category |
| Image | You can upload a category image for parent or sub-category |
| Description | Create a description for the category |
| Status | It shows the status of the category, whether it’s active or inactive |
How to filter & search category in flexiPIM?
Step 1: On left side of the page, you can filter the channel based category by
        choosing select option in the list and then
Step 2: You can search the parent category or subcategory from the created
        category tree
Step 3: Searched category list is highlighted in dark color
Step 4: Category view looks like a tree structure, and you can expand
        and collapse the category view
How to sort category in flexiPIM?
Category Sorting
In the category tree view on the left side, drag the category which you have created and drop the category to parent or sub-category as you wish.
Sort categories with a drag and drop action. You can sort both parent and child categories based on your preference. This sorting order will reflect in your eCommerce stores.
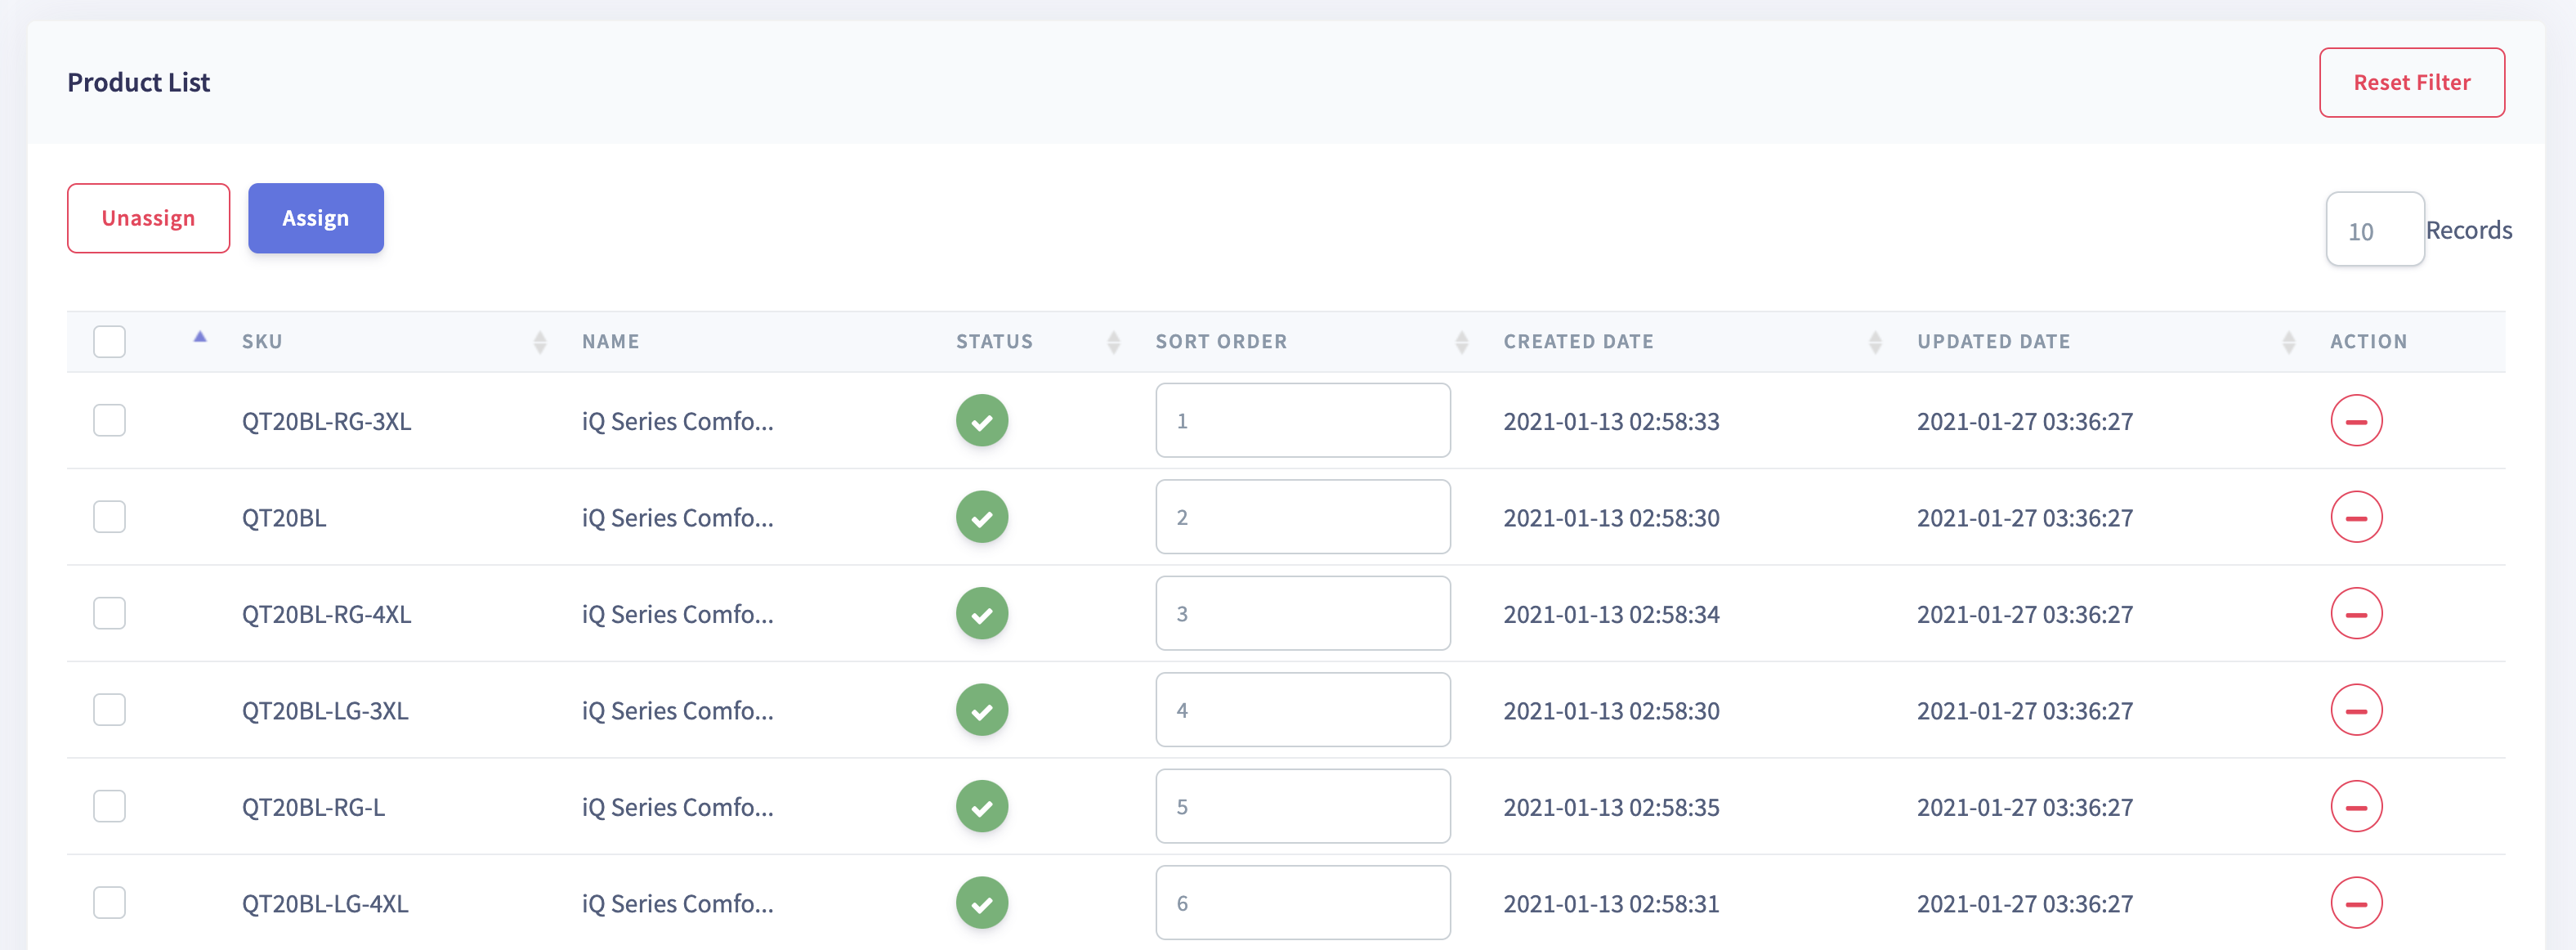
Category product sorting
Prioritize the sort order of products belonging to a category. This sorting order will reflect in the eCommerce stores and APIs.
How to edit category in flexiPIM?
Step 1: On the left side of the page, click on the created category name which
        you want to edit, and it is redirected to that particular page. You can
        also edit those fields shown below except 'Category code,'
        - Name
        - Image
        - Description
        - Image
        - Status
Step 2: Click on the 'Save' button
How to check active & inactive category status in flexiPIM?
-
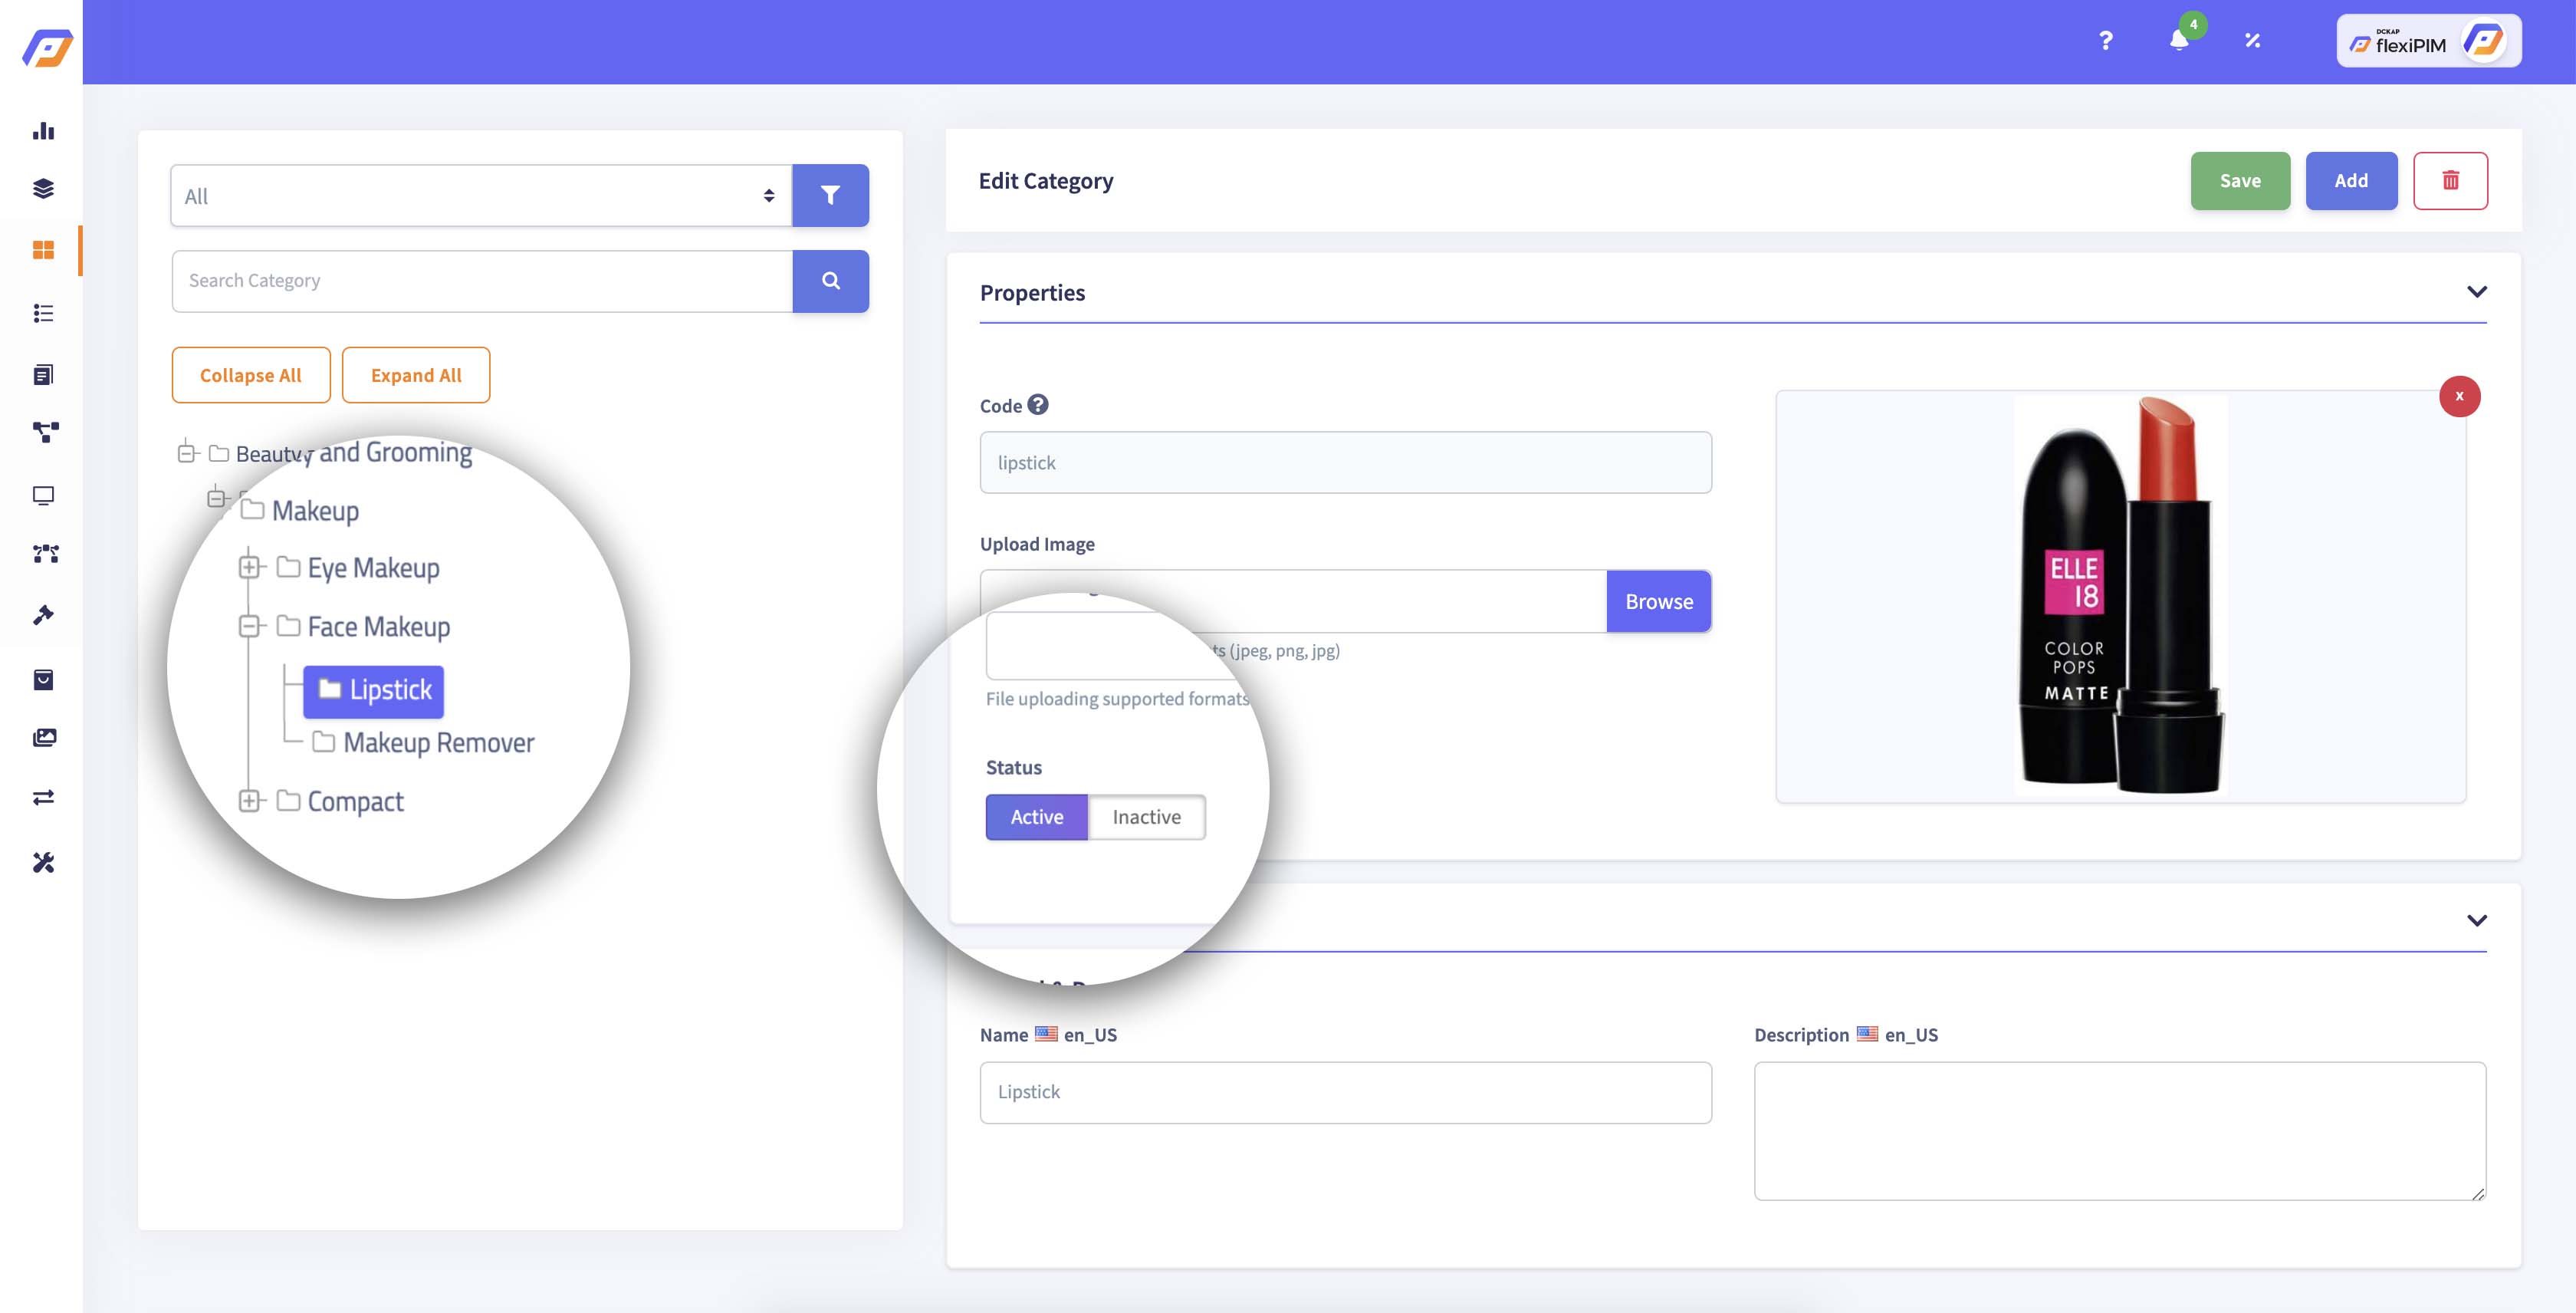
Left side on the page is category list, the text highlighted in dark color is the
Active category, and on the right side, it shows status asActiveswitch button. -
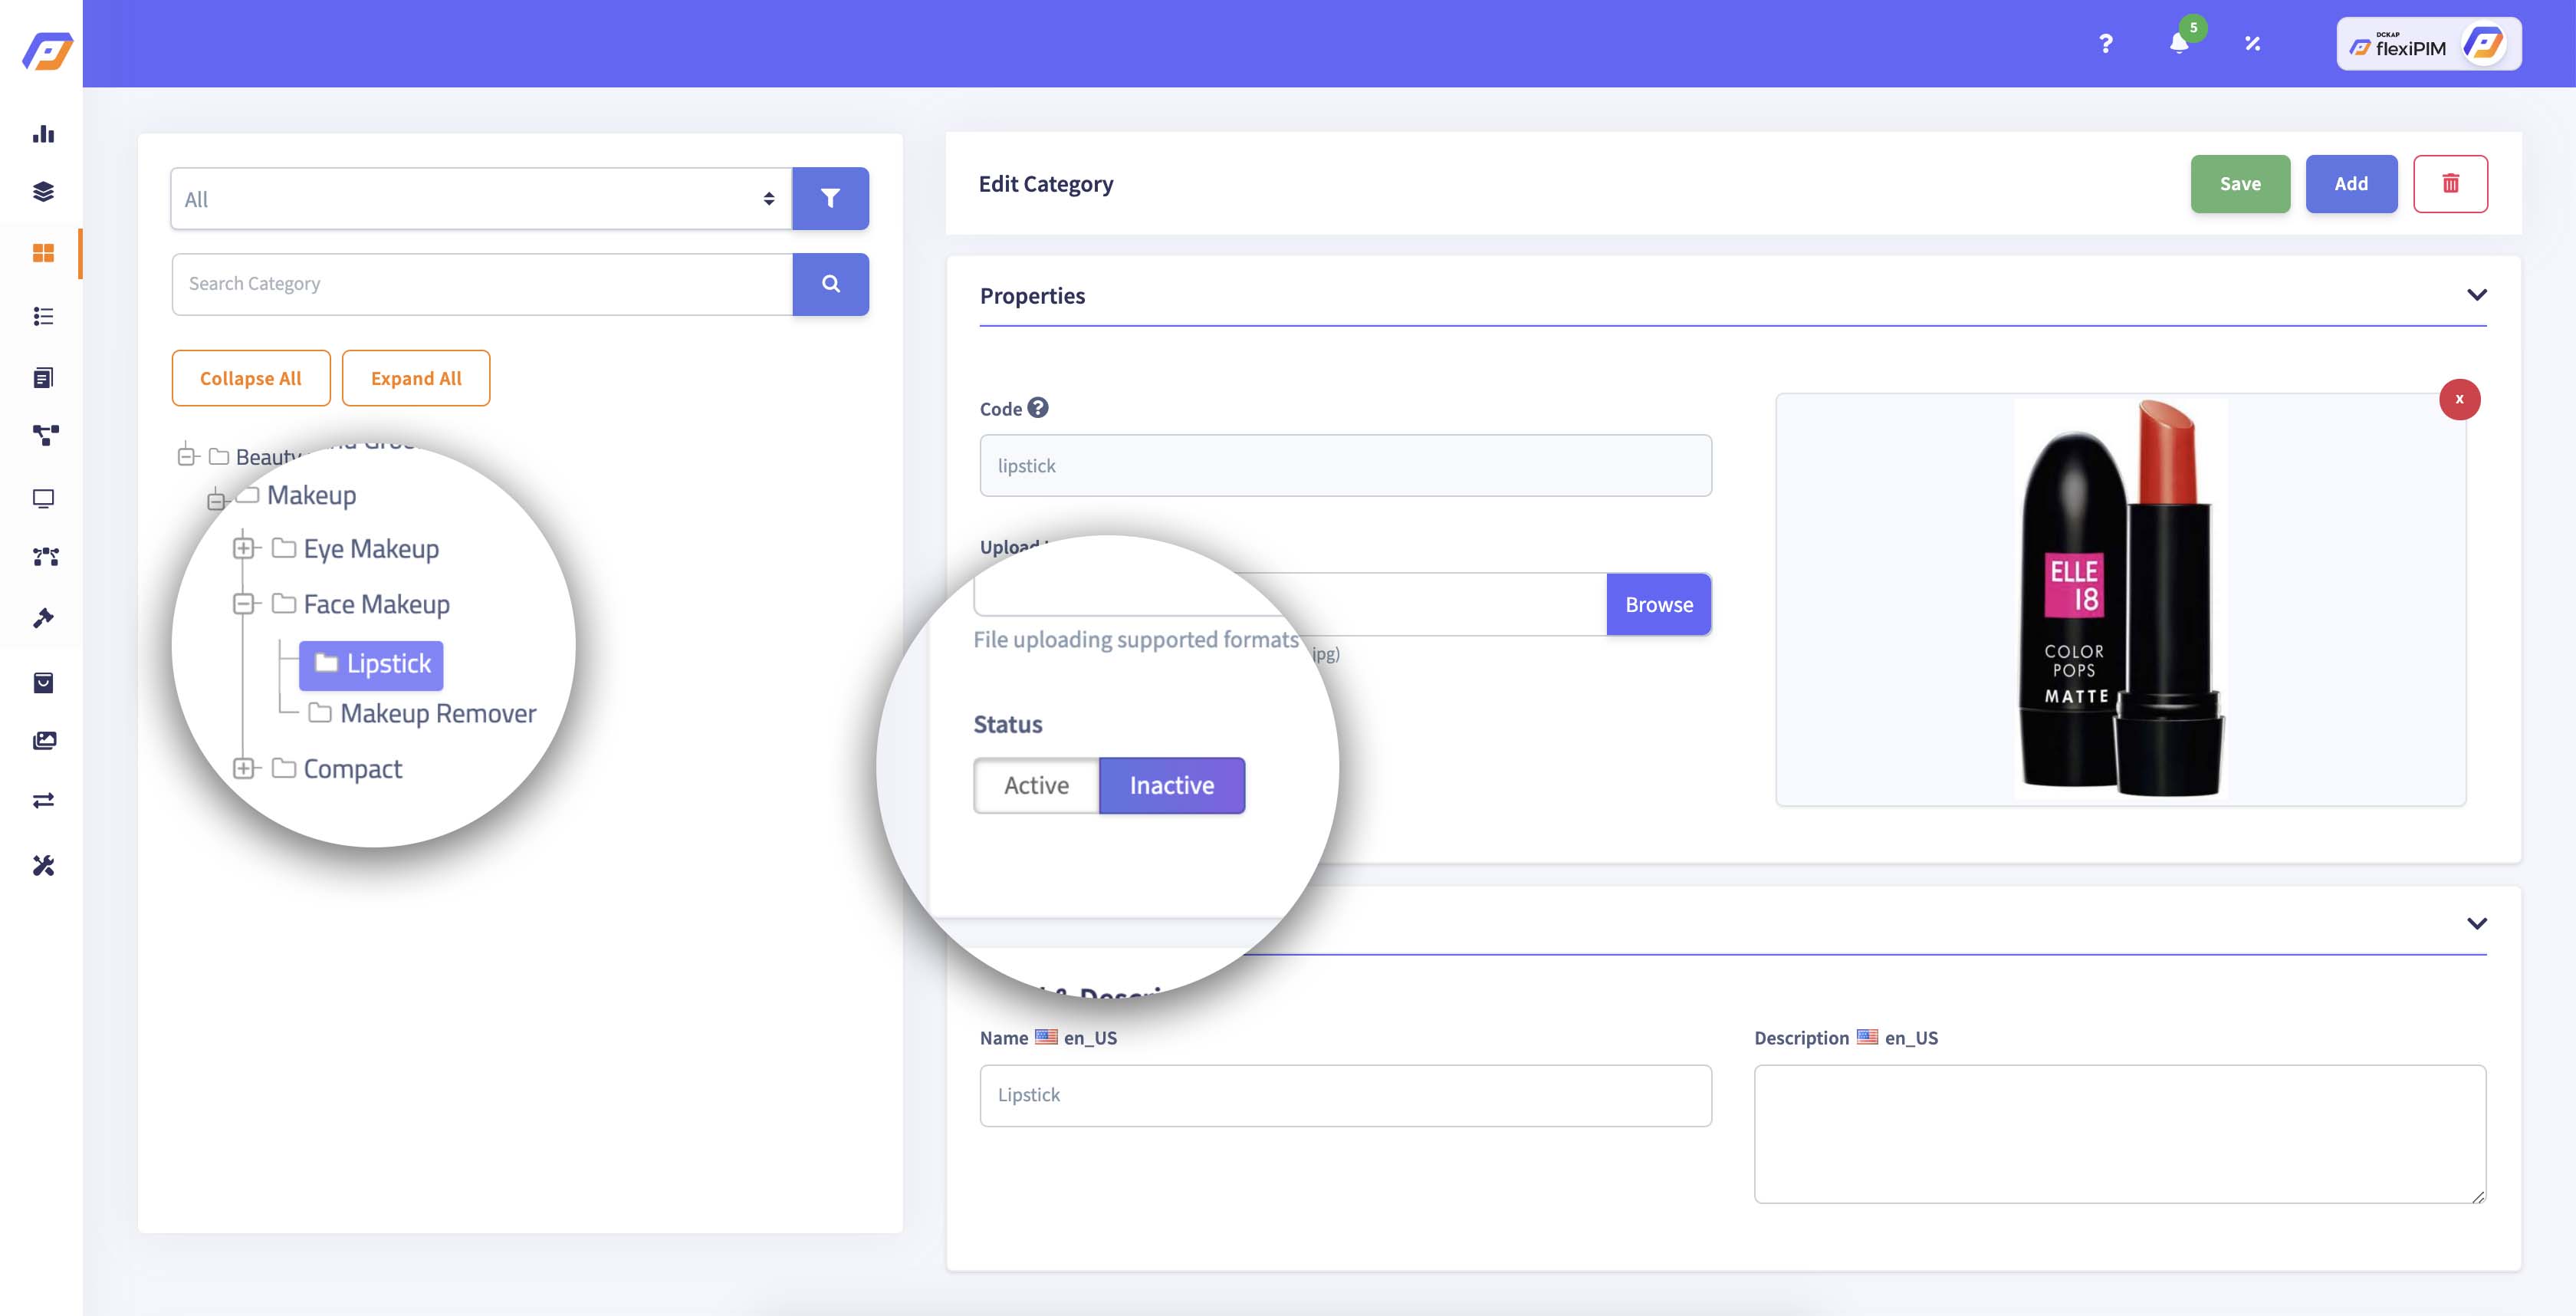
Left side on the page is category list, the text is highlighted in light color denotes
Inactive category, and right side, it shows status as anInactiveswitch button.
| Active Category | Inactive Category |
|---|---|
 |
 |
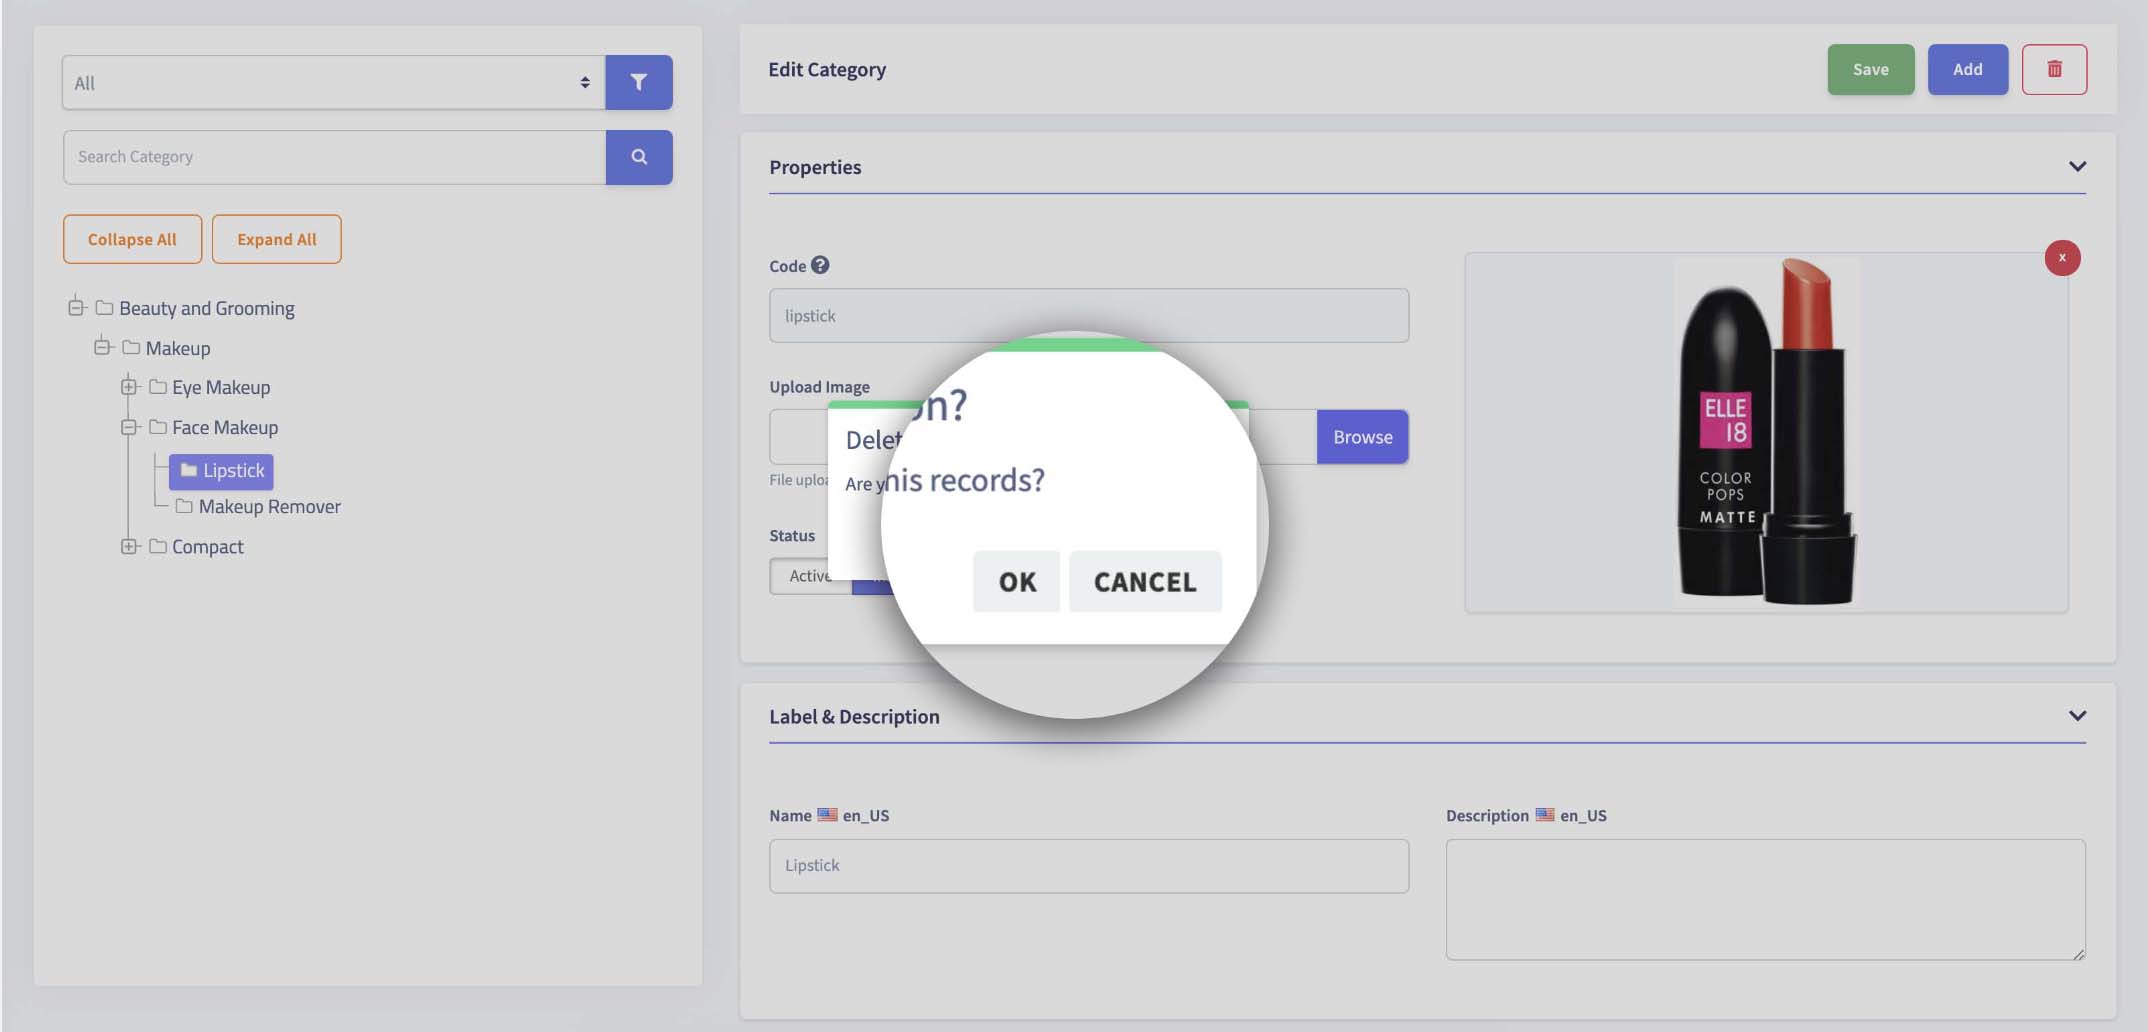
How to delete a category image in flexiPIM?
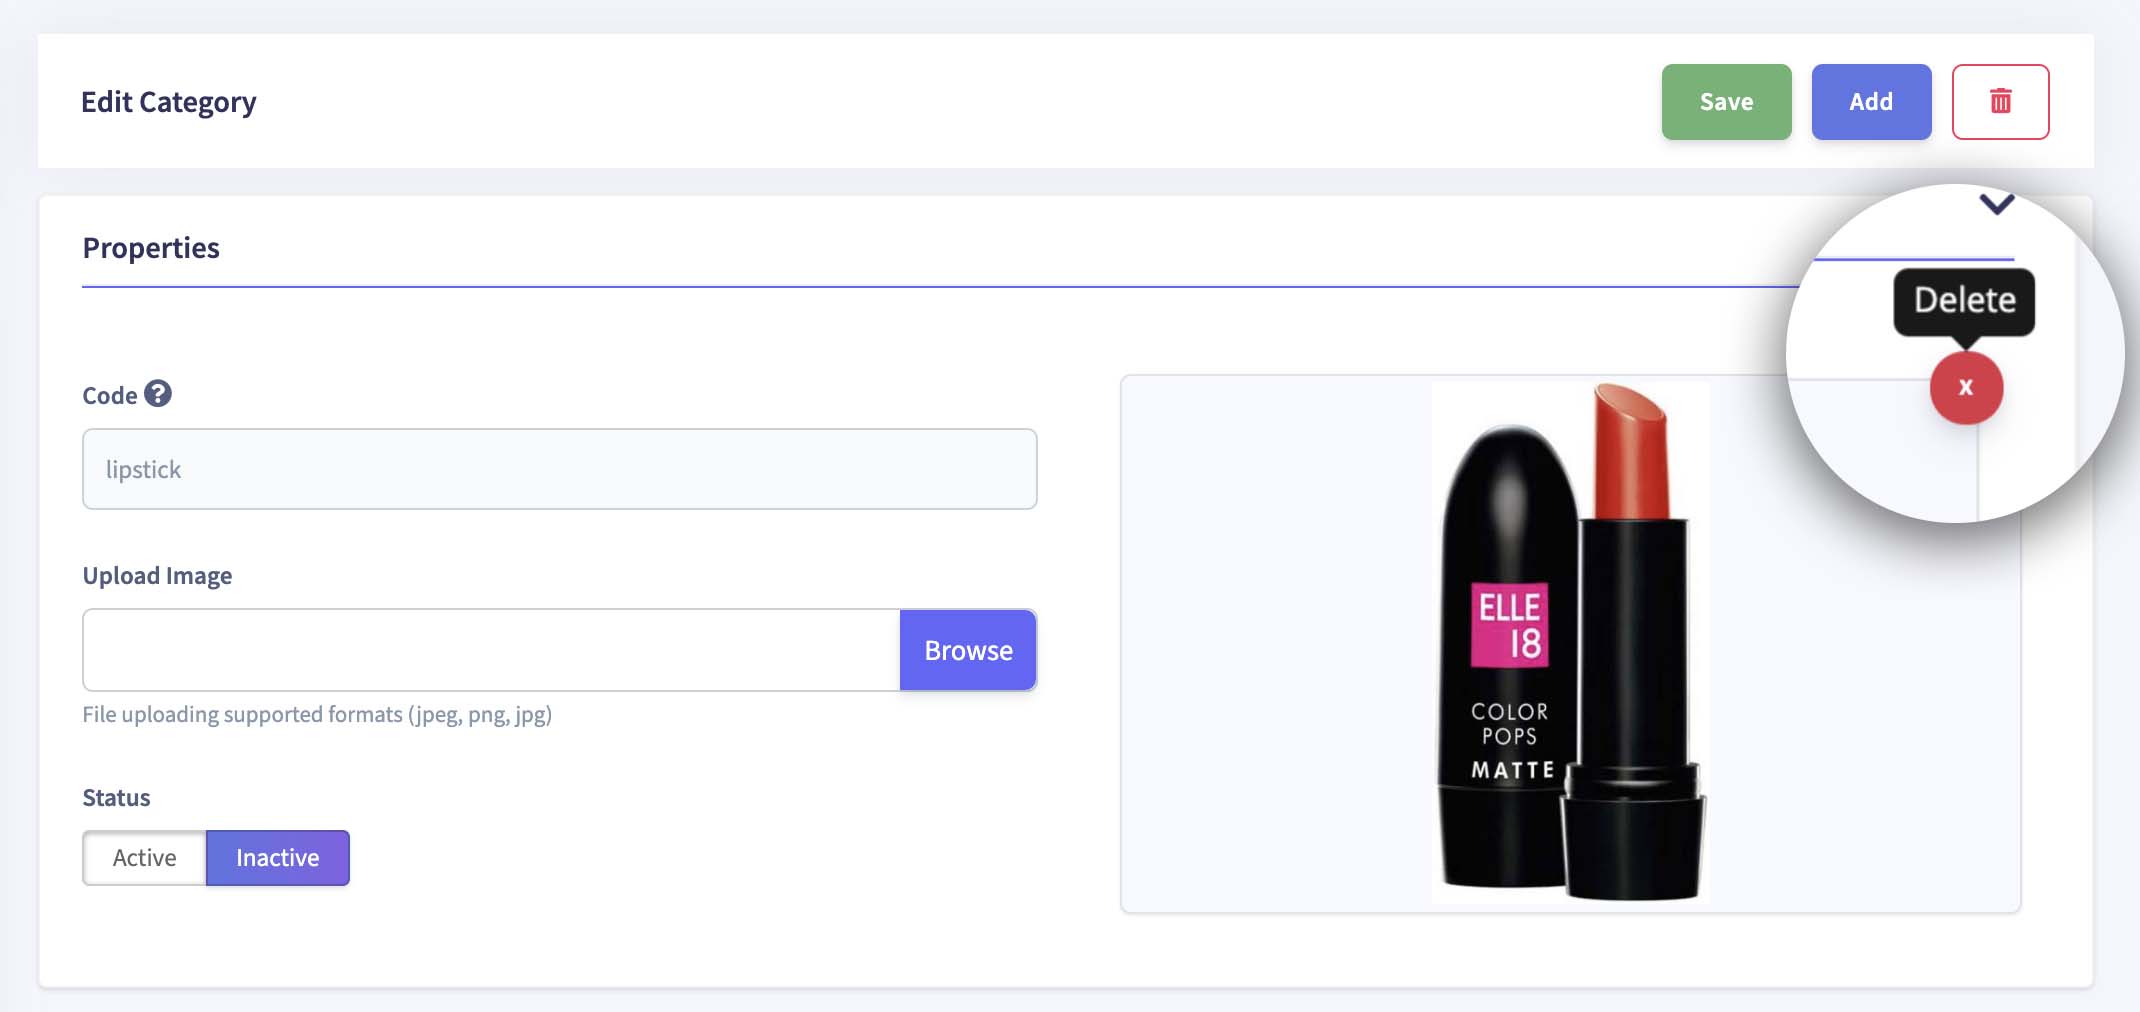
Step 1: When you hover over on the 'X' icon button, it shows popover 'Delete'
Step 2: Click 'X' icon button, and it shows a popup confirmation
Step 3: Click the 'OK' button to delete the image or click the
'Cancel' button if you want to discard your changes| Delete Category Image | Confirmation Popup |
|---|---|
 |
 |
How to delete a category in flexiPIM?
Step 1: When you hover over on the 'Trash' icon button, it shows popover 'Delete' Category
Step 2: Click the 'Trash' icon button, and it shows a popup confirmation
Step 3: Click the 'OK' button to delete a category or click the 'Cancel' button
to discard your changes| Delete Category | Confirmation Popup |
|---|---|
 |
|