Custom Import Extension
The Custom Import extension on flexiPIM solves the problem of importing rigid formats of import
sheets in flexiPIM. With Custom Import users can now import product data from various sources by
creating templates for each data source, as a one-time activity.
- How to create a Custom Import Template?
- How to edit a Custom Import Template?
- How to Edit Mapping in a Custom Import Template?
- How to delete a Custom Import Template?
Below are some use cases where Custom Import makes your job easy.
-
Unlike the native
Importoption in flexiPIM, the Custom Import extension automatically creates
Categoriesmissing in your Import sheet, into flexiPIM. -
It enables you to import both categories and variants from a single sheet, unlike flexiPIM’s native
Importwhere you had to use multiple import sheets for the same. -
You have multiple vendors who supply product data in various formats. Custom import lets you create a template for each type of import sheet which you can edit/reimport every time there is a new update.
Let’s see how Custom Import works.
Step 1: Hover over the 'Grid' icon on the top bar of the flexiPIM dashboard. Click on the
        'Custom Import' extension icon as shown below.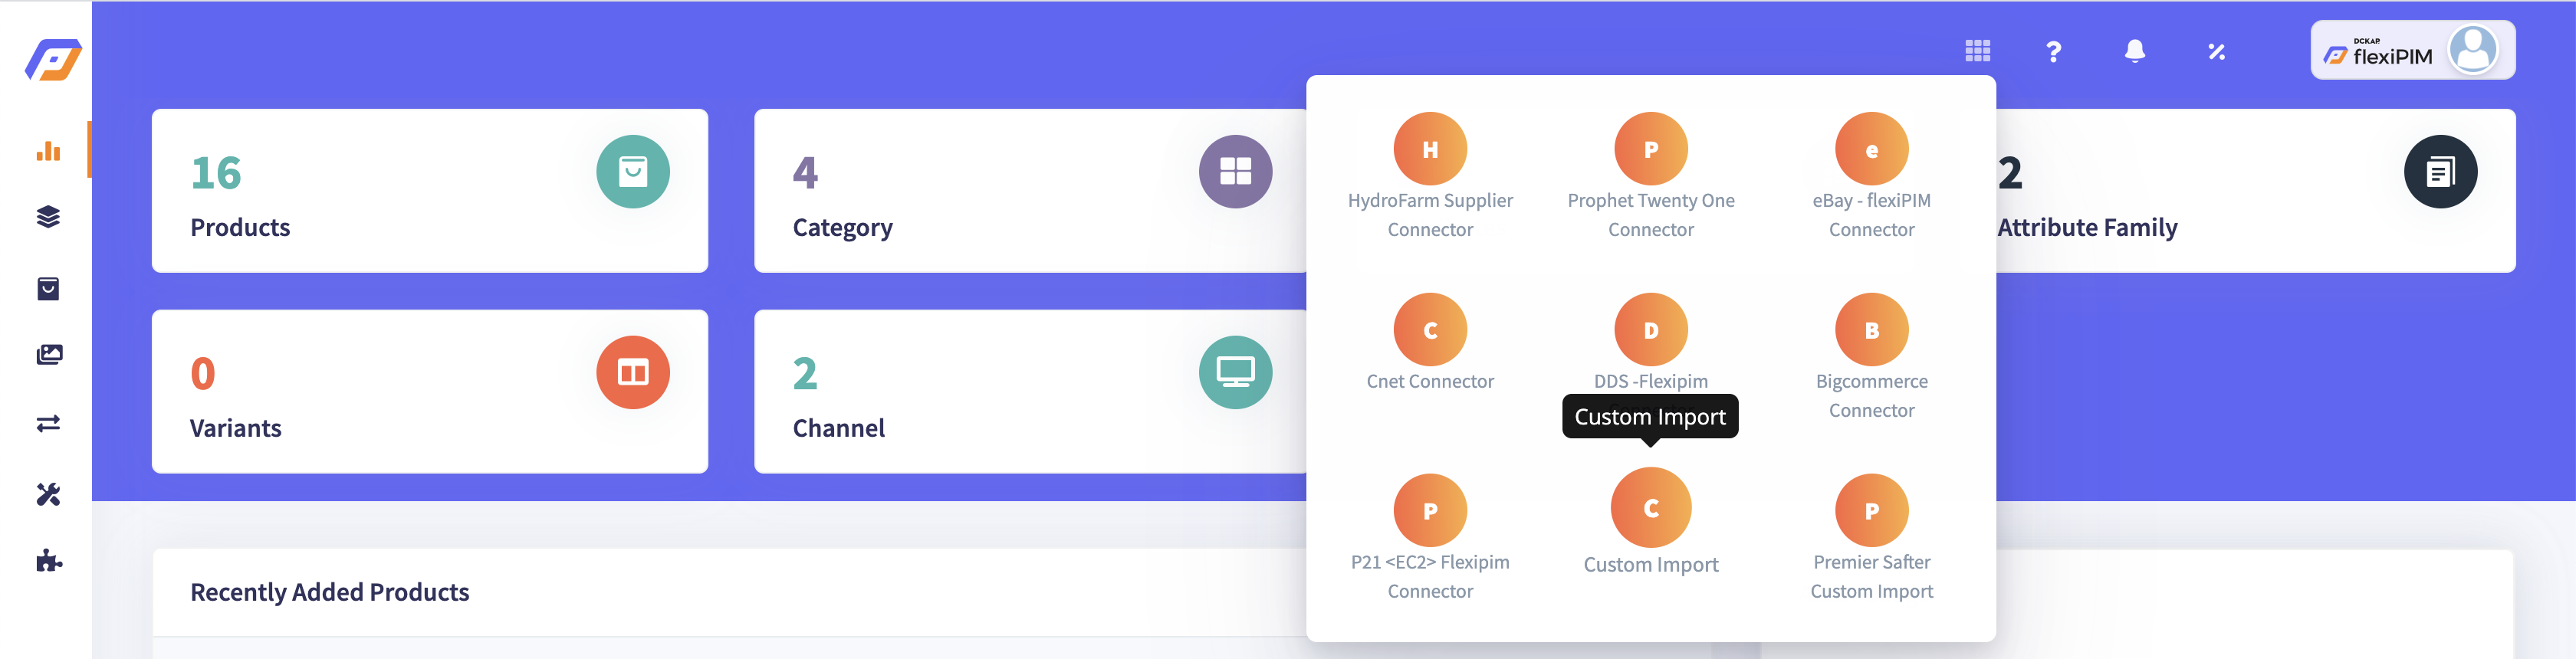
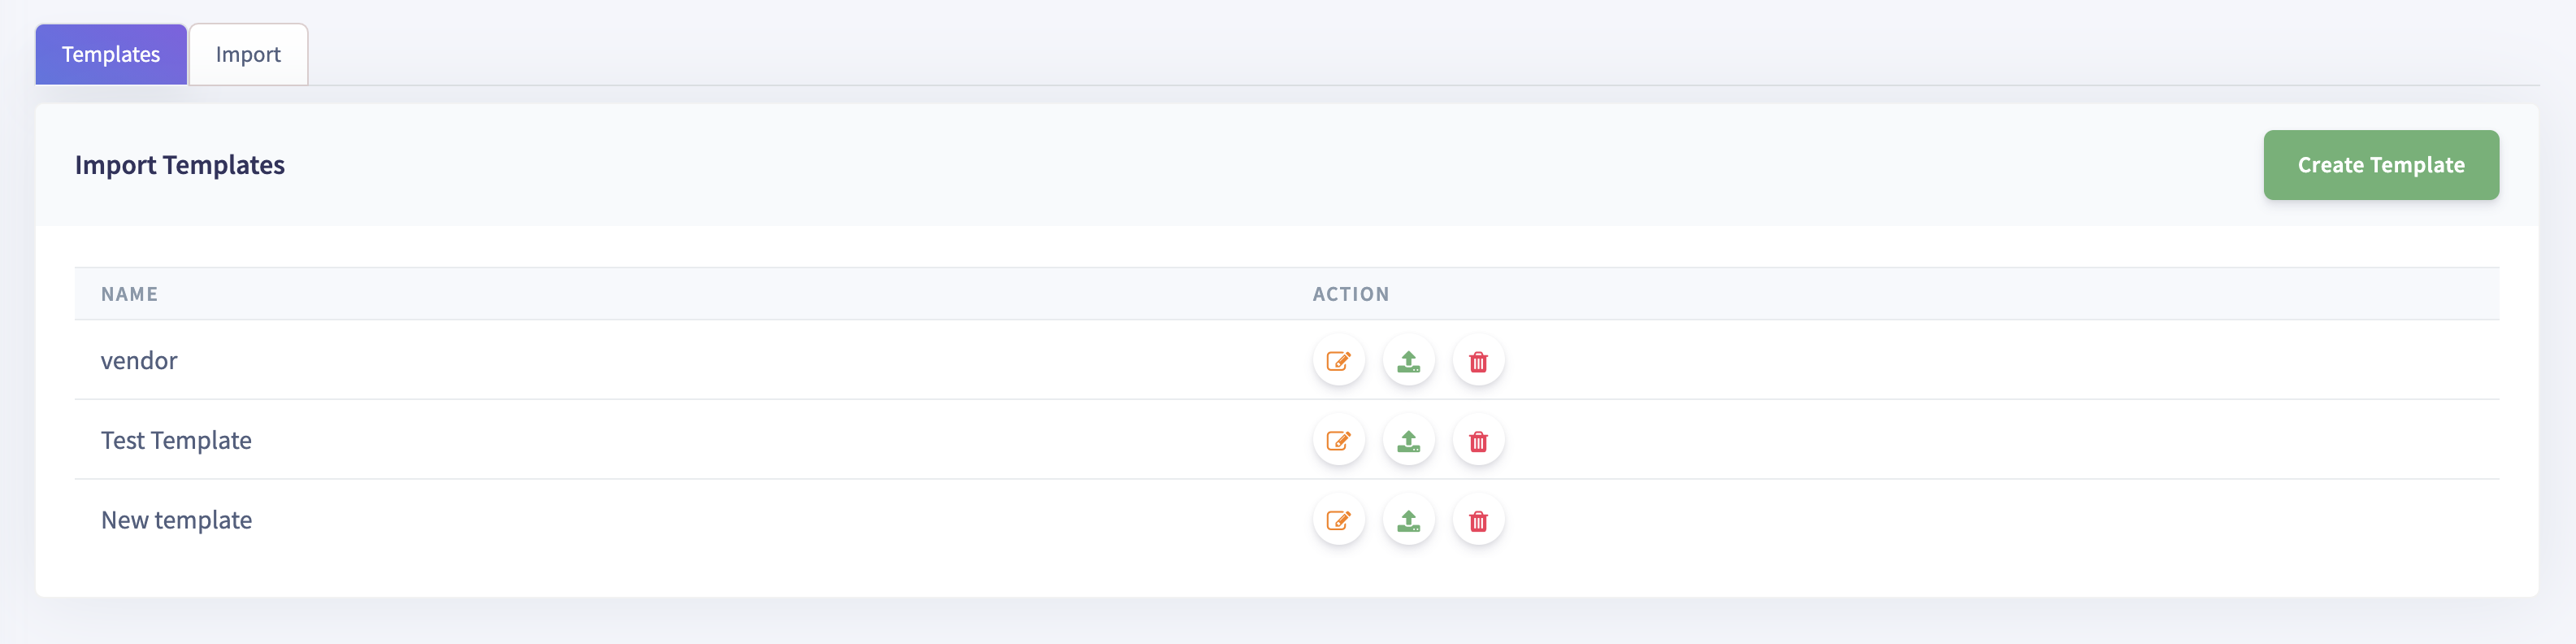
Step 2: You will be directed to the 'Import templates' page as shown below that
consists of 'Templates' and 'Import' tabs. The 'Templates' tab displays
the predefined import templates. The Import tab shows the activity logs
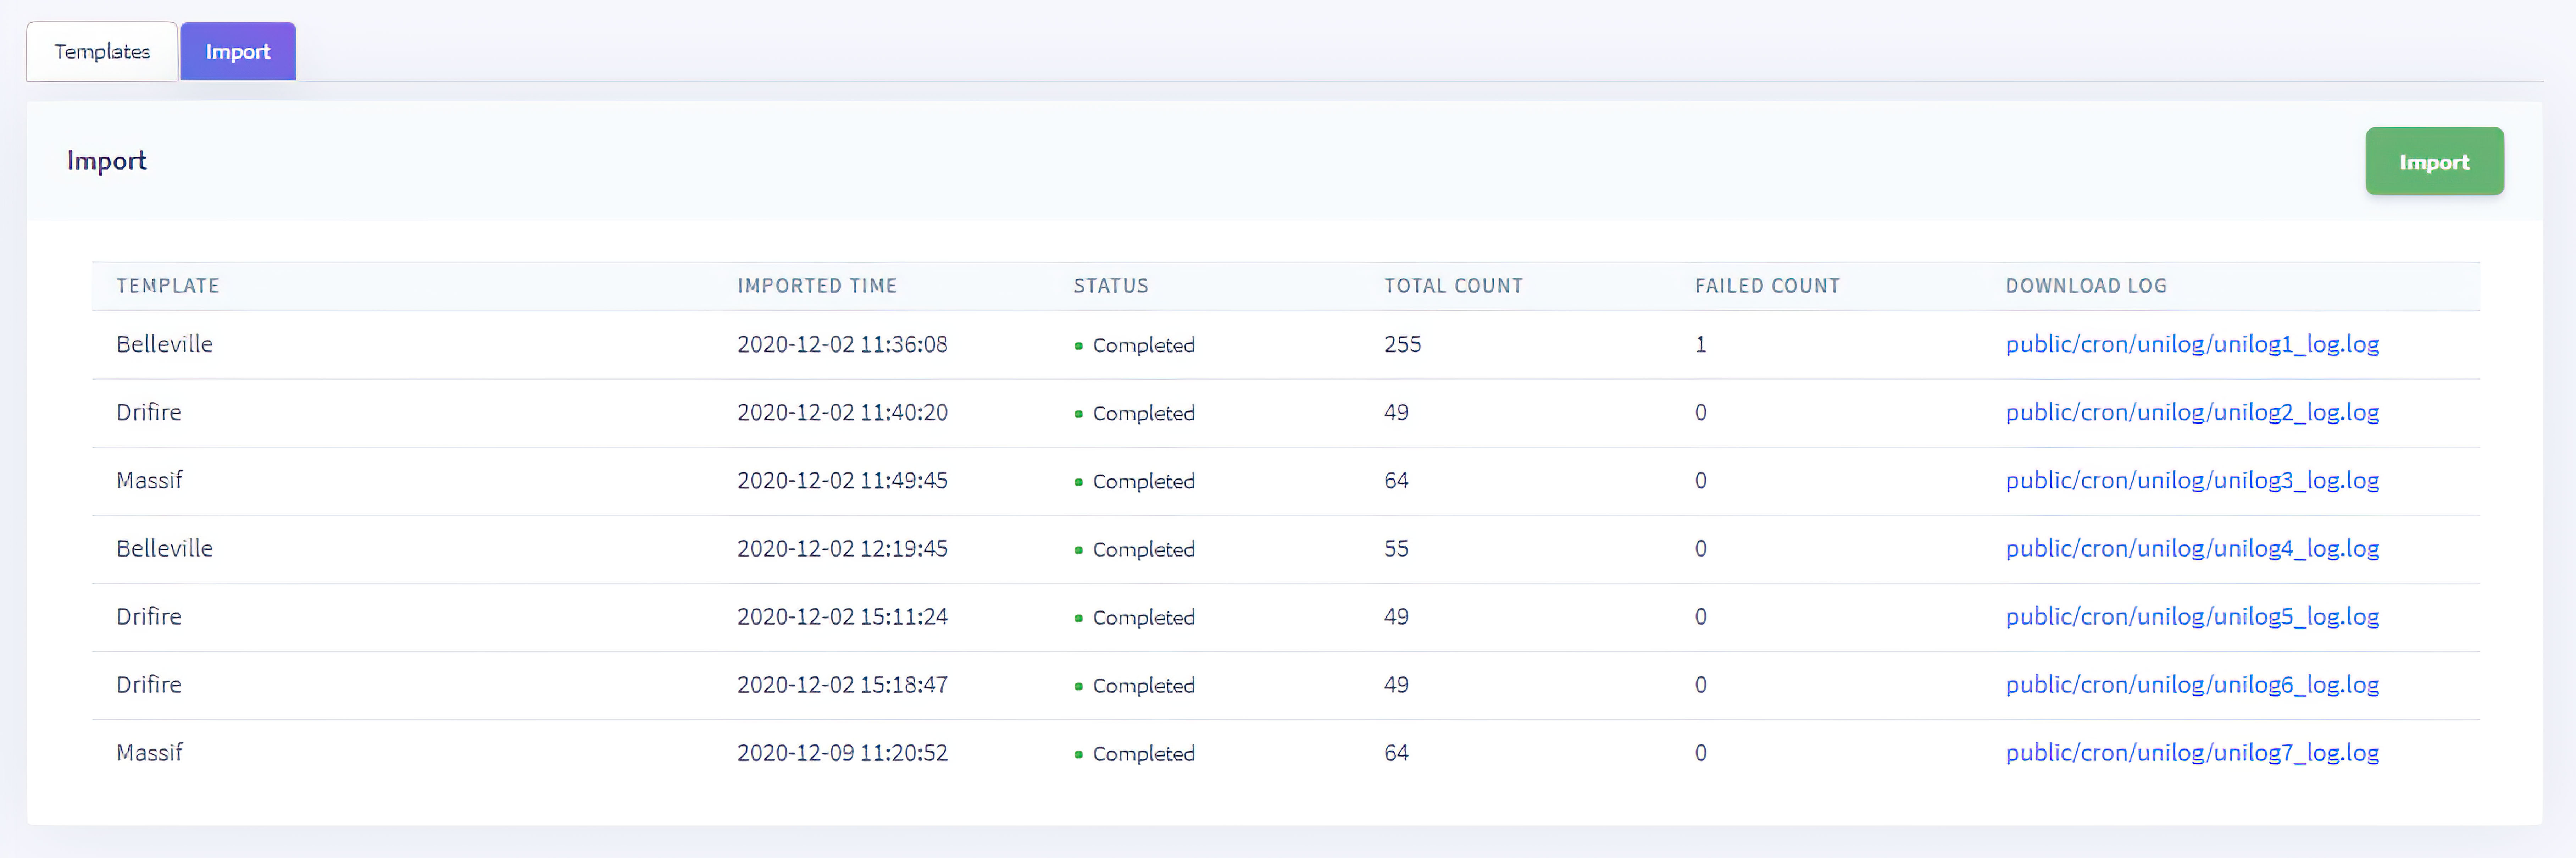
of the Imports done on your flexiPIM account.Custom Import - Templates page
Custom Import - Import page
How to create a Custom Import Template?
Step 1: Click on 'Create template' on the top right-hand side of the
        'Import Templates' page.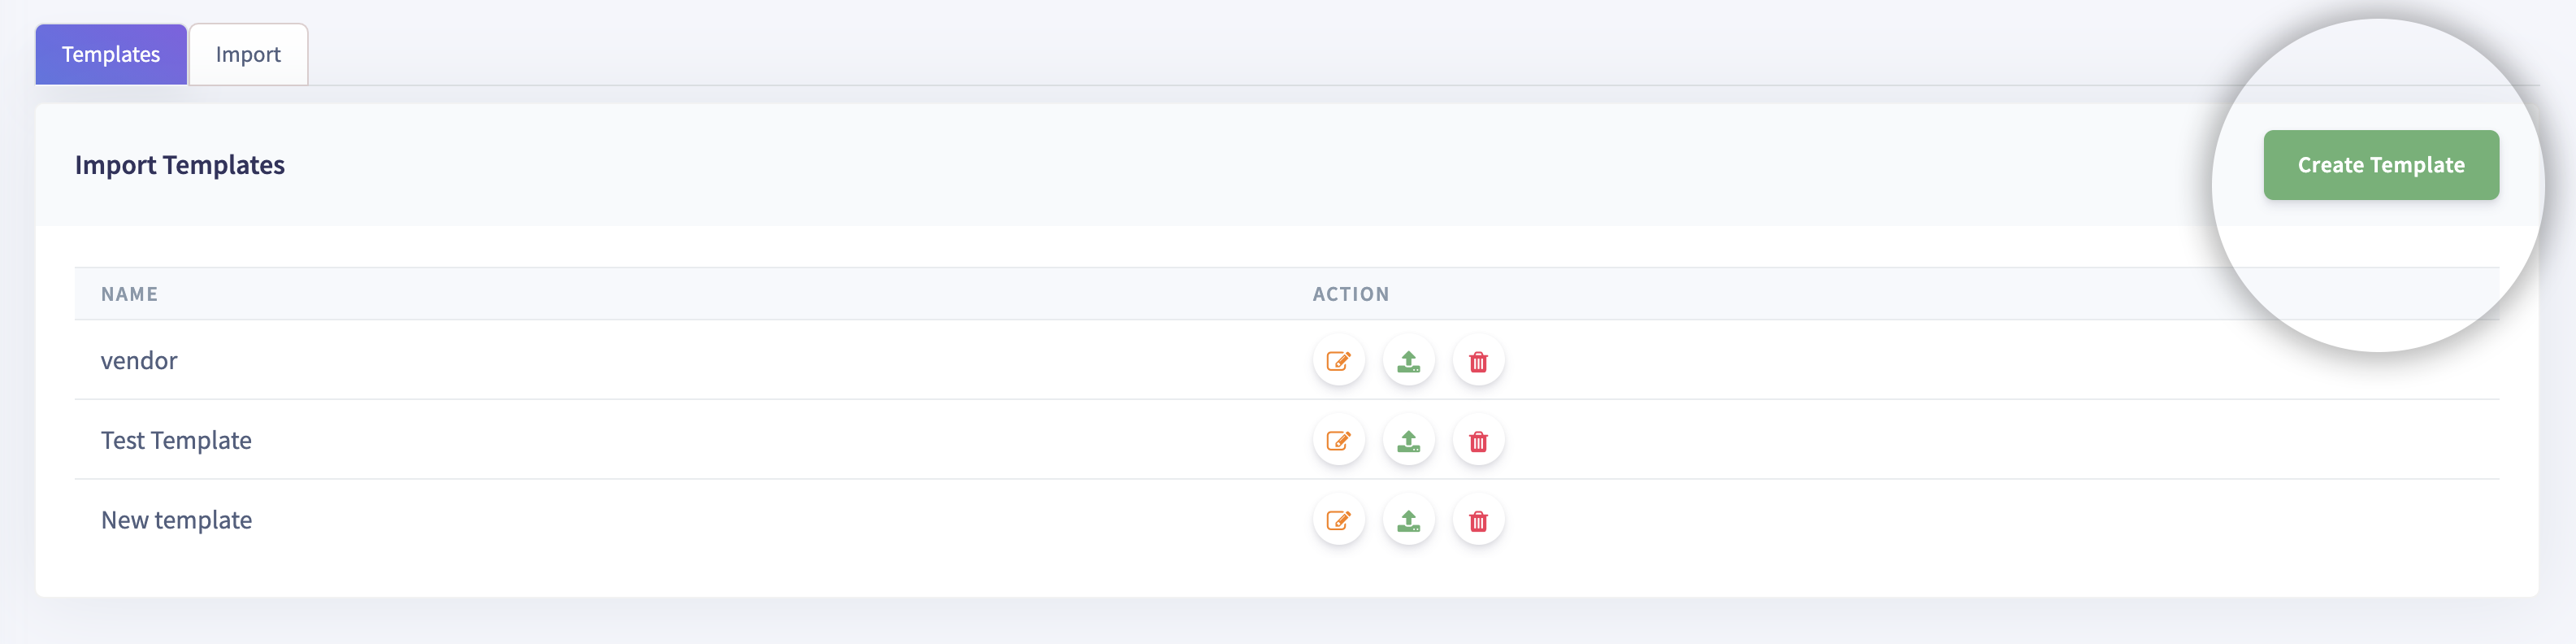
Step 2: A pop-up appears as shown below. Enter the template name and upload the
        Import file you want to set as a template for your future imports.
        This is a one-time activity that allows you to set as many templates
        as the sources of product data you may have.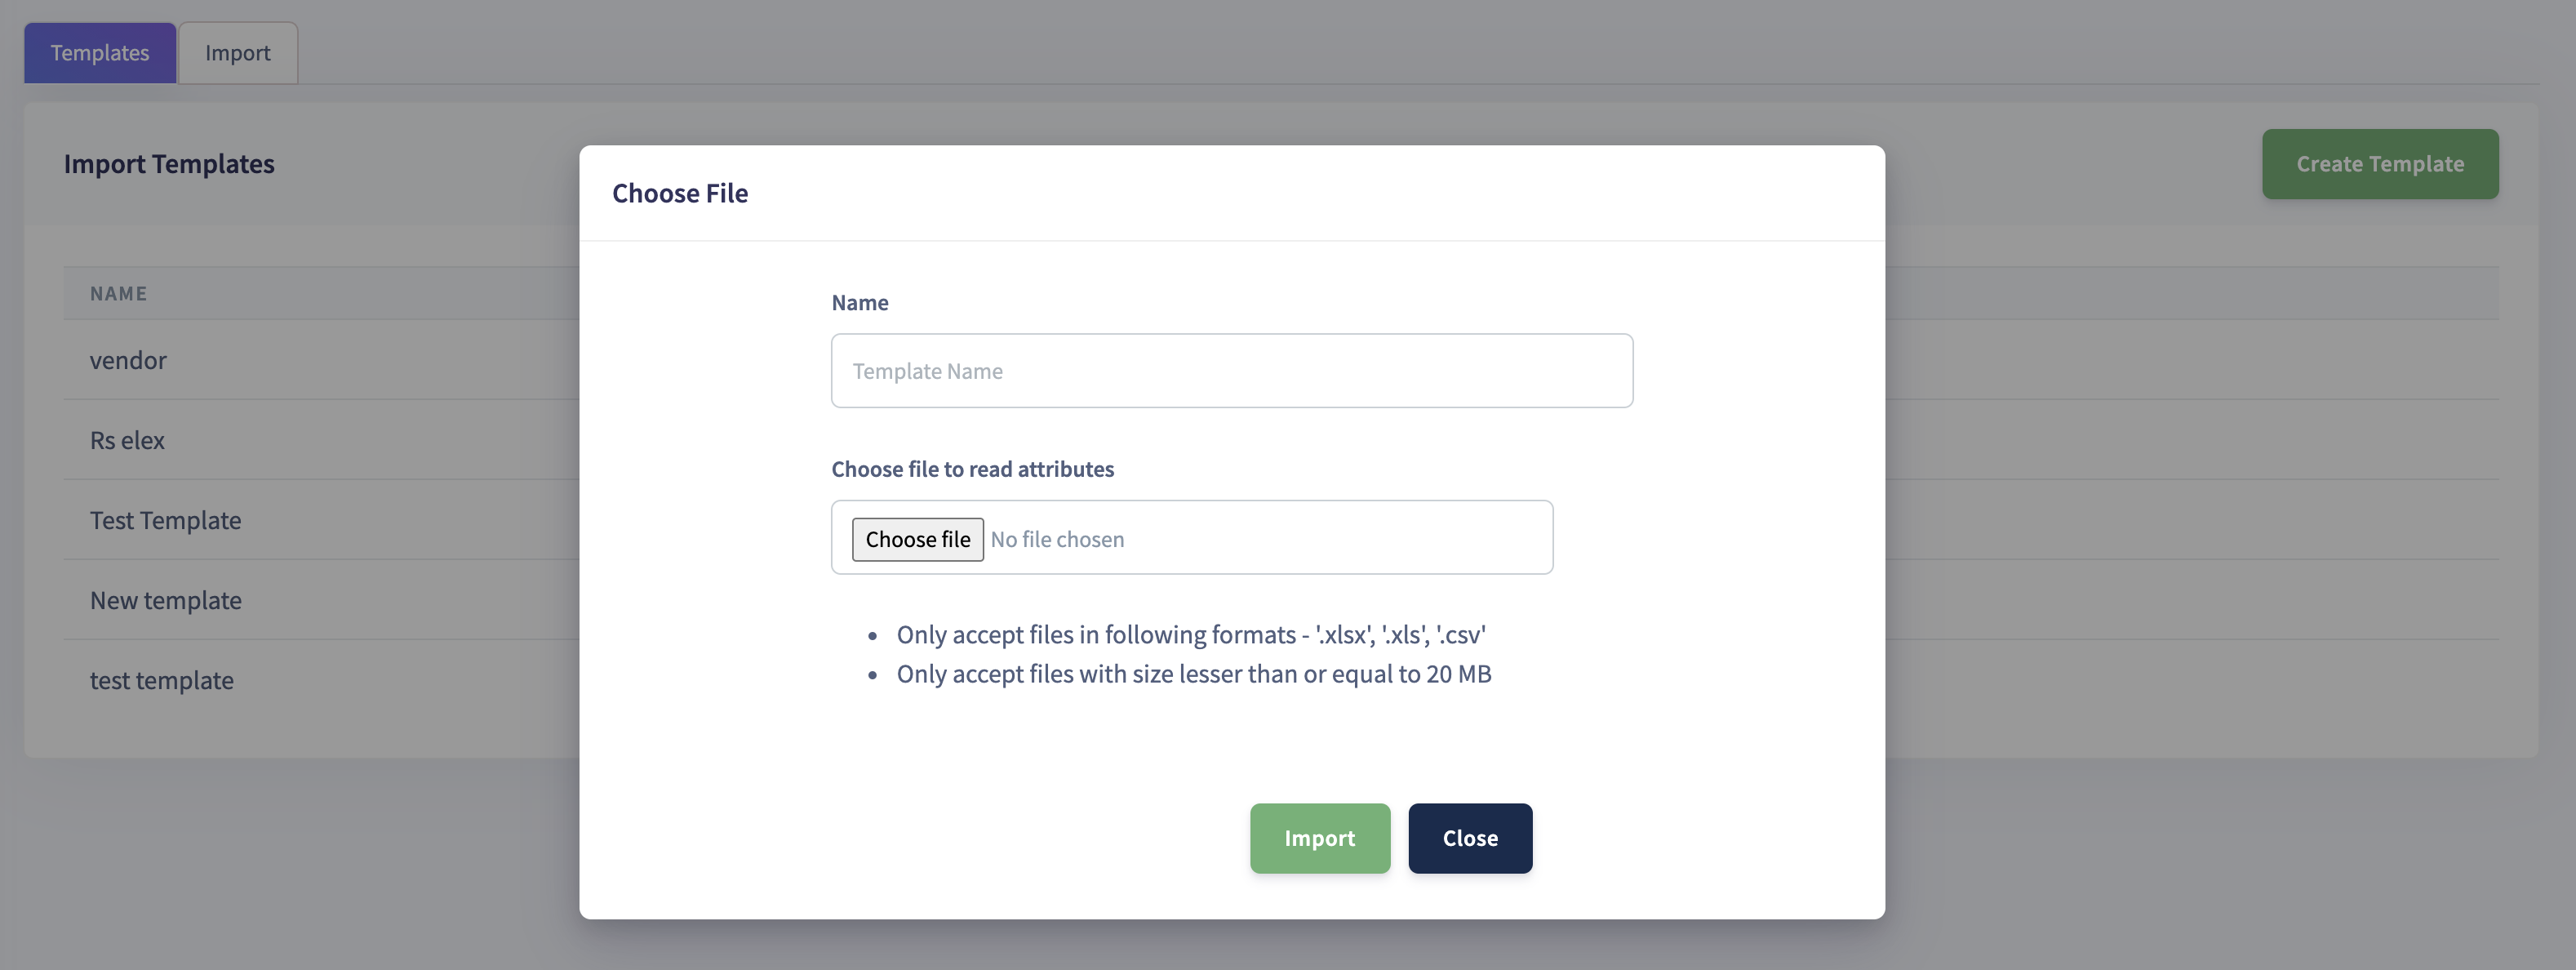
Step 3: Click on Import and your import file will be on its way.How to edit a Custom Import Template?
{info} Please note that the
Namefield is not editable at this stage.
Step 1: Click on the green 'upload' icon corresponding to the Import
        template you wish to edit.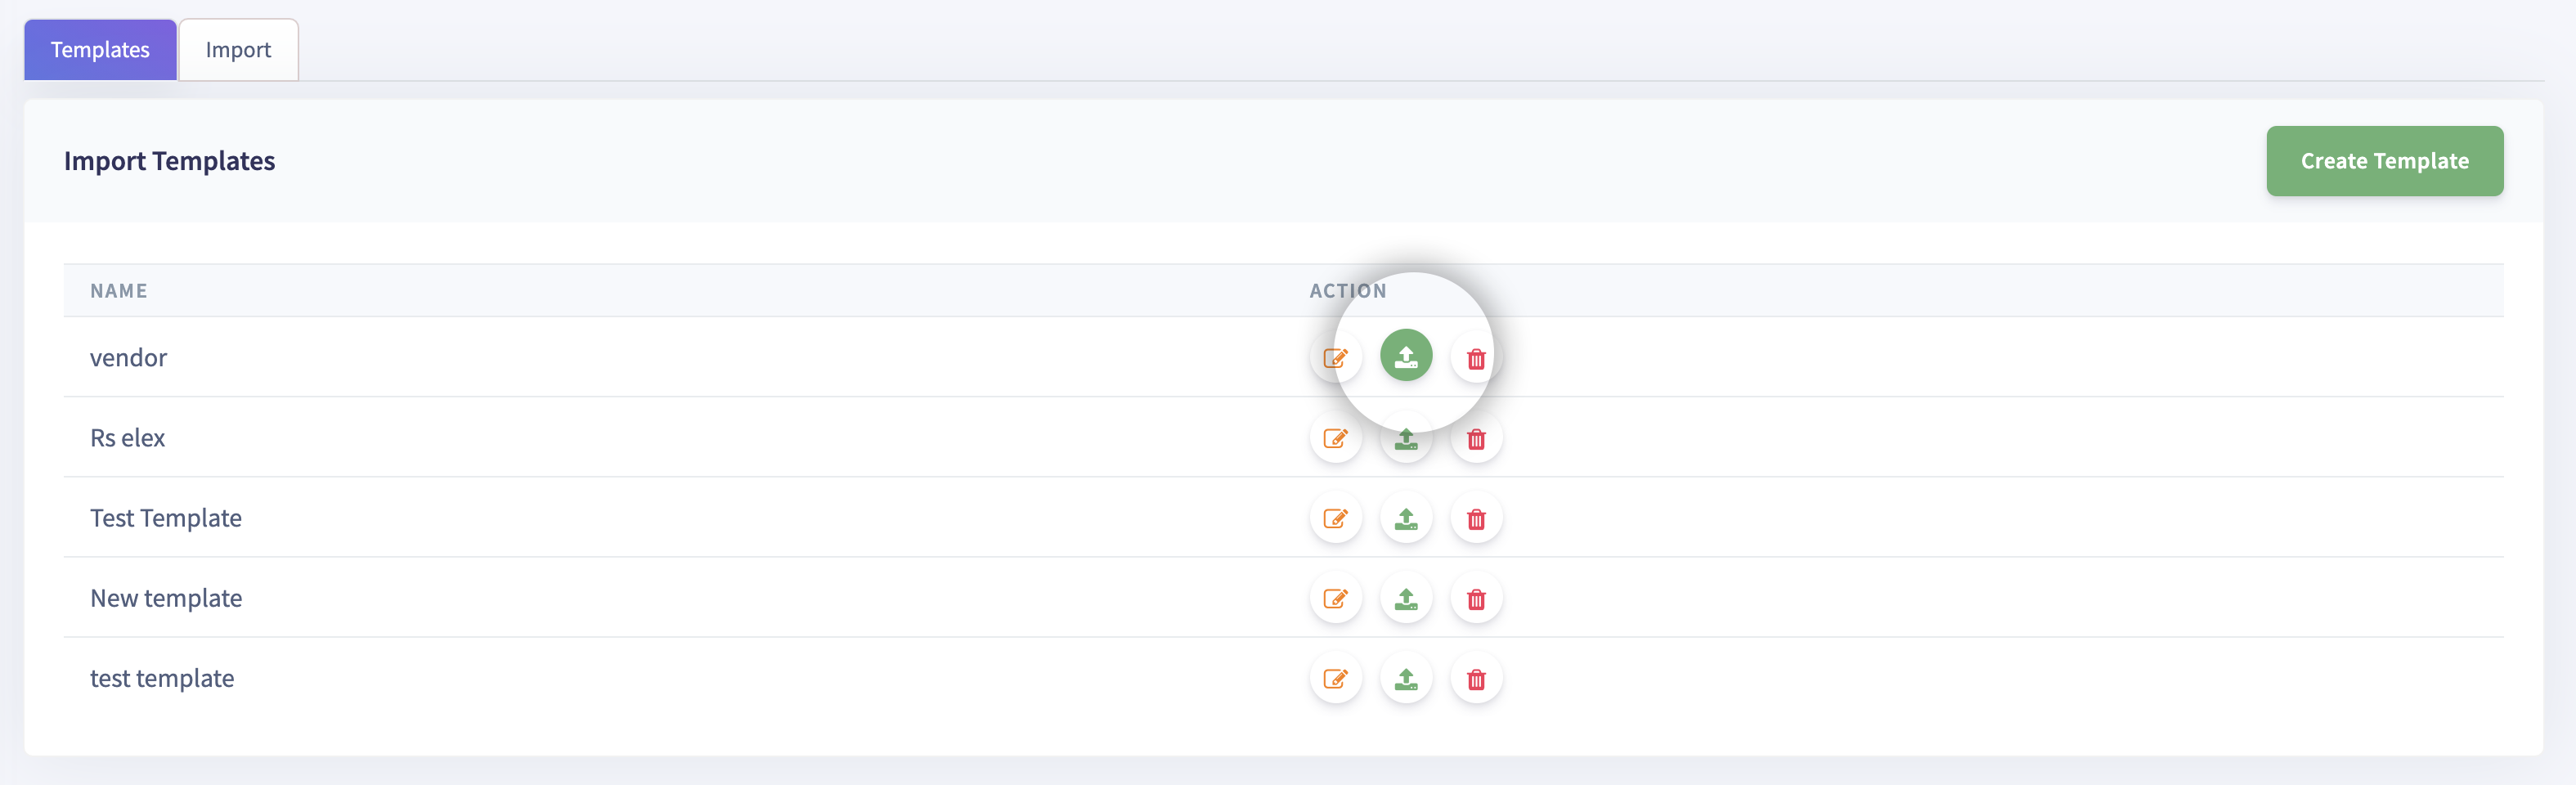
Step 2: A pop-up appears as shown below. You may upload the updated
        product data sheet using the 'Choose file' field. Click on Import.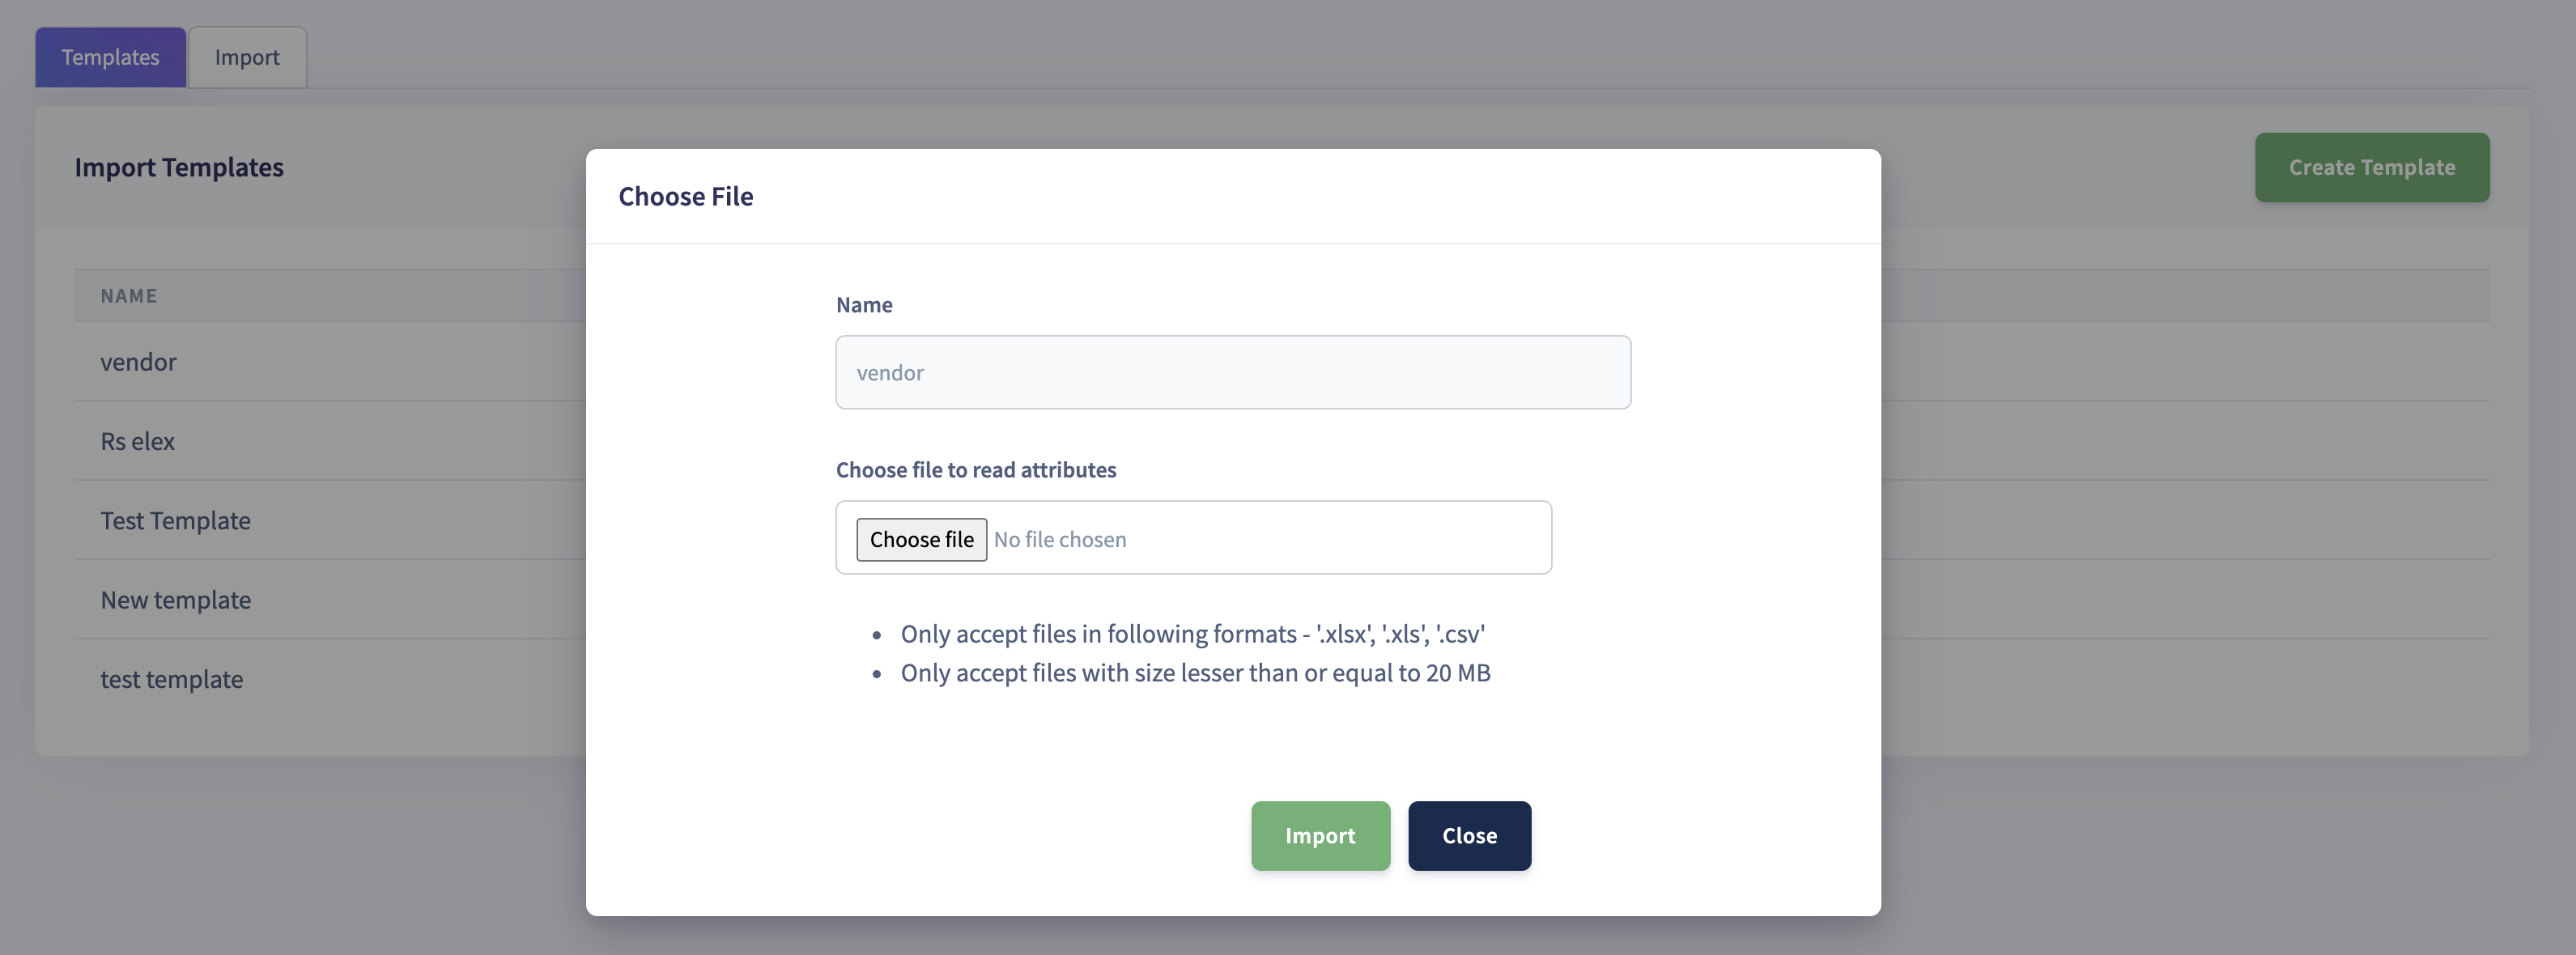
How to Edit Mapping in a Custom Import Template?
Step 1: Click on the orange 'pencil' icon corresponding to the Import
        template you wish to edit.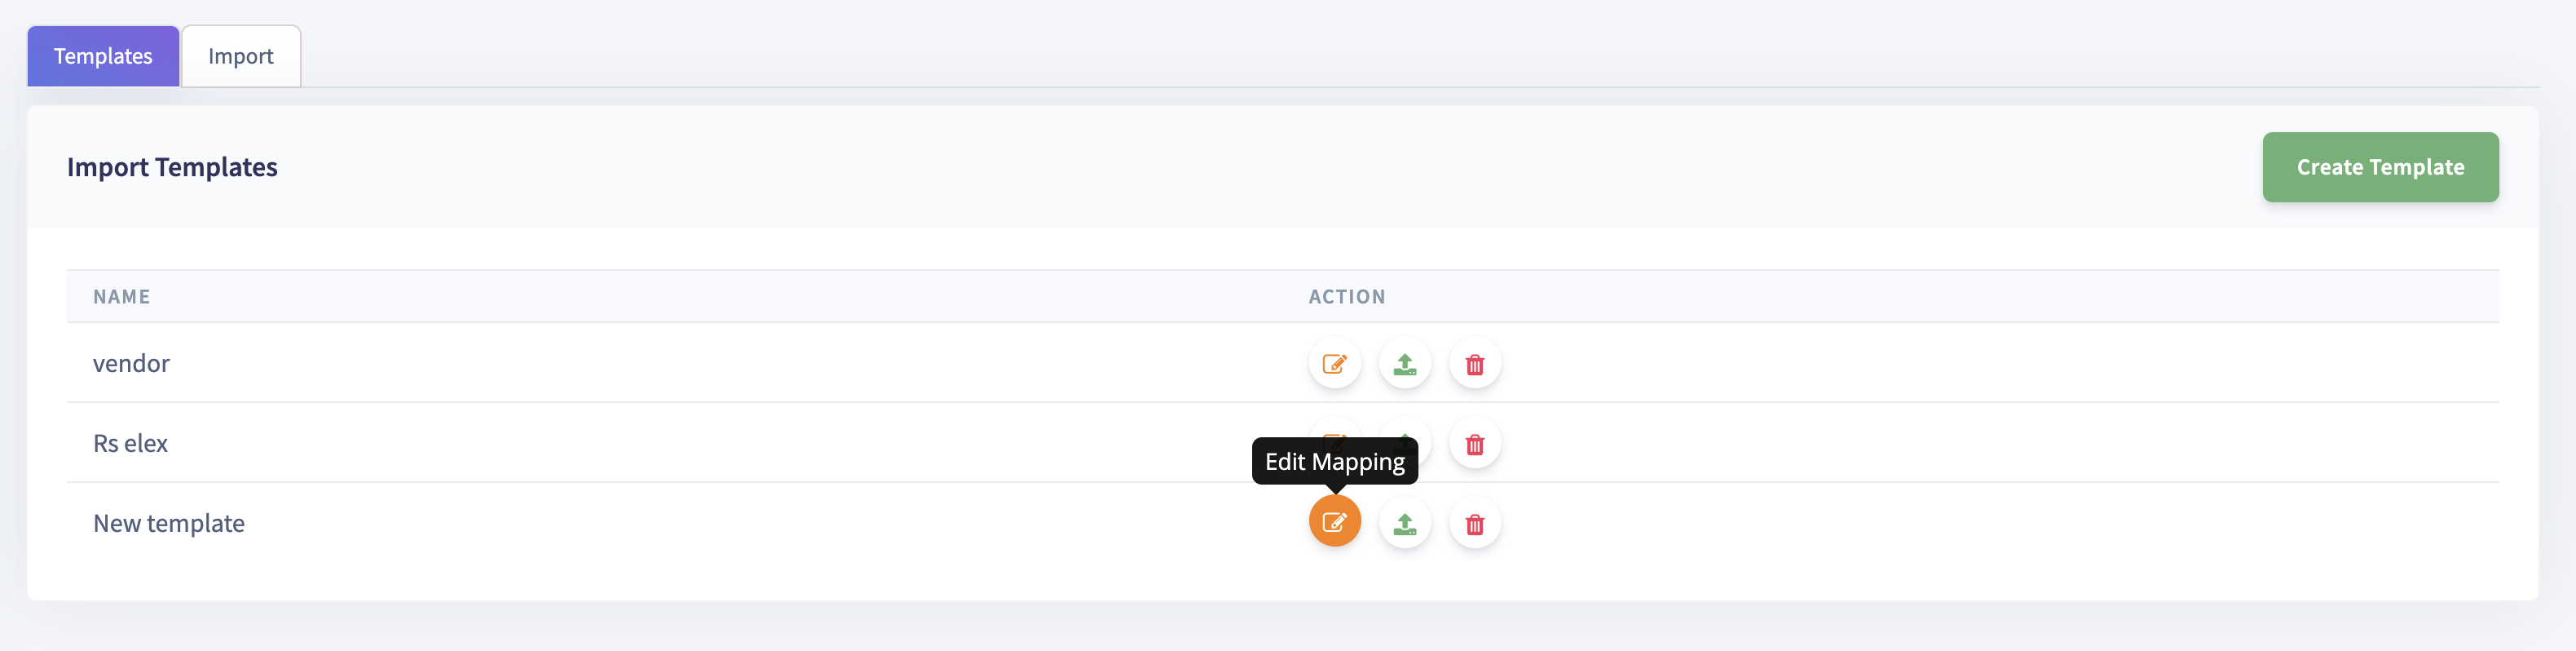
Step 2: You will be redirected to the 'Category, Family, and Variant field mapping'
        page where you can map flexiPIM items like category, family, channel, and
        variants to the respective corresponding items from PIM or spreadsheet as
        you can see in the image below.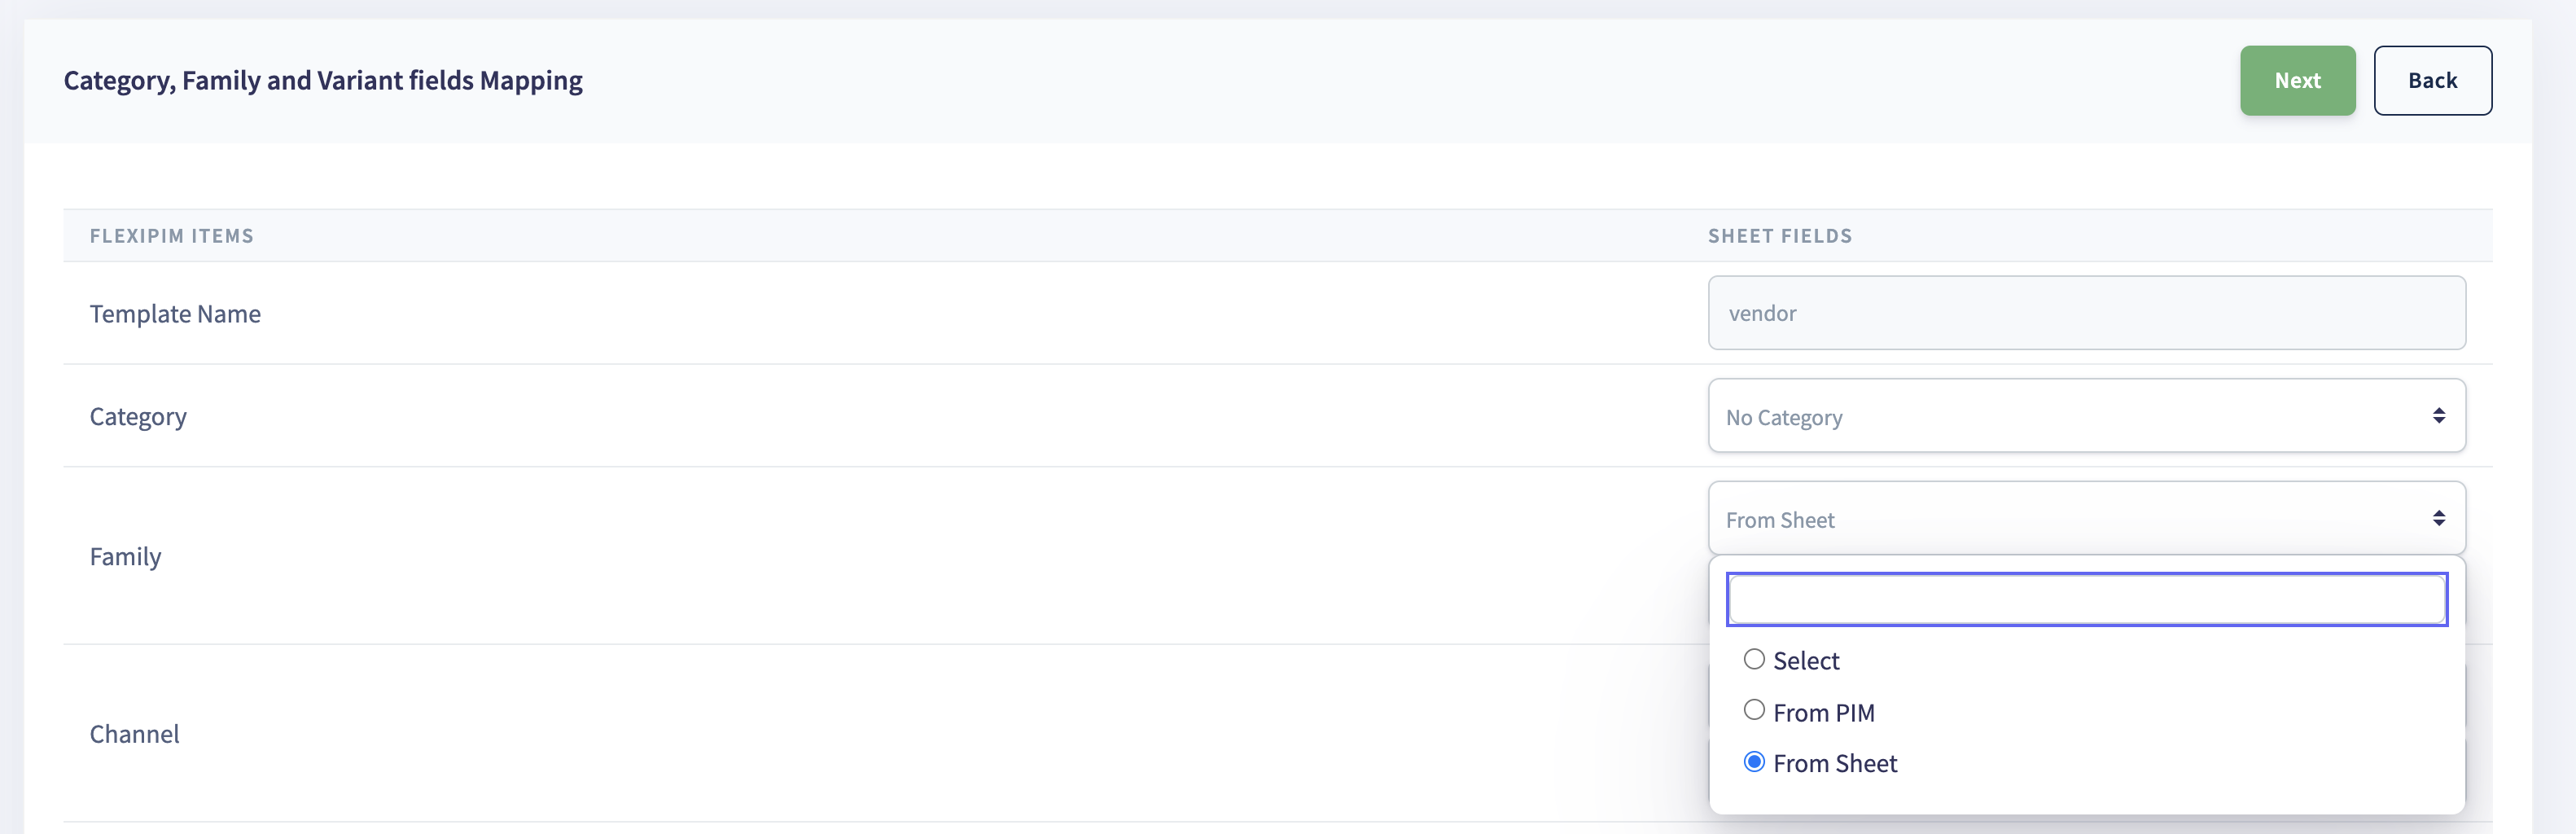
Category mapping
-
On the right-hand side, the category drop-down menu lets you select the category to be mapped into the flexiPIM category.
-
If you select
No categorythe products will be mapped into thedefaultCategory in flexiPIM.

Family Mapping
{info}
Note:The steps forChannelmapping are the same as explained above forFamilymapping.
- You can map families from flexiPIM or from the import sheet using the dropdown menu corresponding to the Family item. The dropdown menu appears as shown below.
- On selecting
From PIM, a list of flexiPIM families will be available in the drop-down menu below it, as shown below.
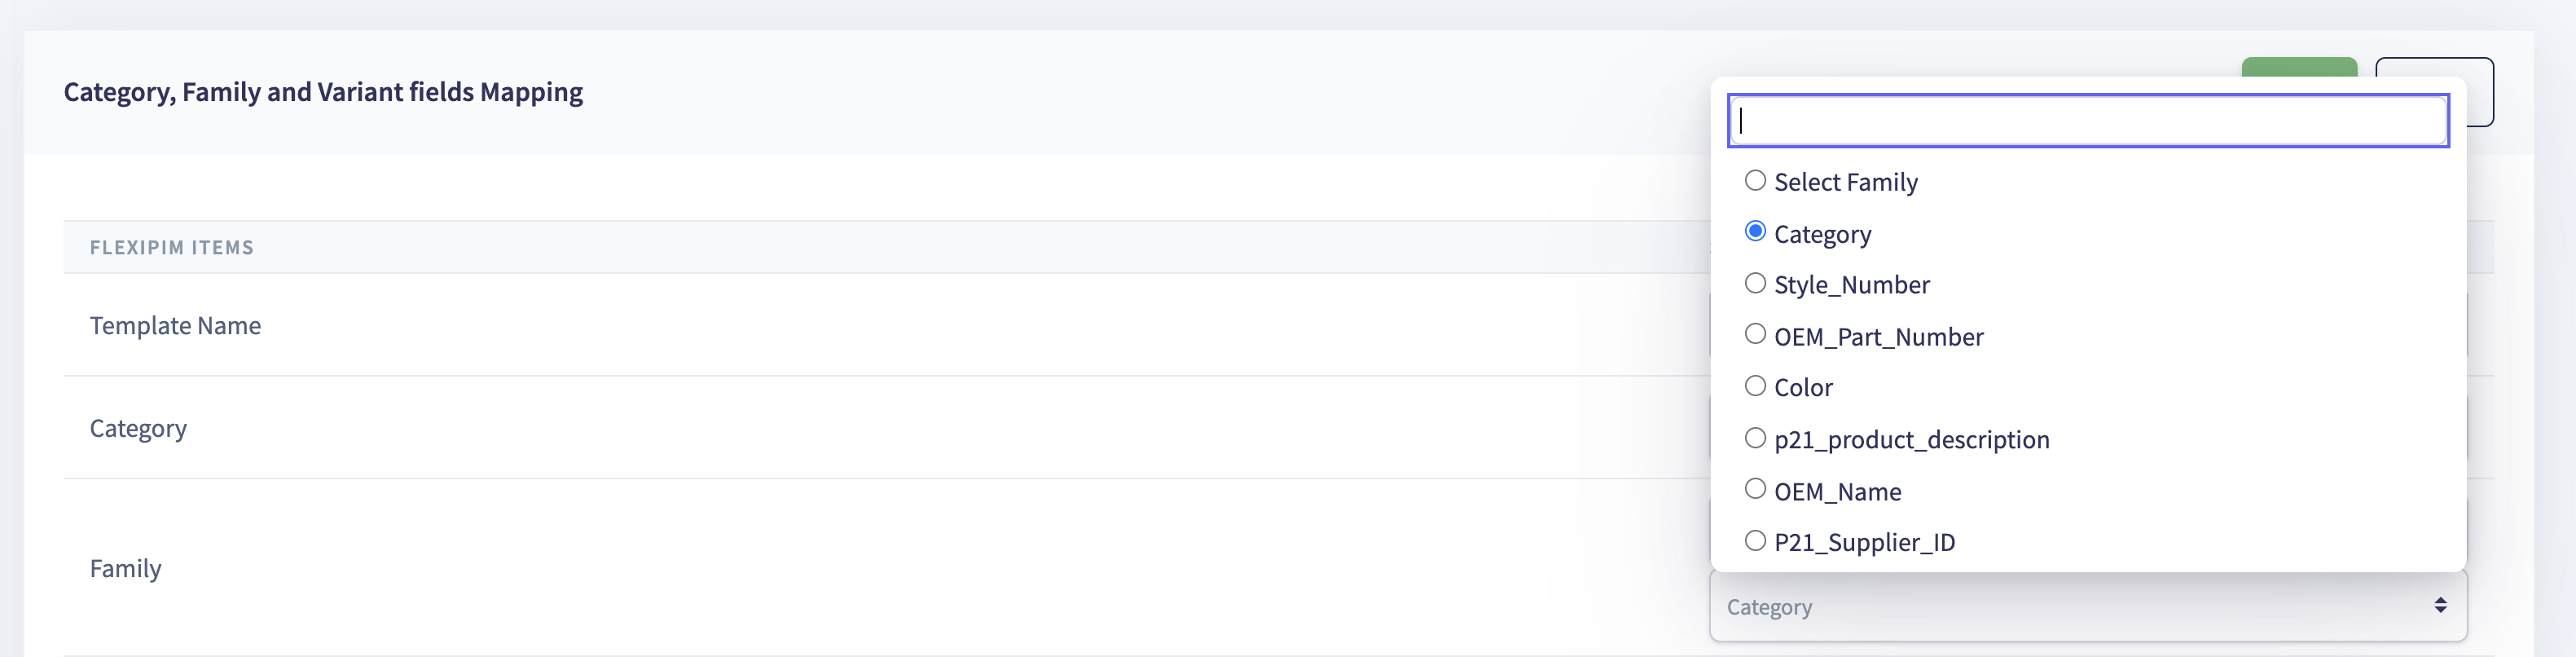
- If you select
From Sheetoption, a list of the column headers of the import sheet will appear in the drop-down menu below it, as shown below.
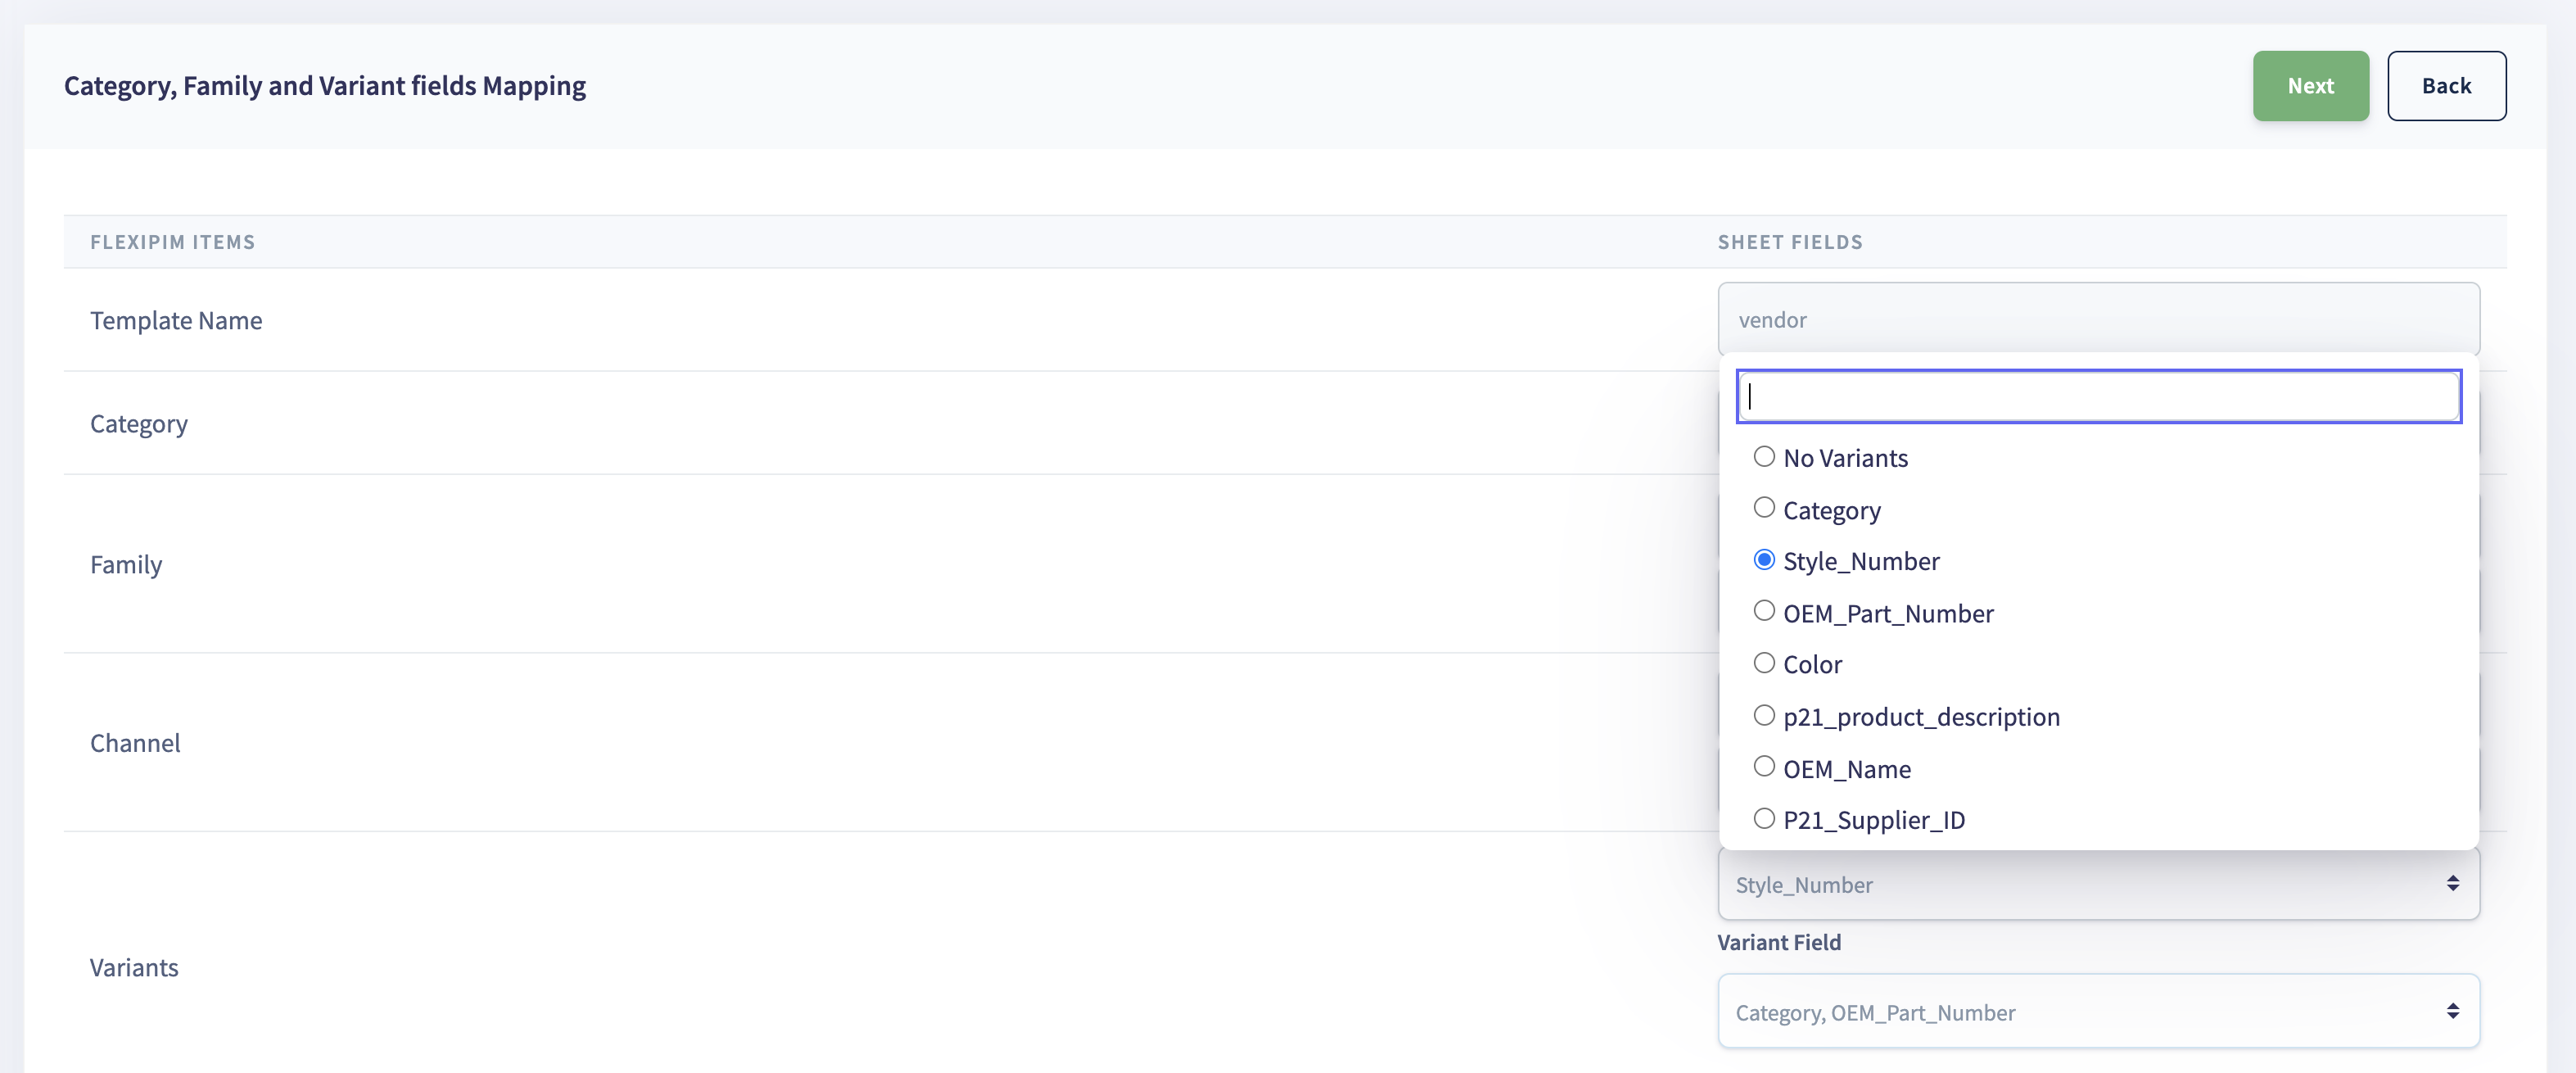
Variant mapping
Directly map variants for your products using Custom import.
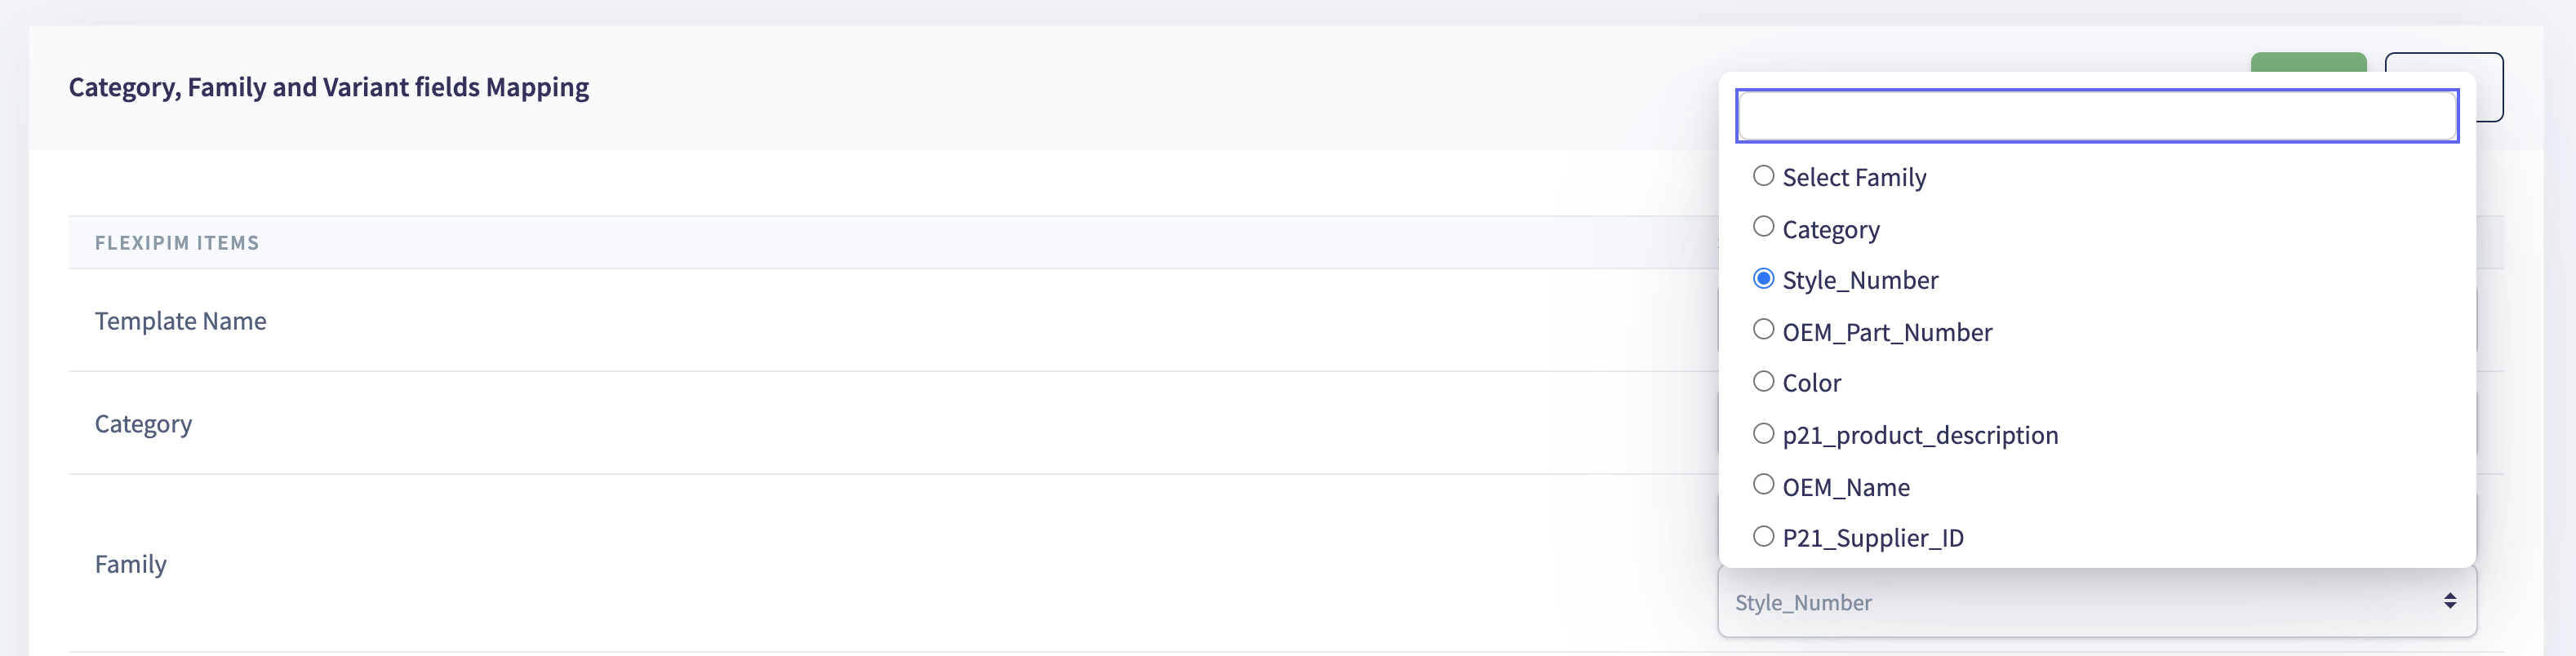
- In the
Variant fielddrop down menu corresponding to variants option in the Custom Import page , choose the header from your spreadsheet which is the differentiator for a set of product SKUs. For example, if TSH-SK-001 is an SKU for a T-shirt andStyle numberis a differentiator for that T-shirt then chooseStyle numberfrom the drop down list. However if you chooseNo Variantsthen variant mapping will not be applicable.
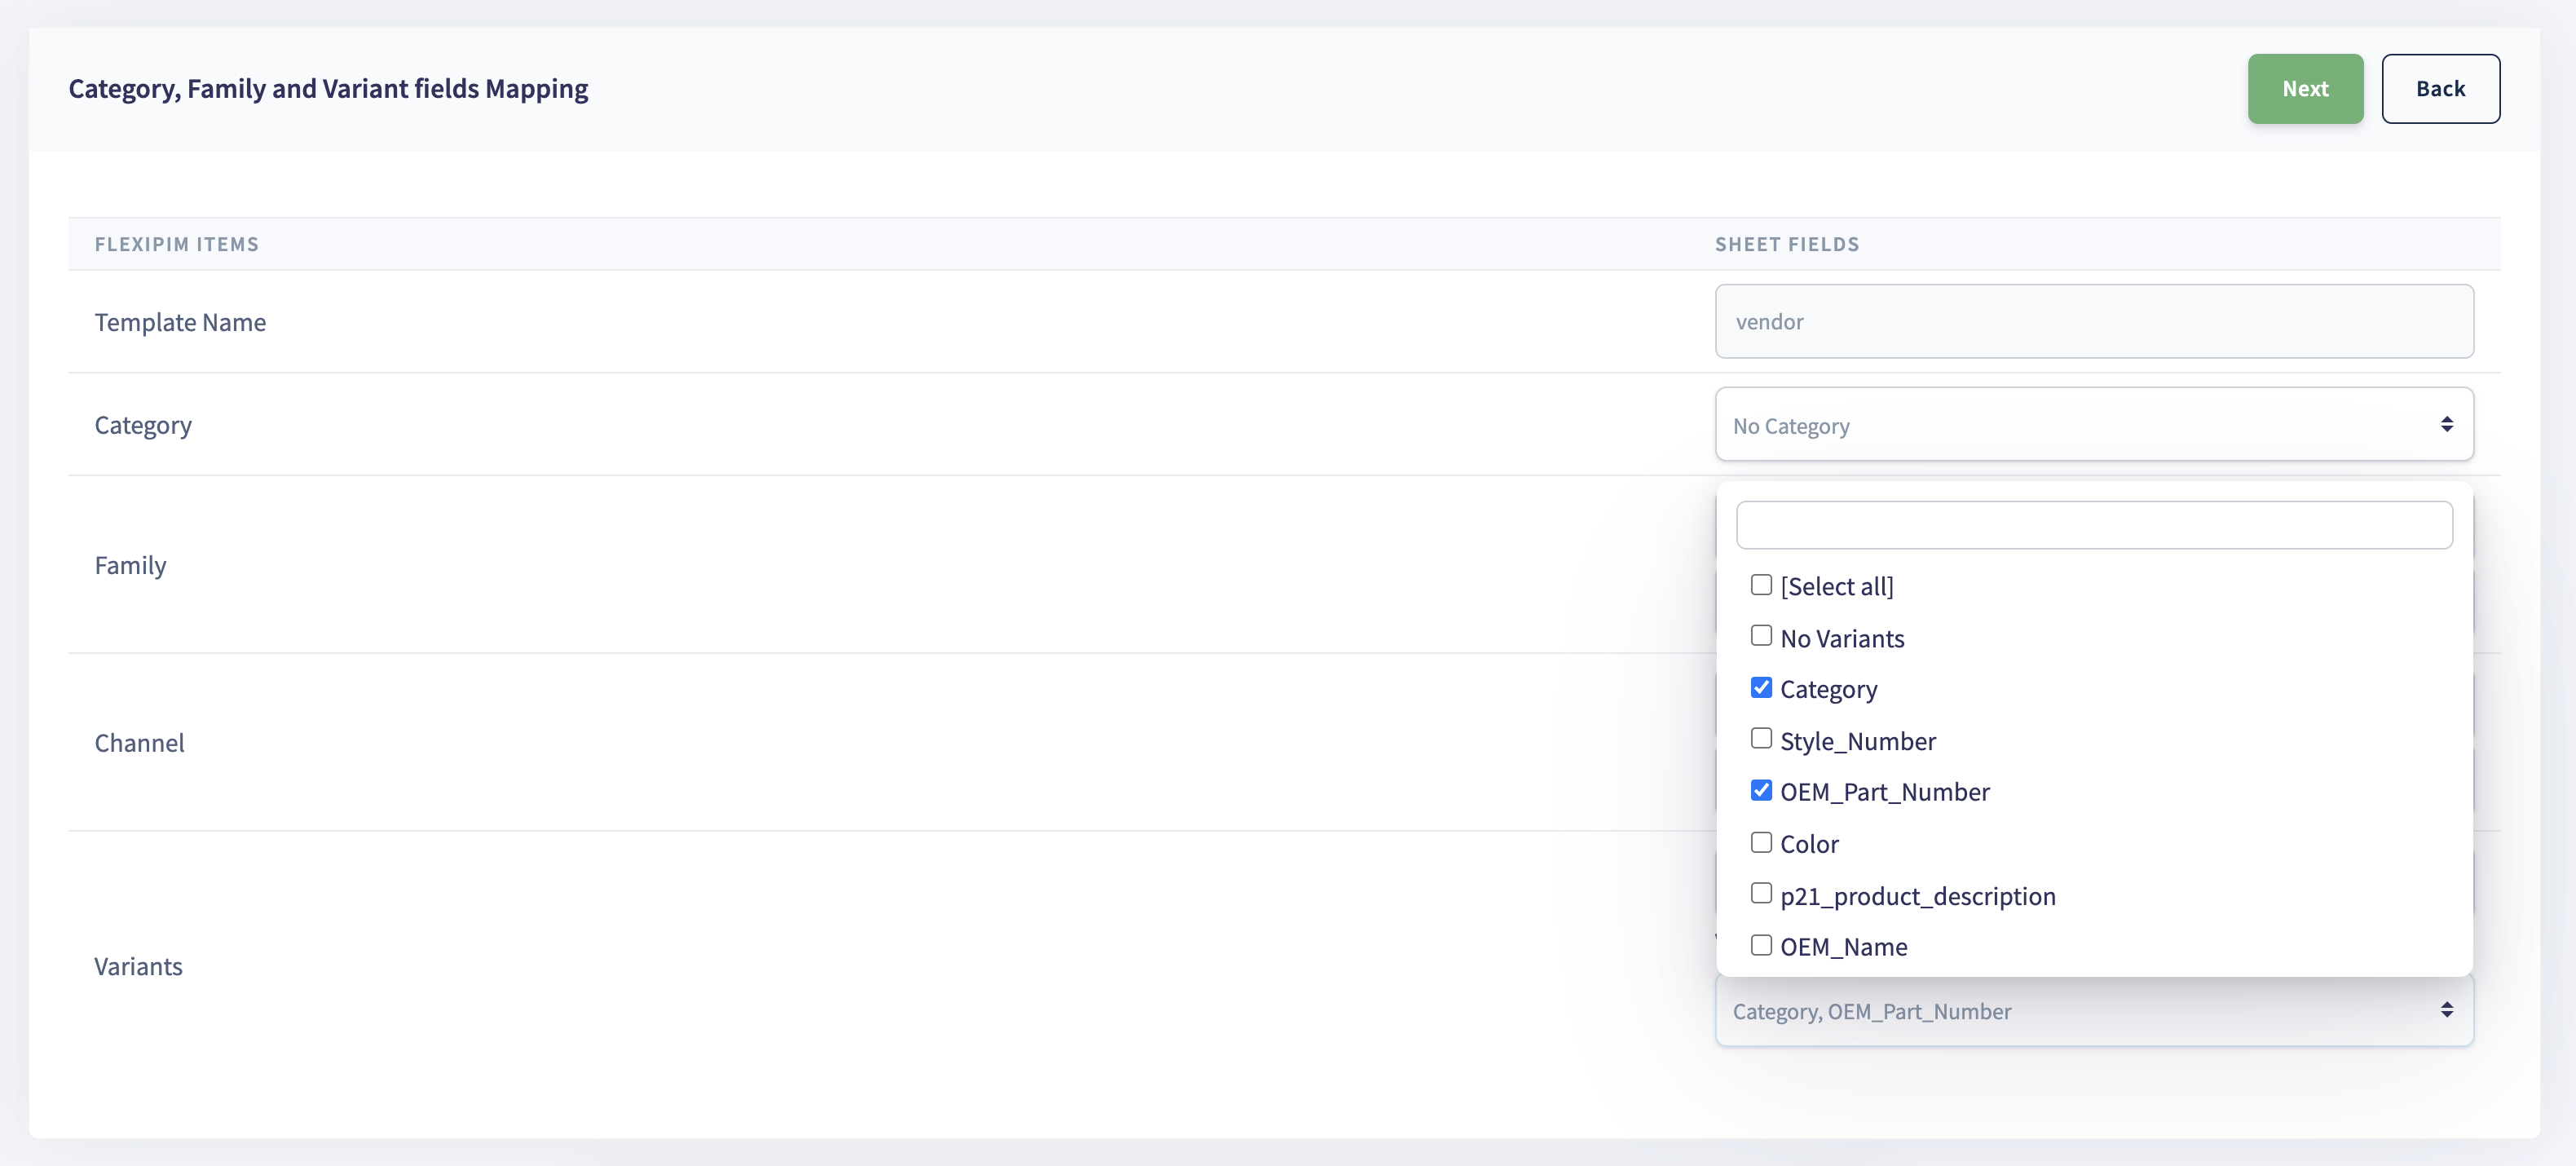
- If the
Style numberfor the SKU=> TSH-SK-001 further has variants like colour, size, width to name a few, then choose them from the drop down below theVariant fielddropwdown as shown in the image below.
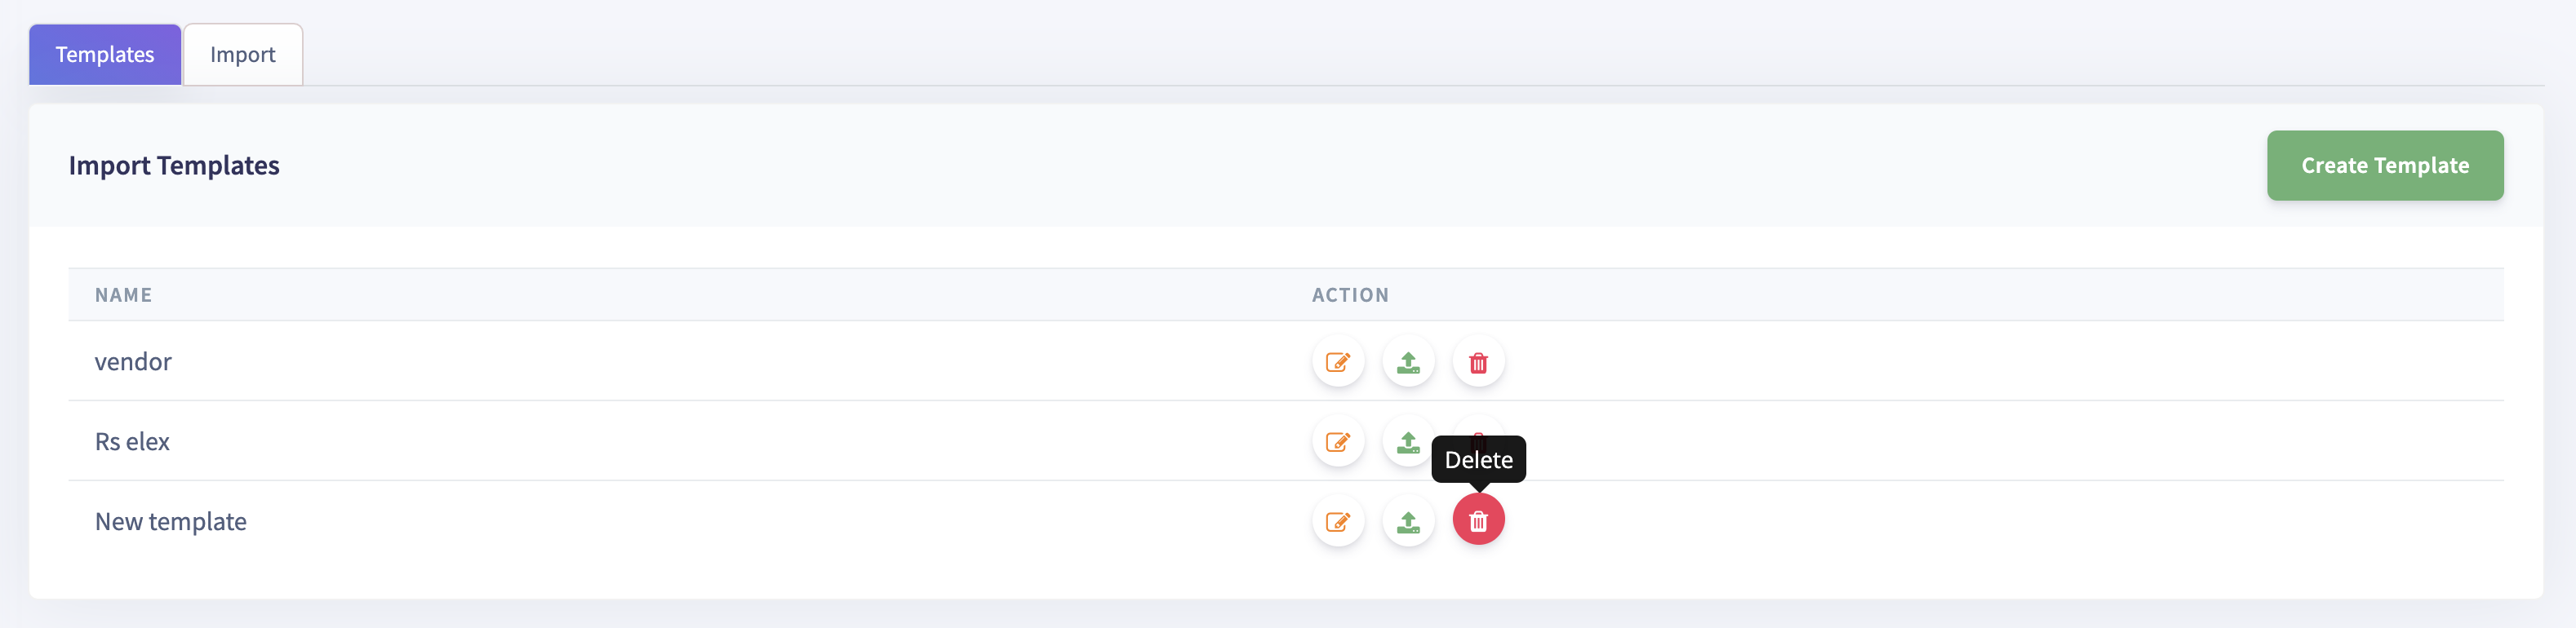
How to delete a Custom Import Template?
Step 1: Click on the 'Trash' icon corresponding to the Import template
        you wish to delete. The template will get deleted.