Families
A Family is a collection of related Attribute Groups and Attributes that define your product.
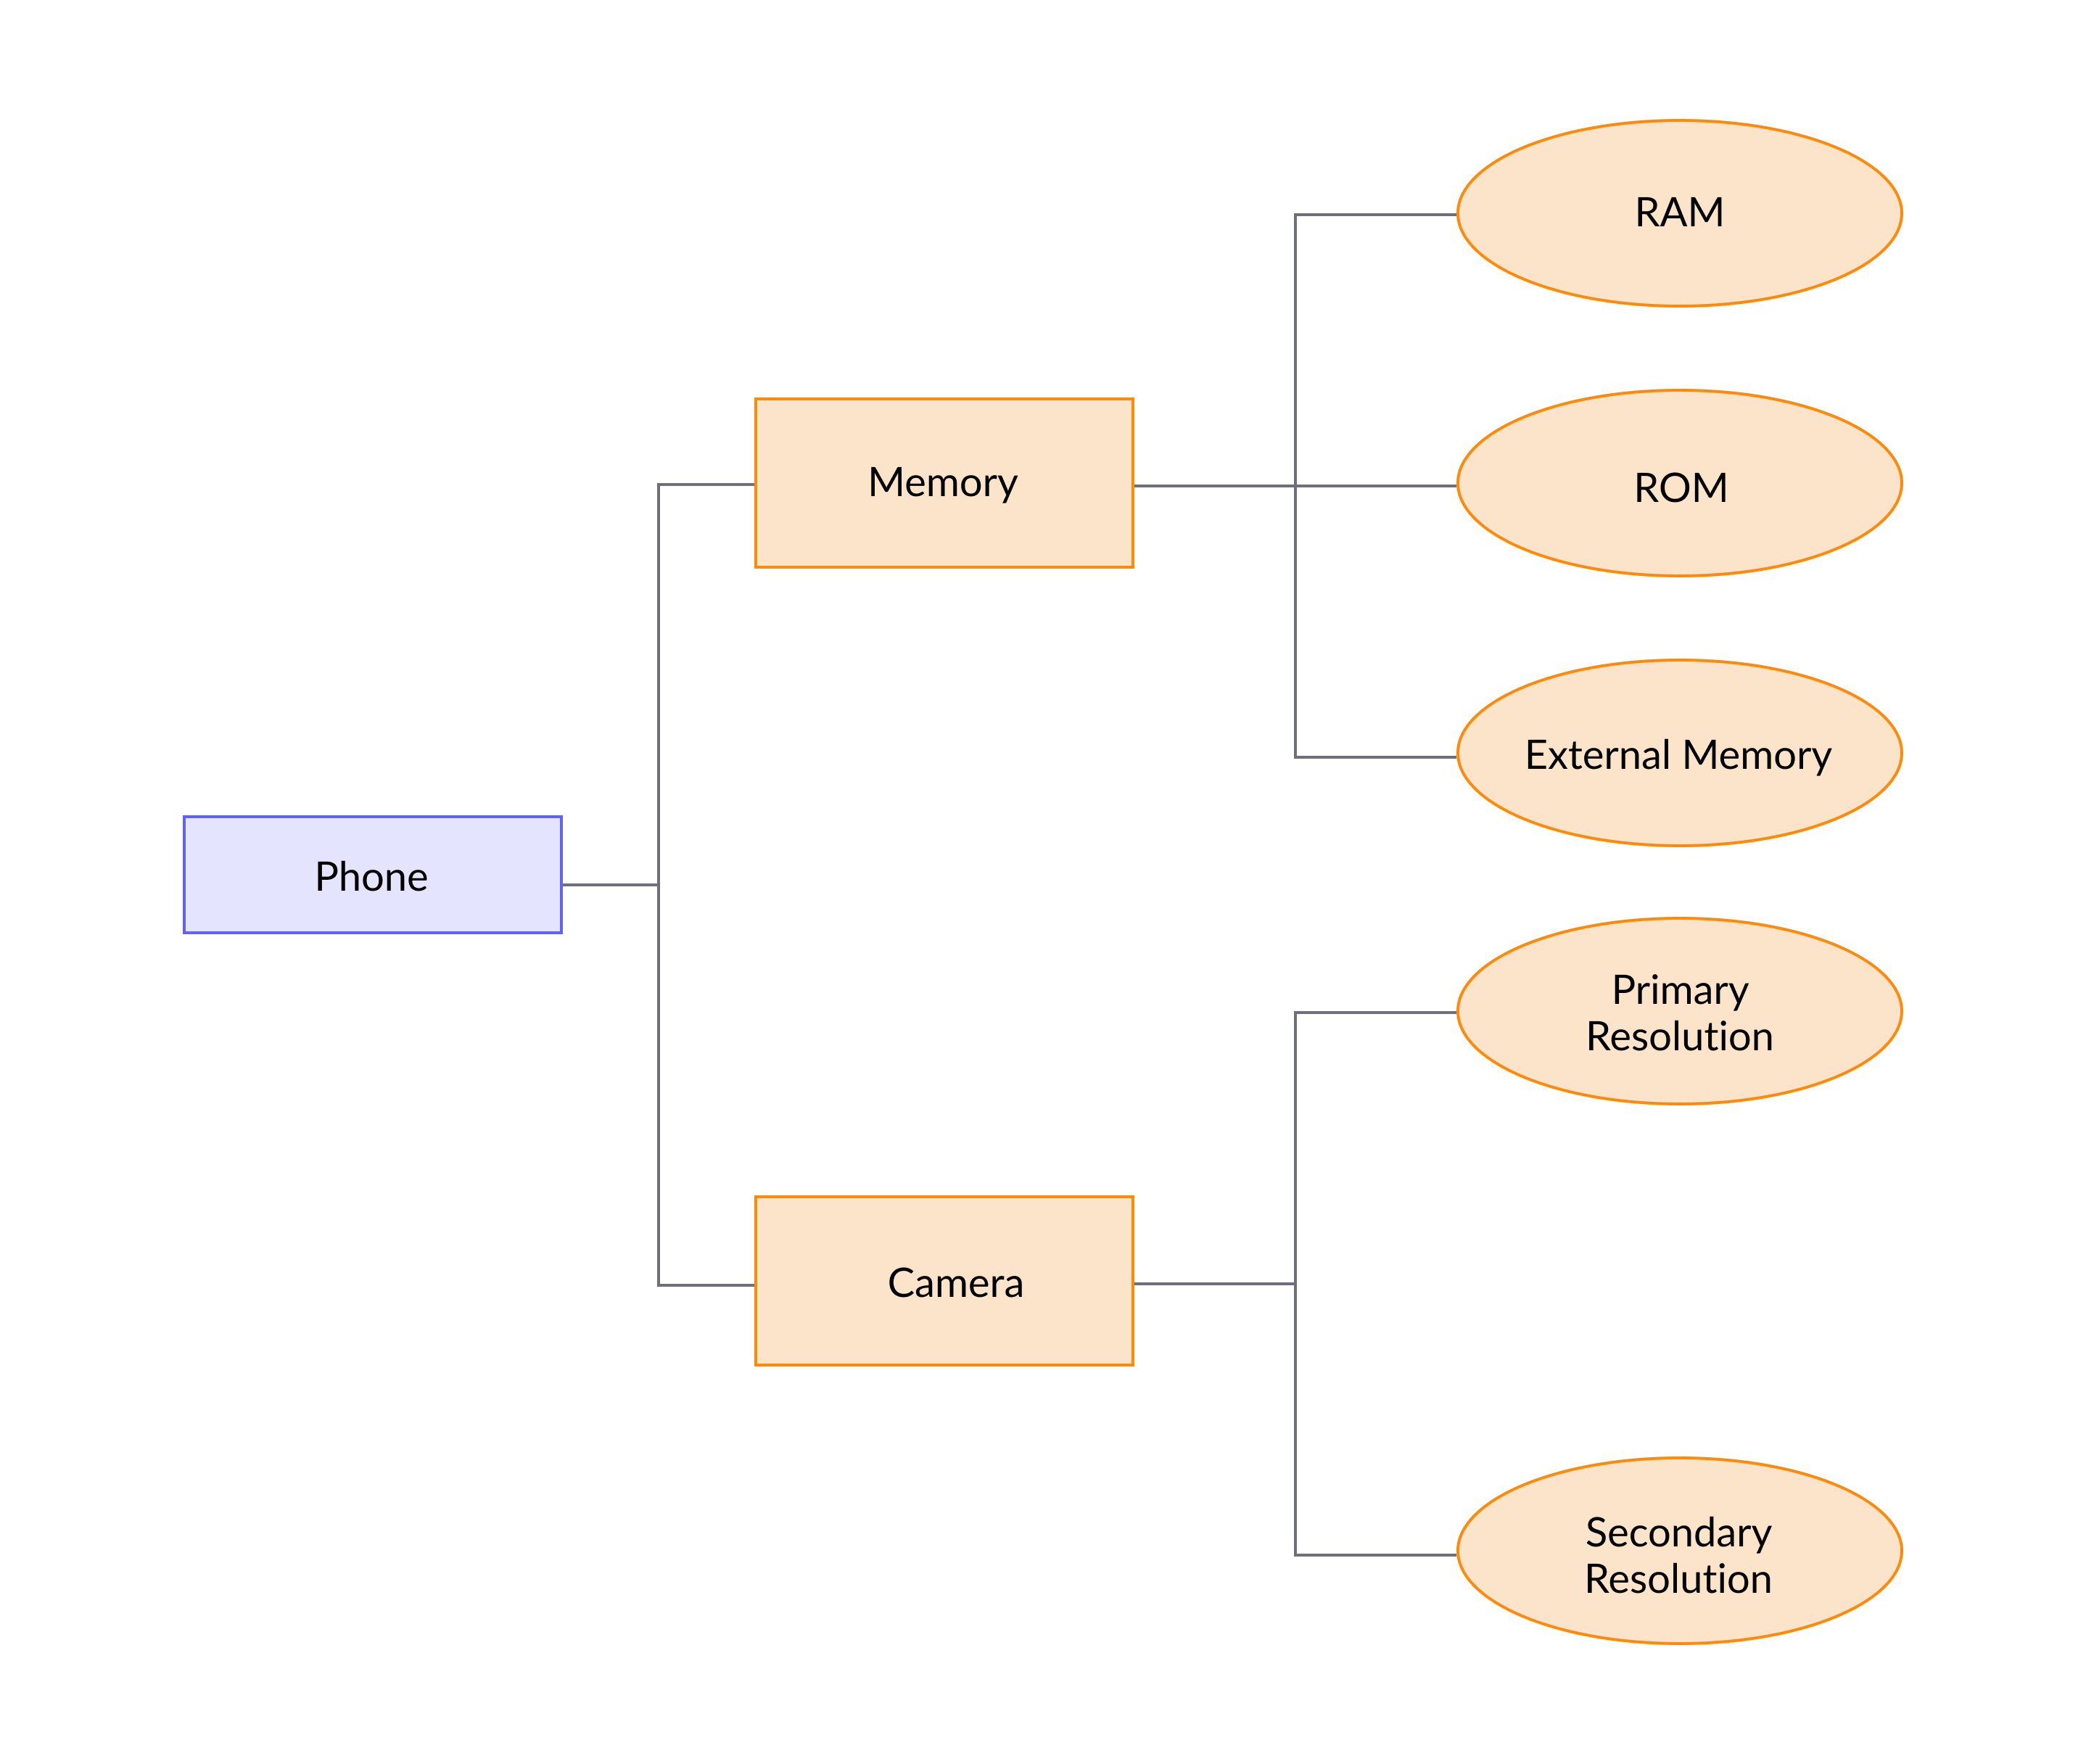
For example, Phone is a Family to which Attribute Groups such as memory, screen, and processor
are mapped and subsequently, the Attributes namely RAM, ROM, External memory, Card capacity, Screen size,
Screen type, Operating system, frequency are mapped to the related Attribute Groups.
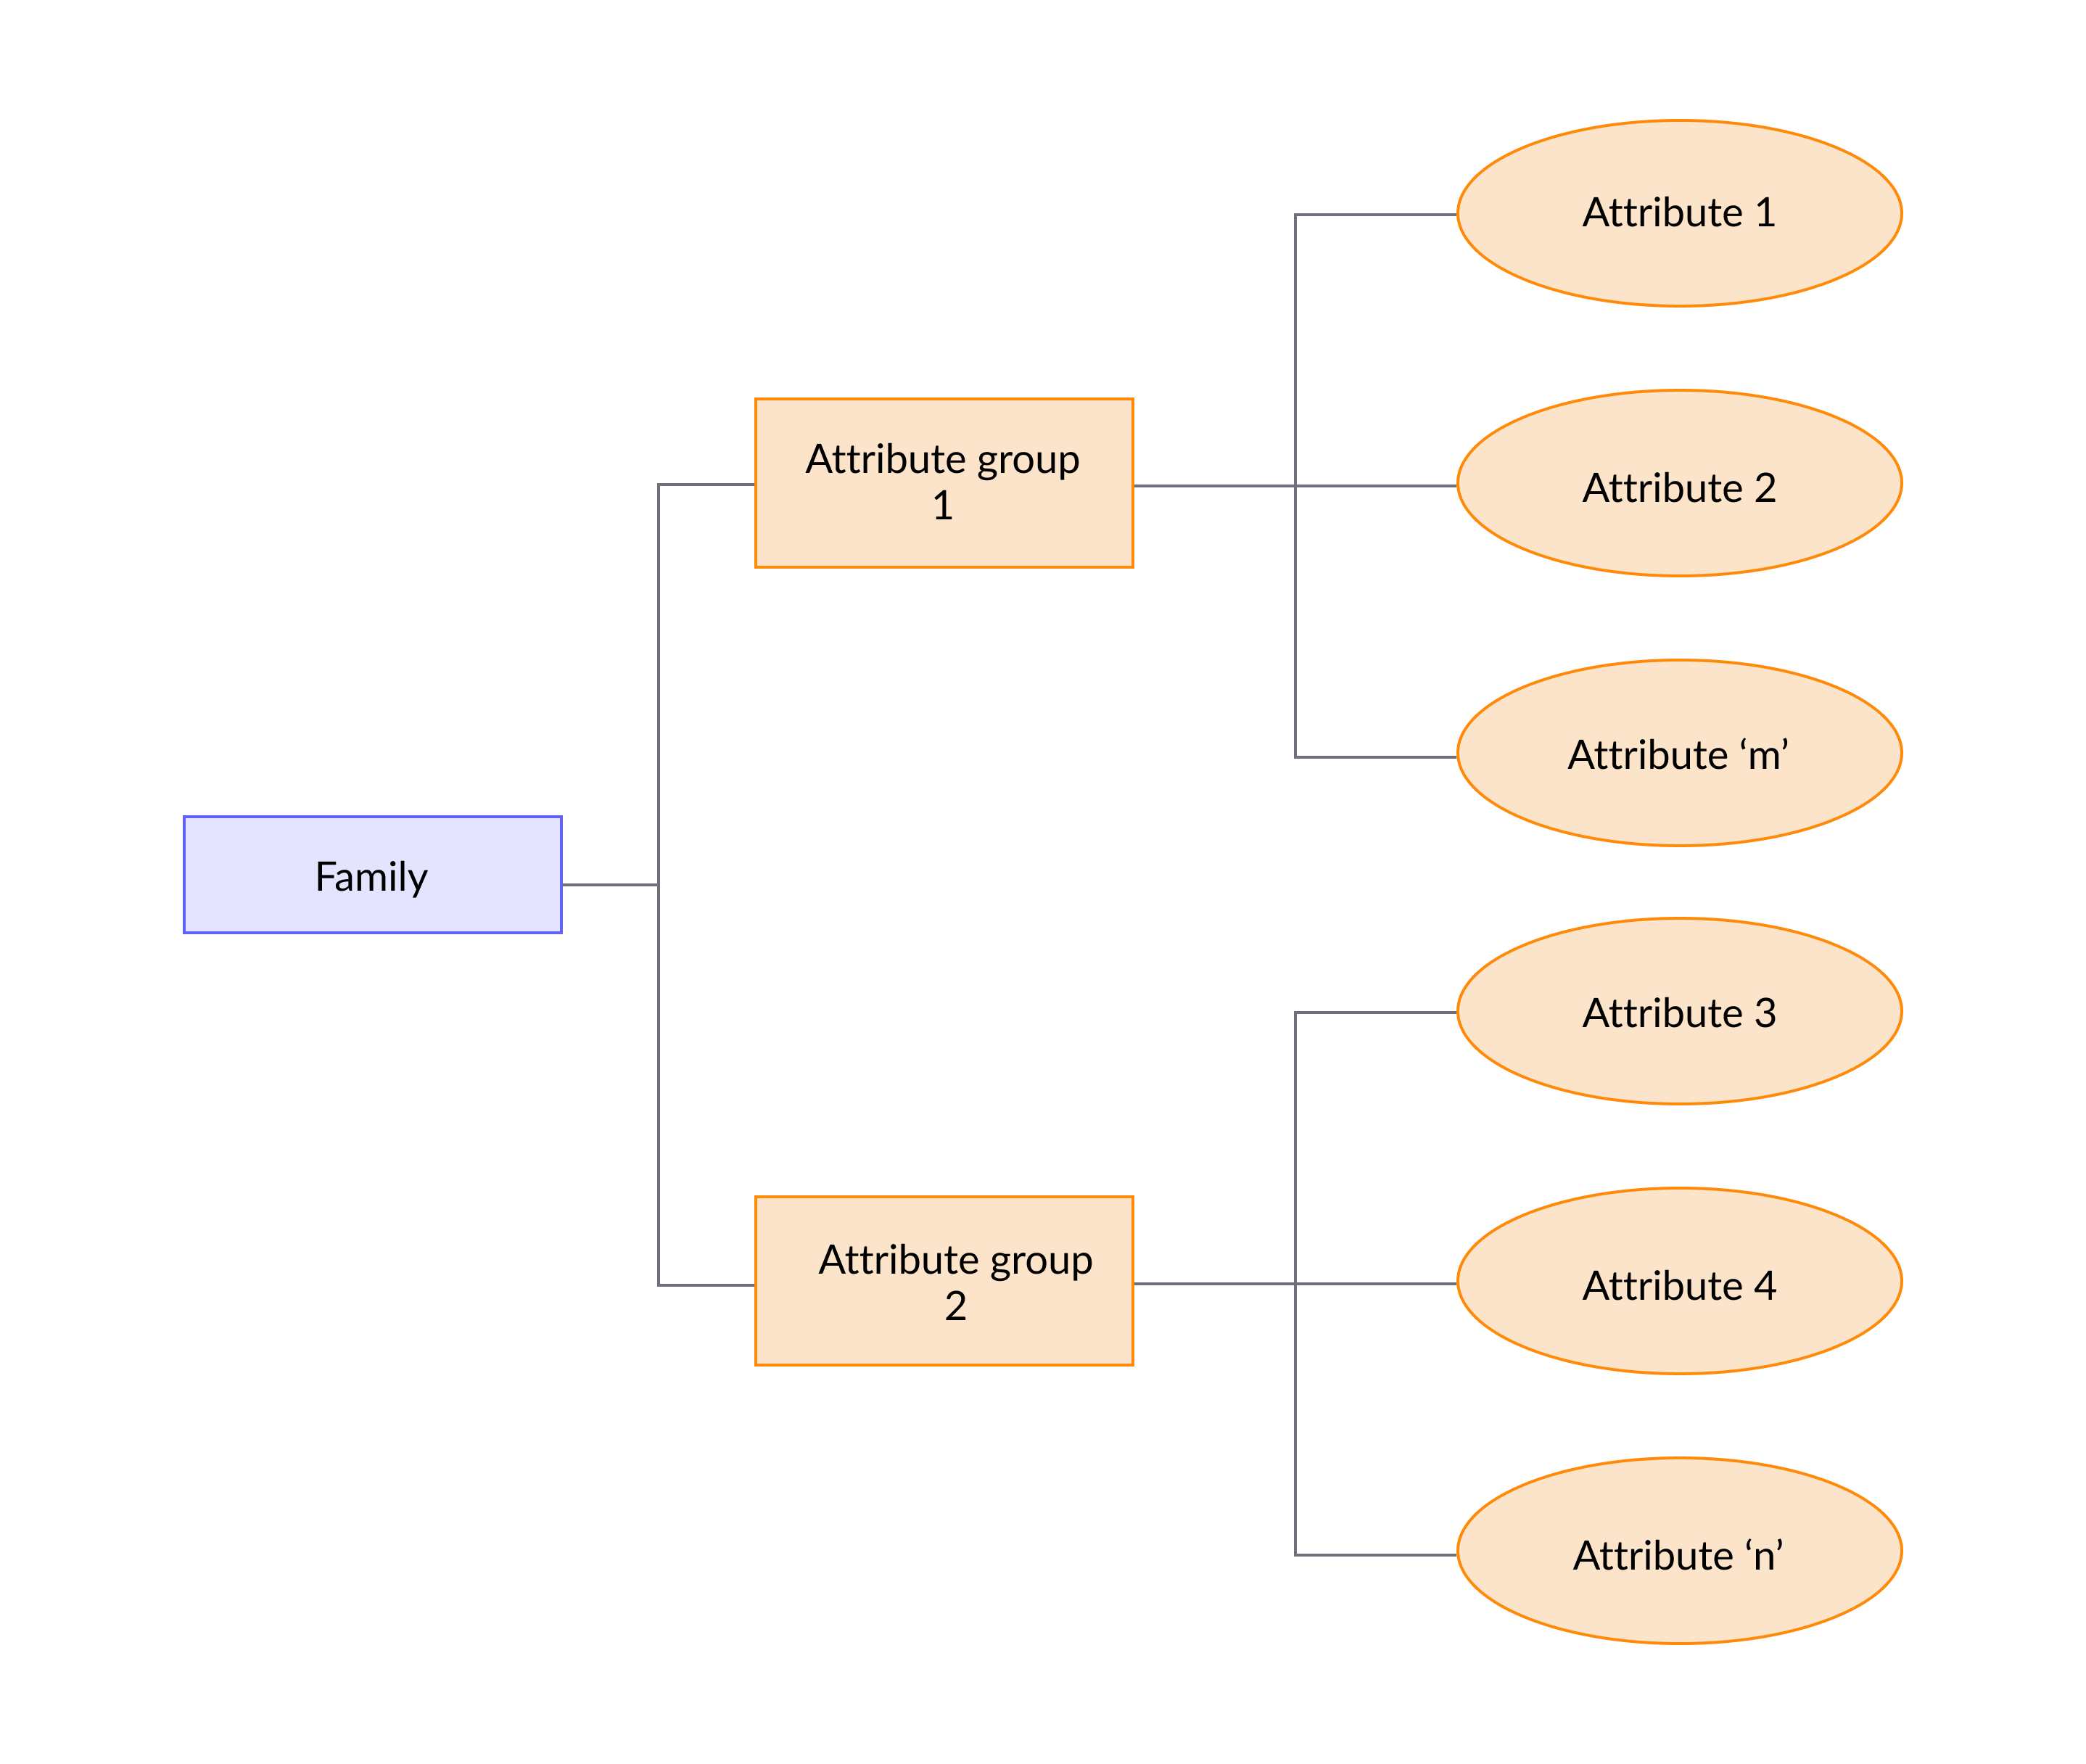
Relationship between Attribute, Attribute Group and Family
Relationship between Attribute, Attribute Group and Family with an example
- How to create a new family in flexiPIM?
- How to edit a family in flexiPIM?
- How to delete a mapped family in flexiPIM?
- How to delete a mapped attribute from a family in flexiPIM?
How to create a new family in flexiPIM?
Step 1: Login with your credentials.
Step 2: Hover over the sidebar on the left side to access the hamburger menu.
Step 3: Click on 'Associations' on the sidebar, then click on 'Families'
        You will be directed to the “Families” page.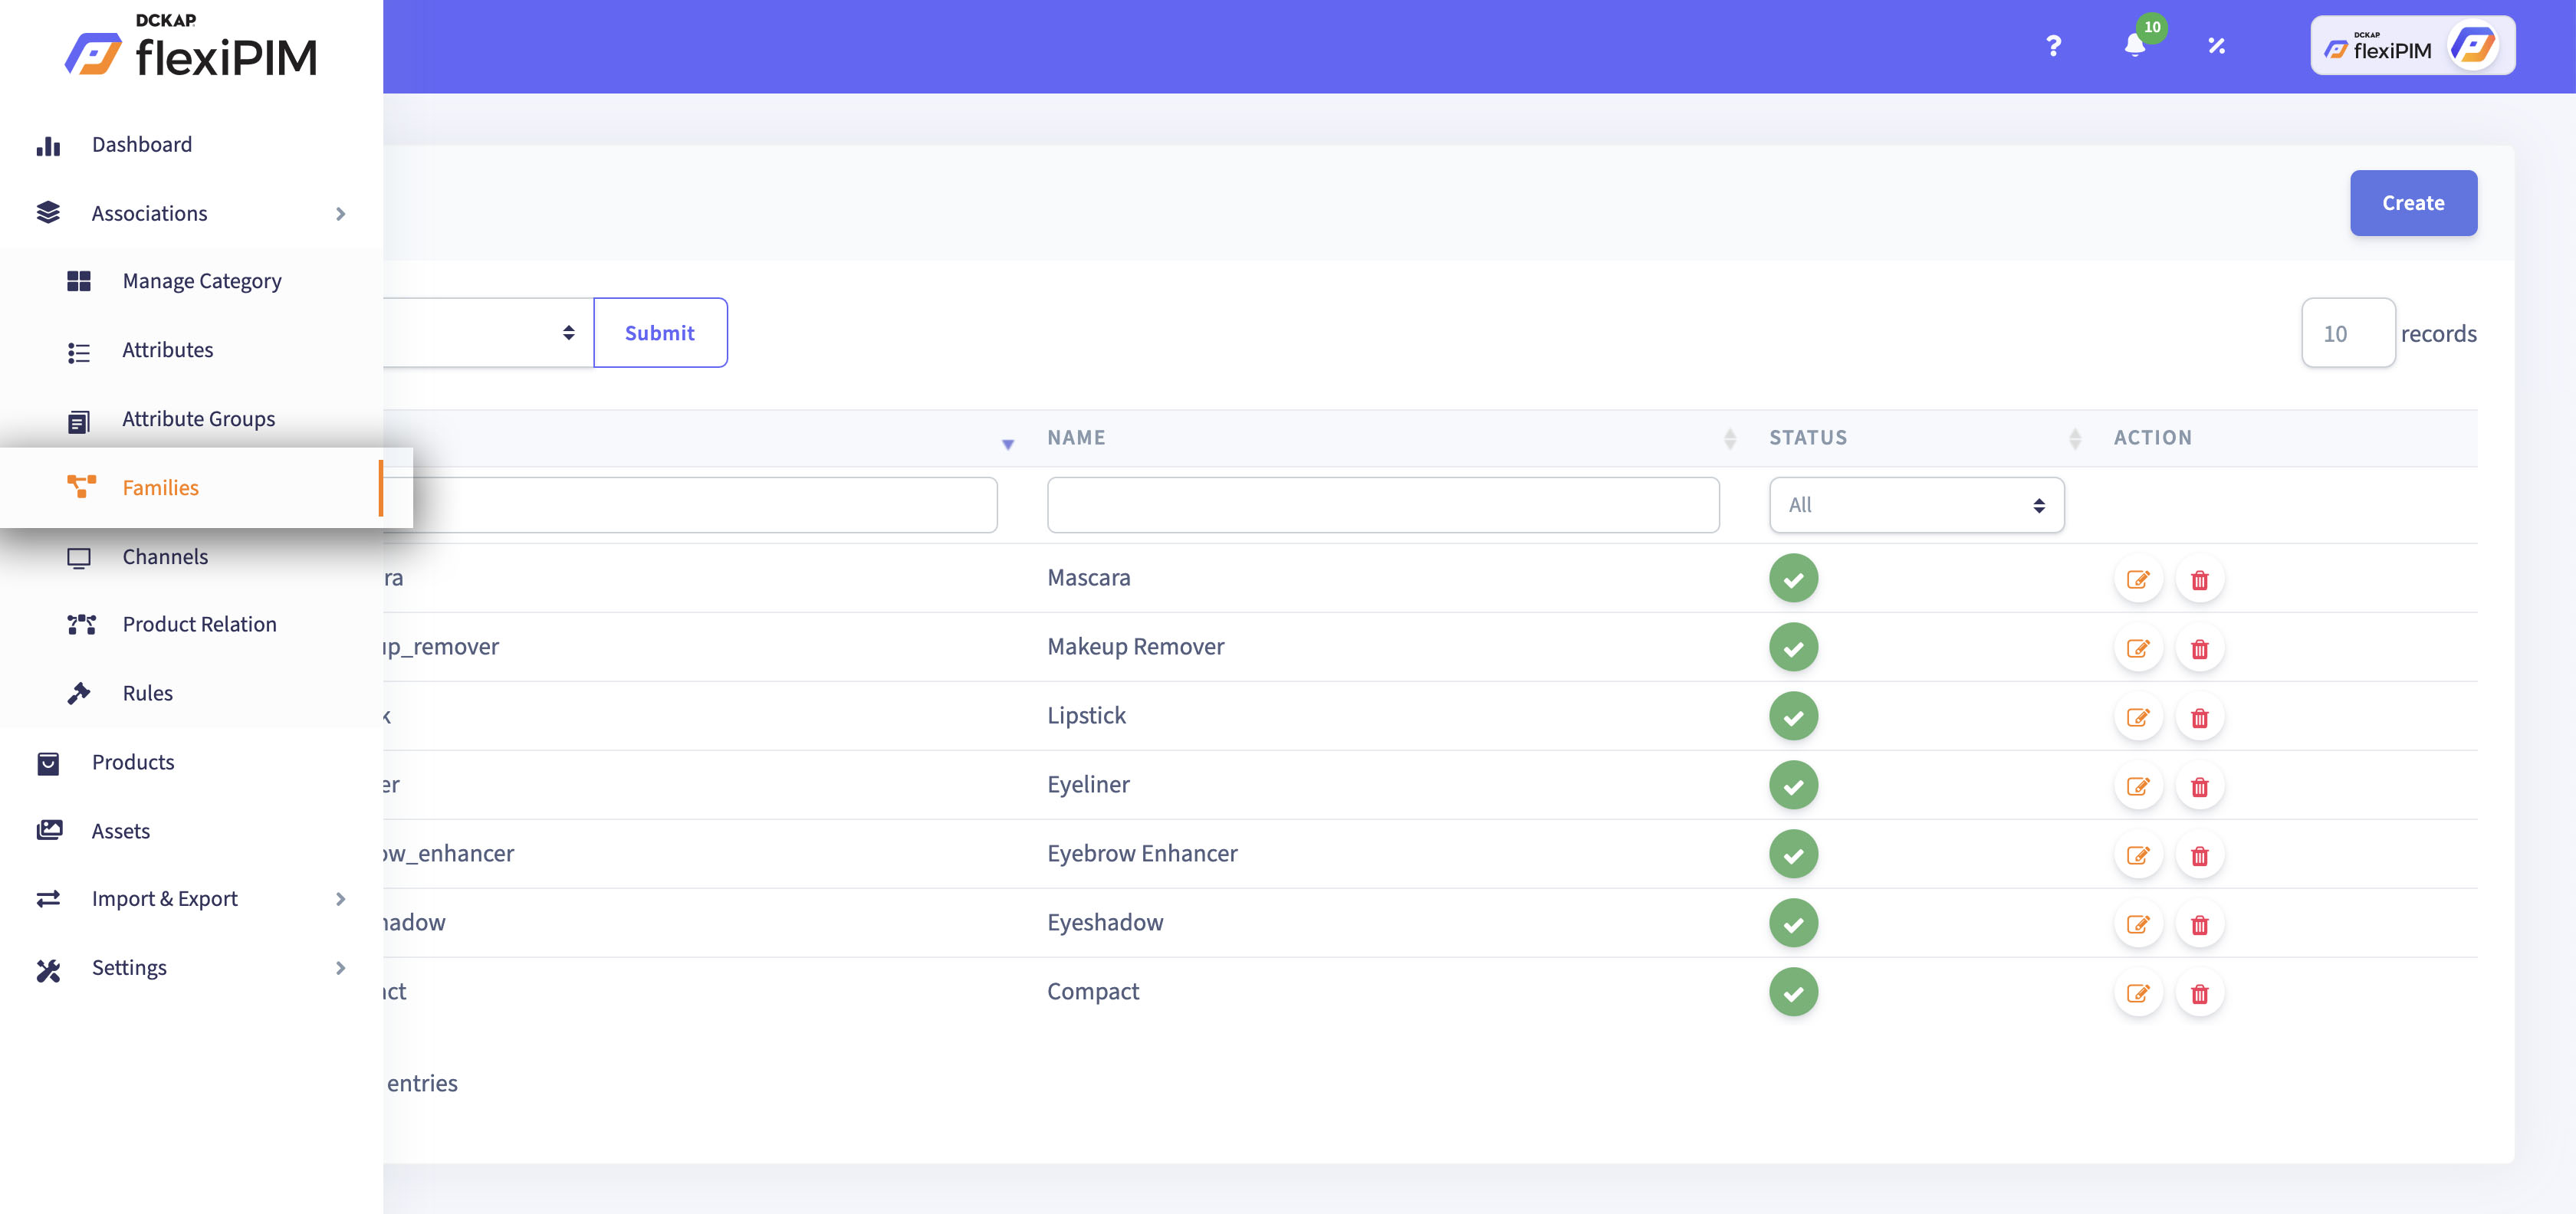
Step 4: Click on the 'Create' button on the top right corner to
        fill the required fields on the next page.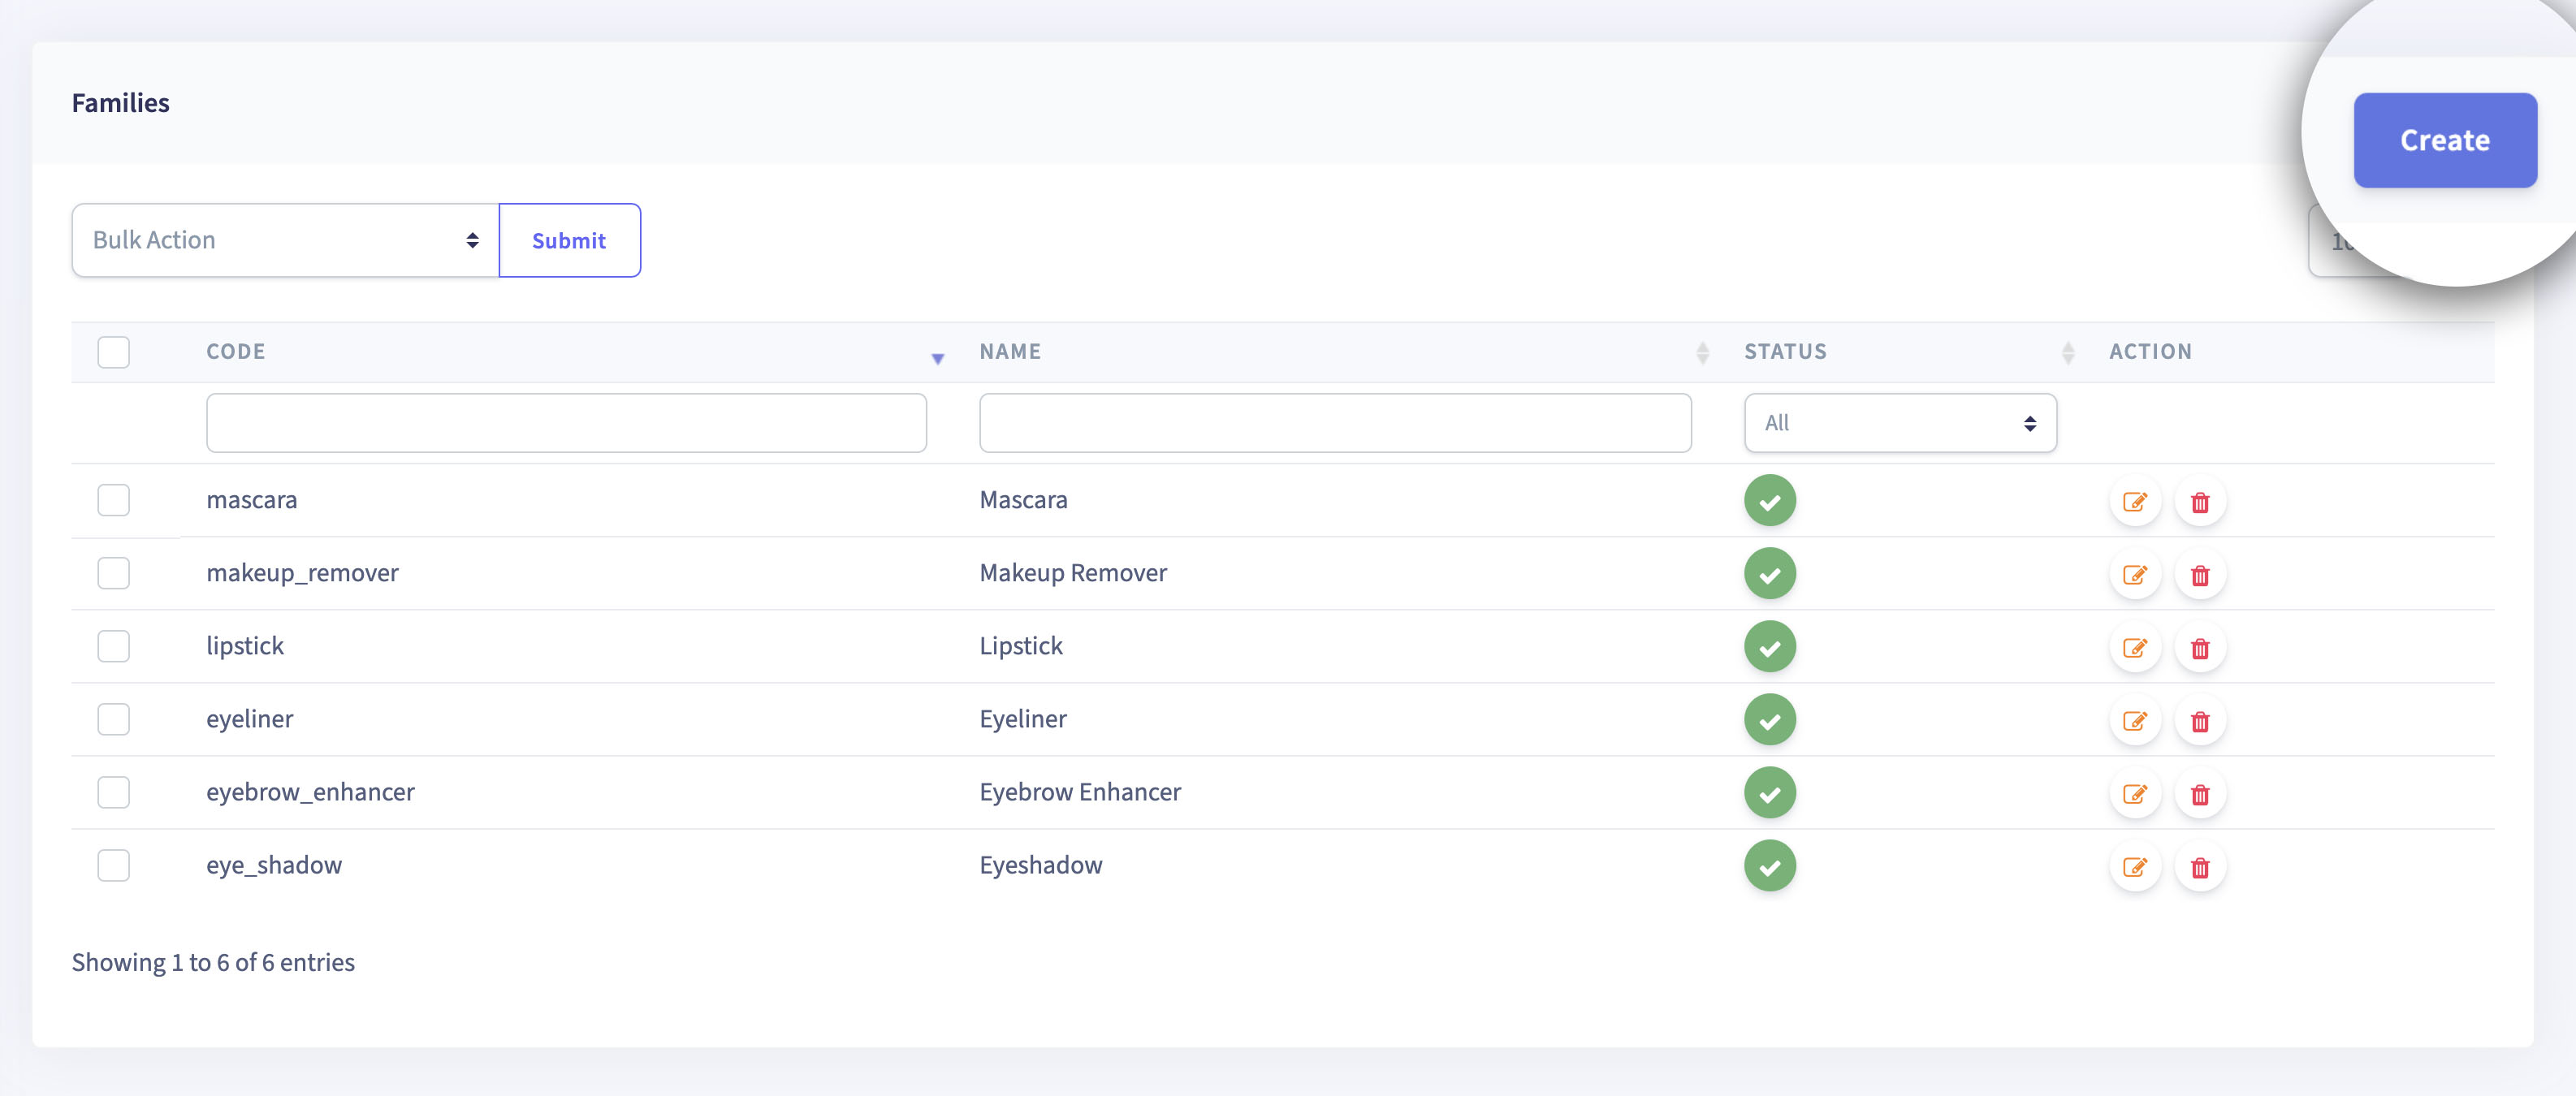
Step 5: The page of the 'Create Families' is displayed.
Step 6: Enter the required fields.
Step 7: Assign the Family 'Code', assign the 'Label', render
        the status as 'Active or Inactive', click on 'Save'.
        A Family is now created.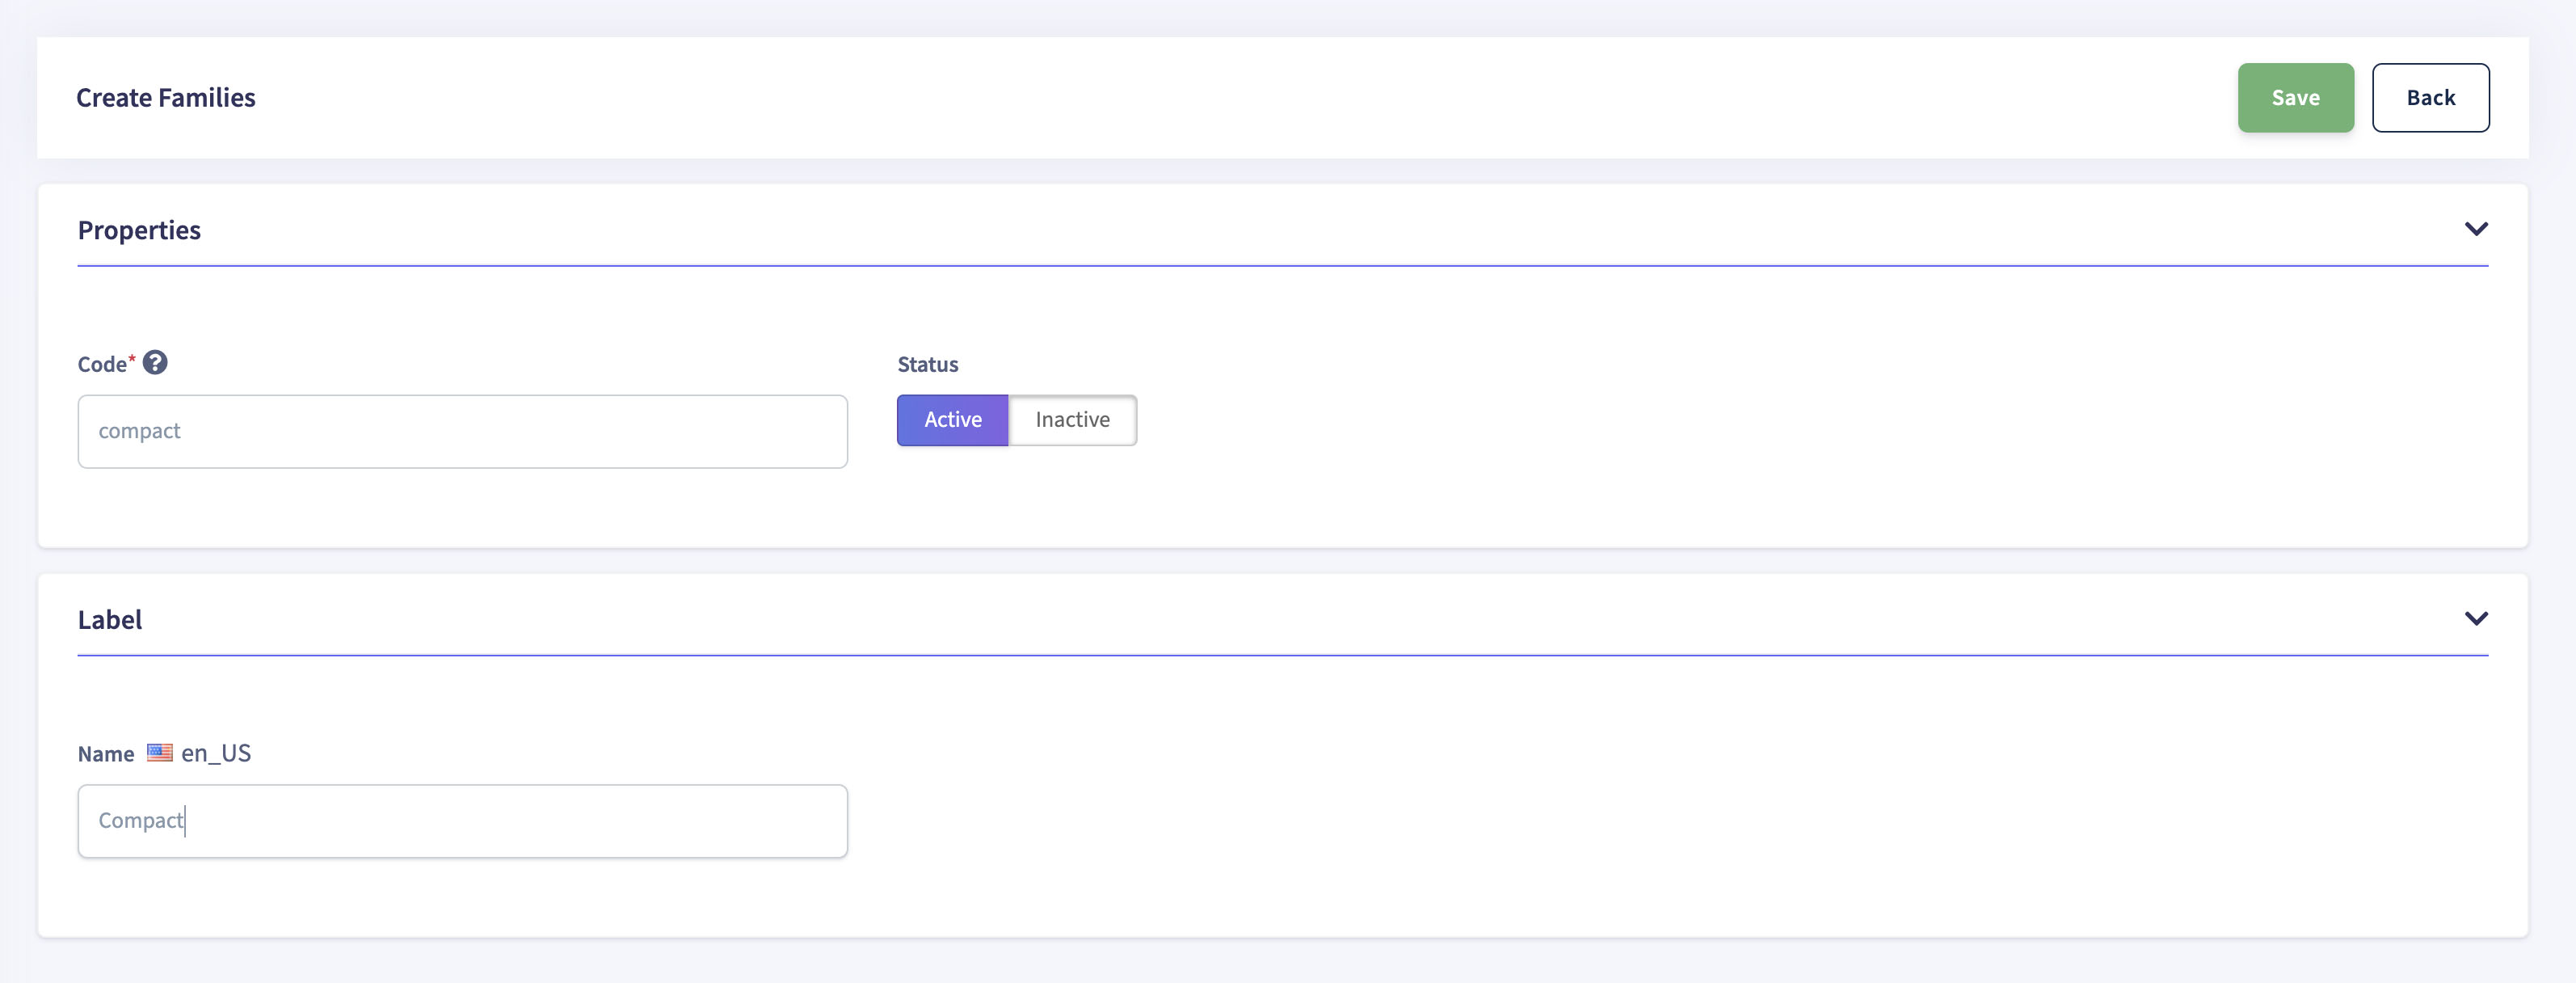
| Title | Description |
|---|---|
| Code | Used to create unique code for families. |
| Name | To create a name for the category families. |
| Status | It shows status of families either Active or in-Active. |
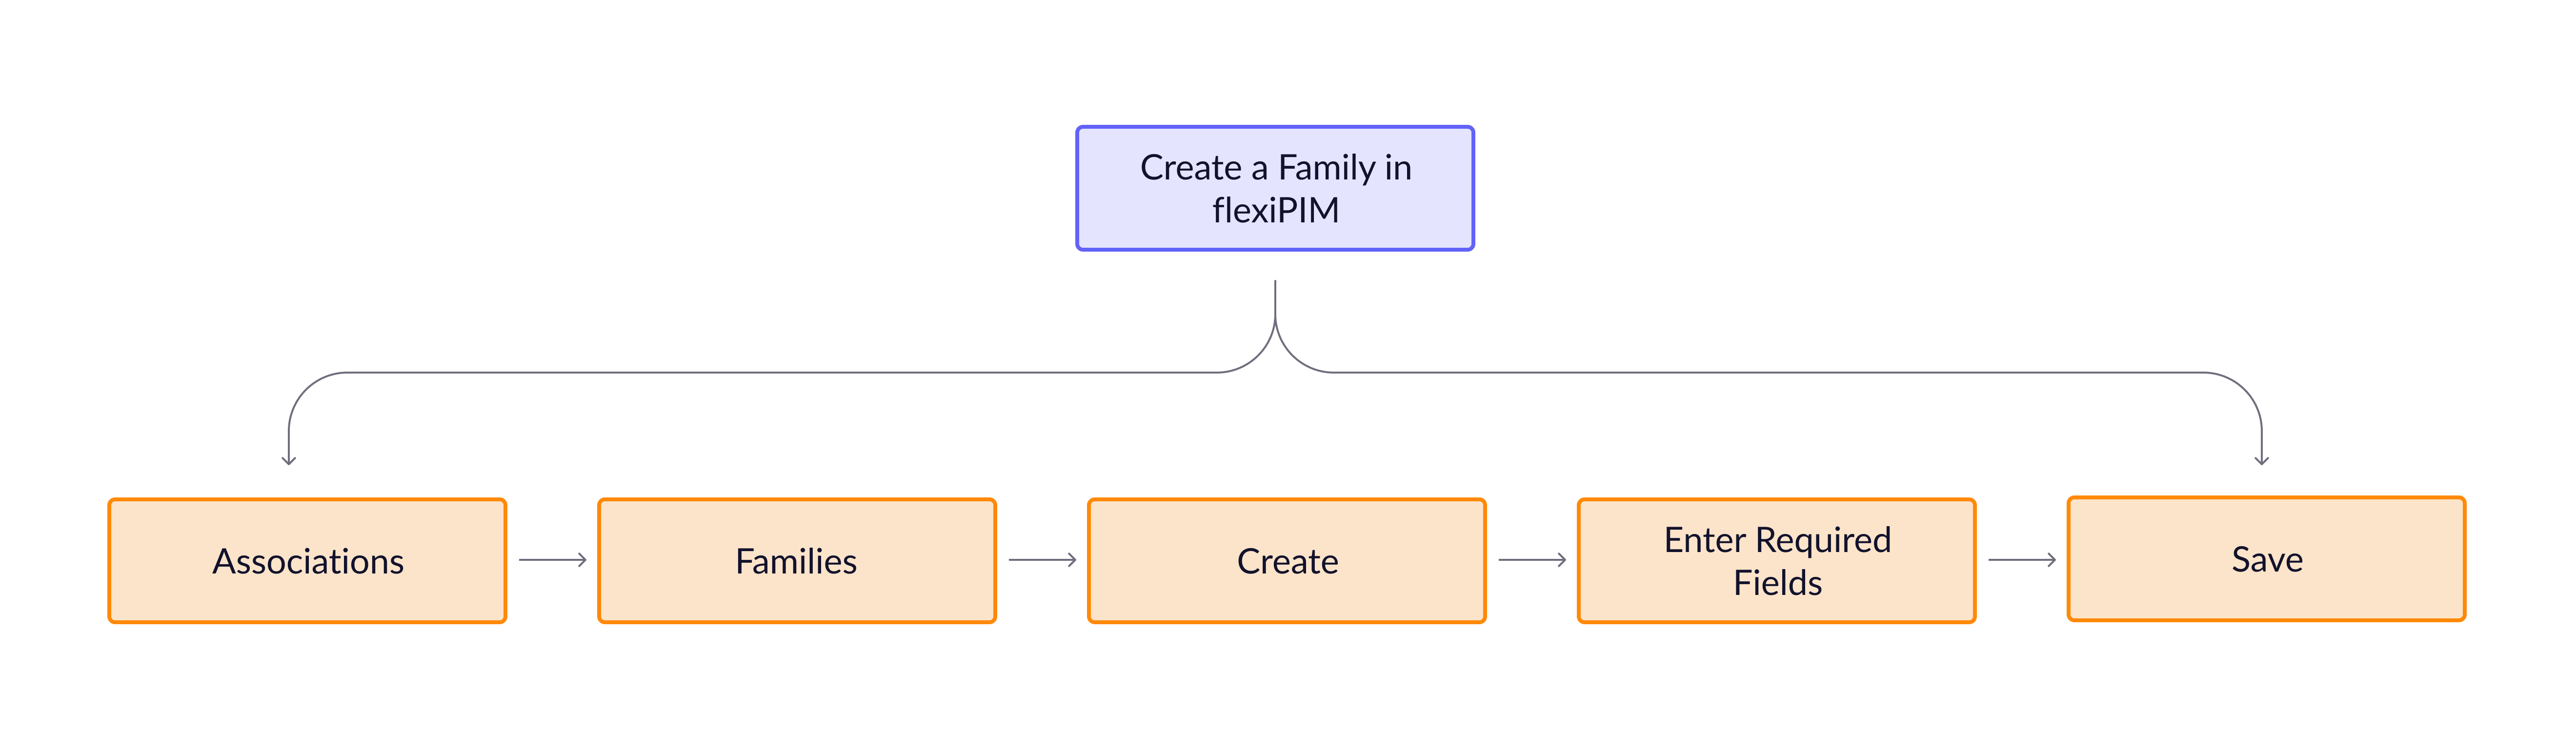
The flowchart below gives a quick overview of the steps:
How to edit a family in flexiPIM?
{primary} A
Familycan be assigned from theAttribute editandFamily editpages. It cannot be assigned from theAttribute group editpage.
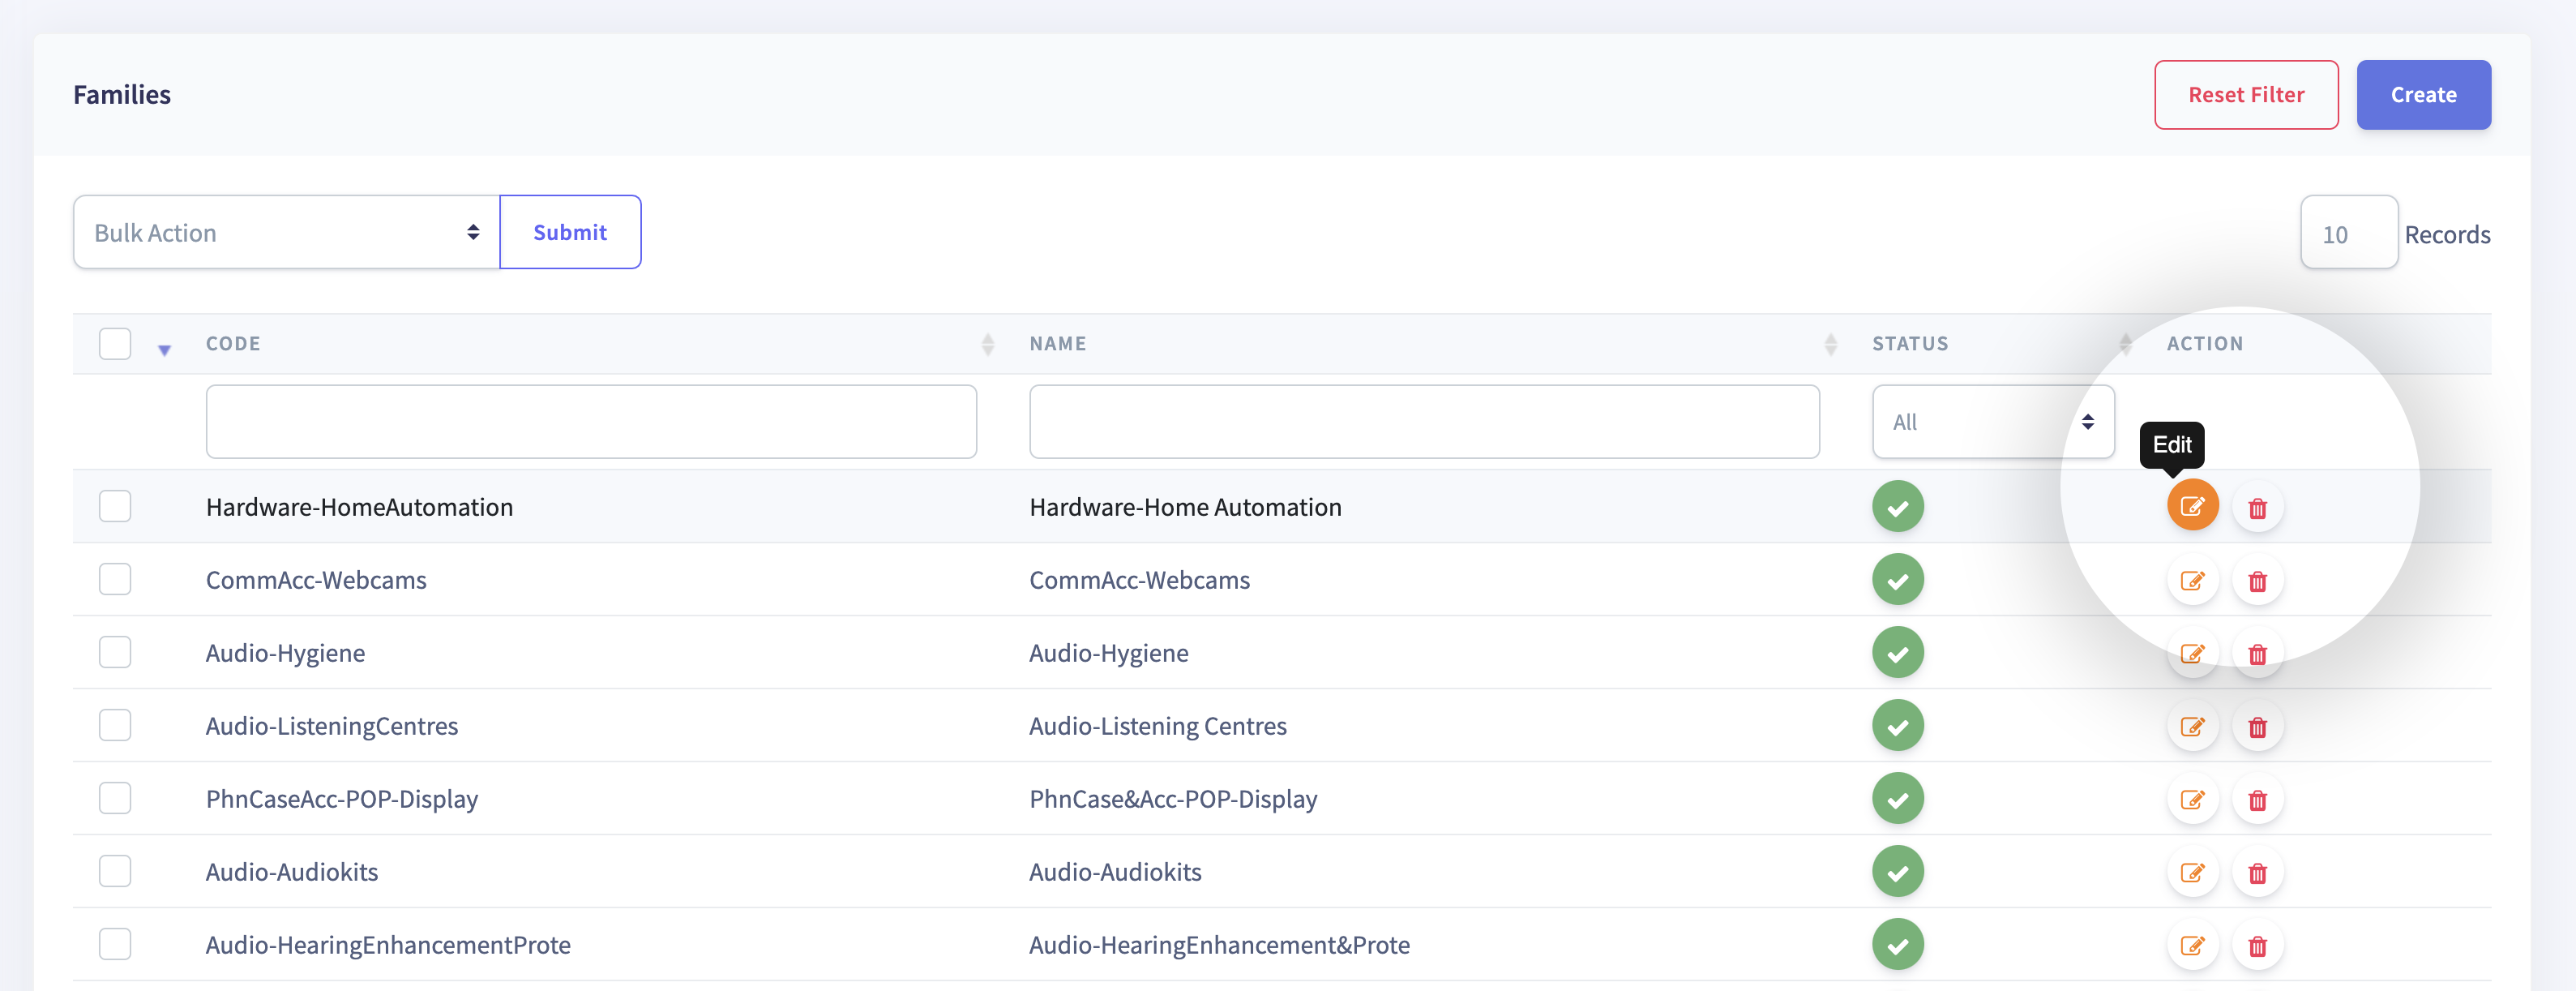
Step 1: In the Families table view, a list of the created
        families is displayed.

Step 2: Click on the 'Pencil' icon to edit the Family and you will
        be directed to the 'Edit Family Group' page.
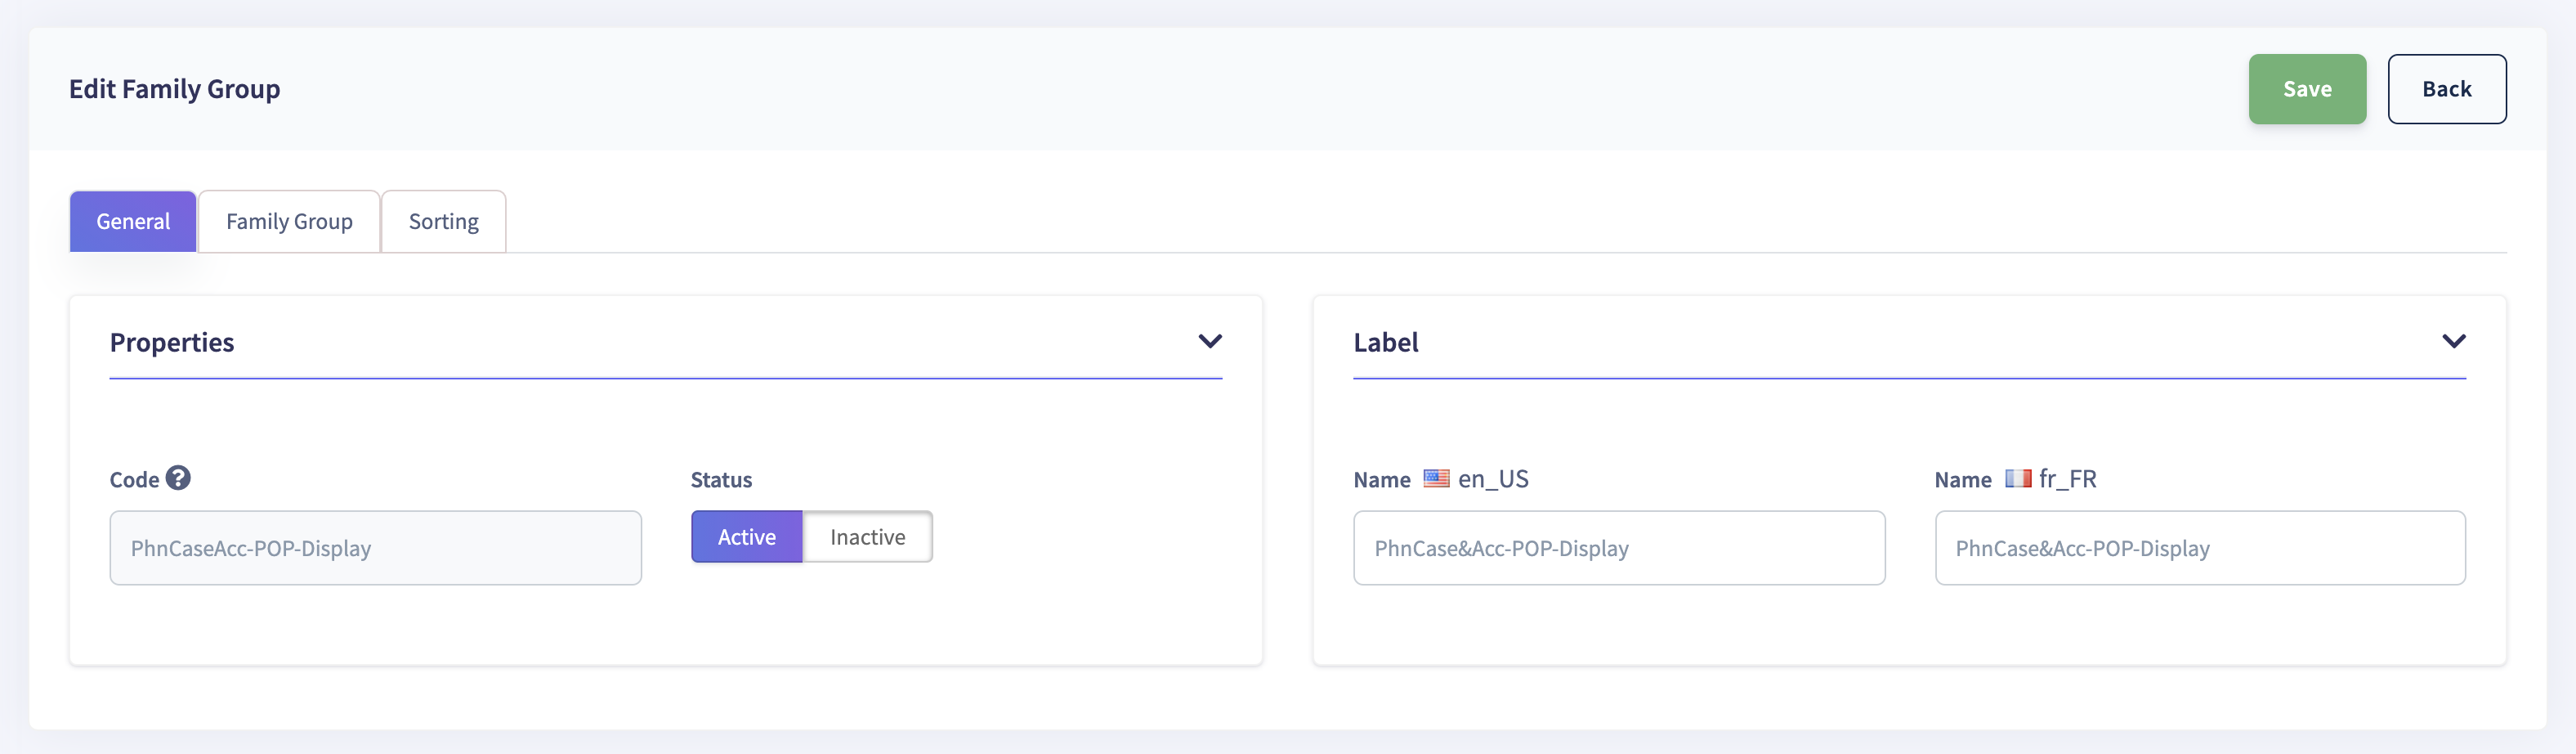
You will see three sub-menus, General, Family Grouping and Sorting
Step 3: In the 'General' tab enter properties like 'Code' (Unique name),
        'Label' (User facing name), and select 'Status' as 'Active' or
        'Inactive'.
{primary} The
Codeunder theGeneralsub-menu is not editable because it is a unique code for the Family Group that can be assigned only while creating theFamilyGroup.
Step 4: Under the 'Family Group' sub-menu, you will see the 'Attribute'
        and 'Attribute Group' drop-down menu with options to select from.

Step 5: Select combinations of predefined Attributes and Attribute Groups
        and click on 'Add' and the added entities will be displayed in the
        table below the drop-down menus.

Step 6: In the bulk action drop-down menu, you may bulk assign/unassign
        the selected(check-marked) attributes to the respective channel.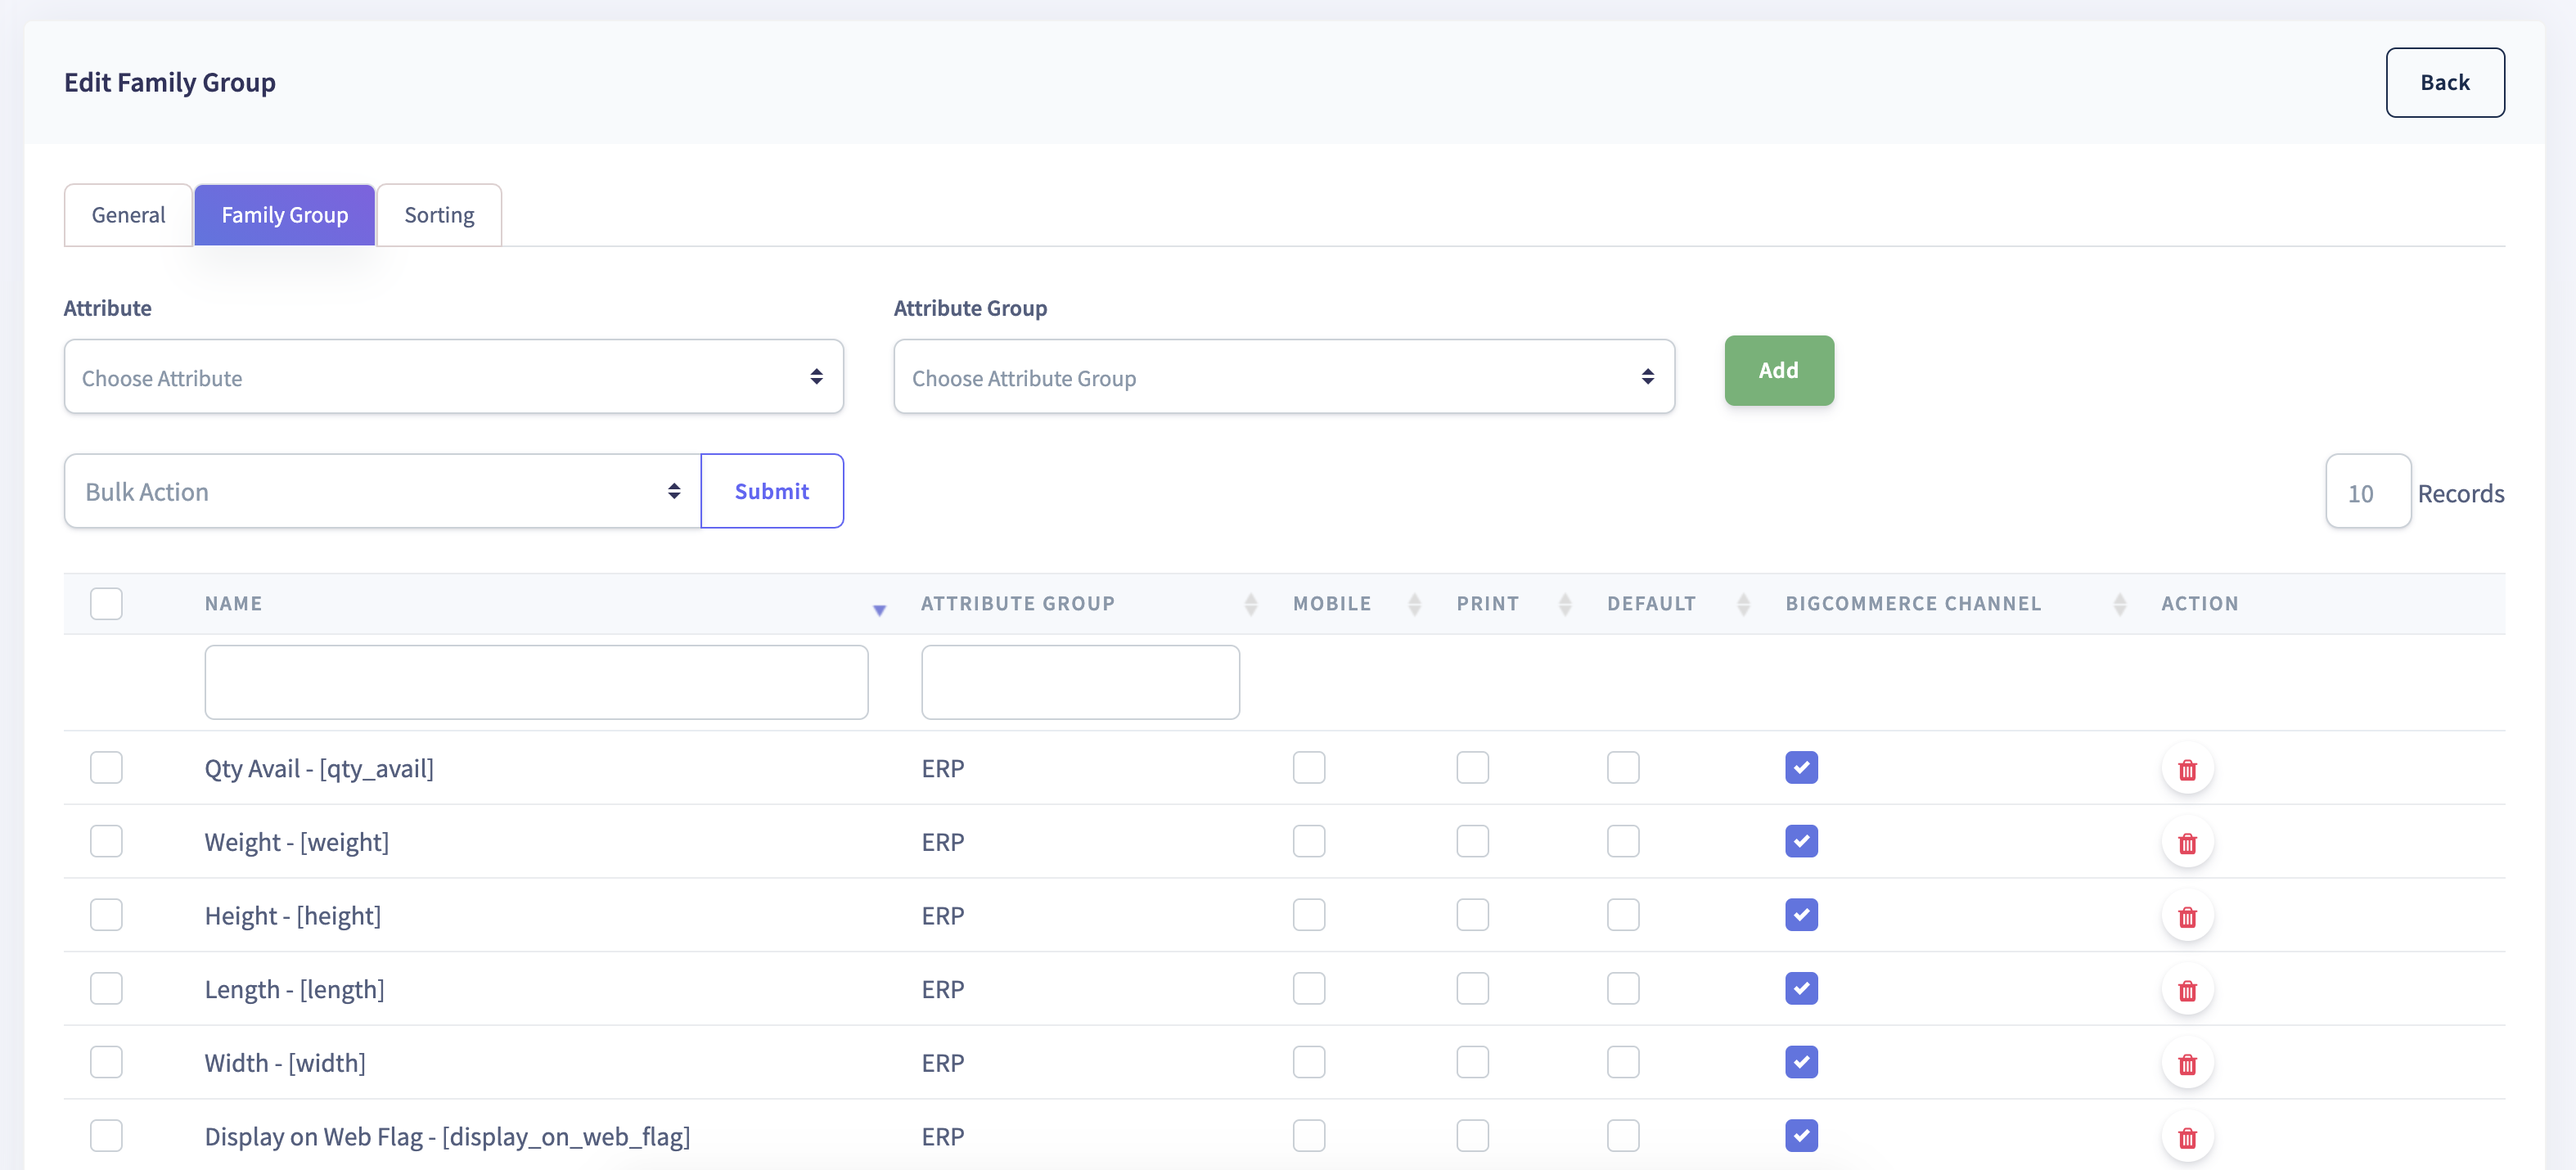
Step 7: Under the 'Sorting' menu, assign the sort order of attribute groups.
        This will reflect in the sorting order of attribute groups on the sidebar
        of the 'Products' page within flexiPIM.
        This helps you keep the regularly used attribute groups on the top of
        the order, making product navigation easier.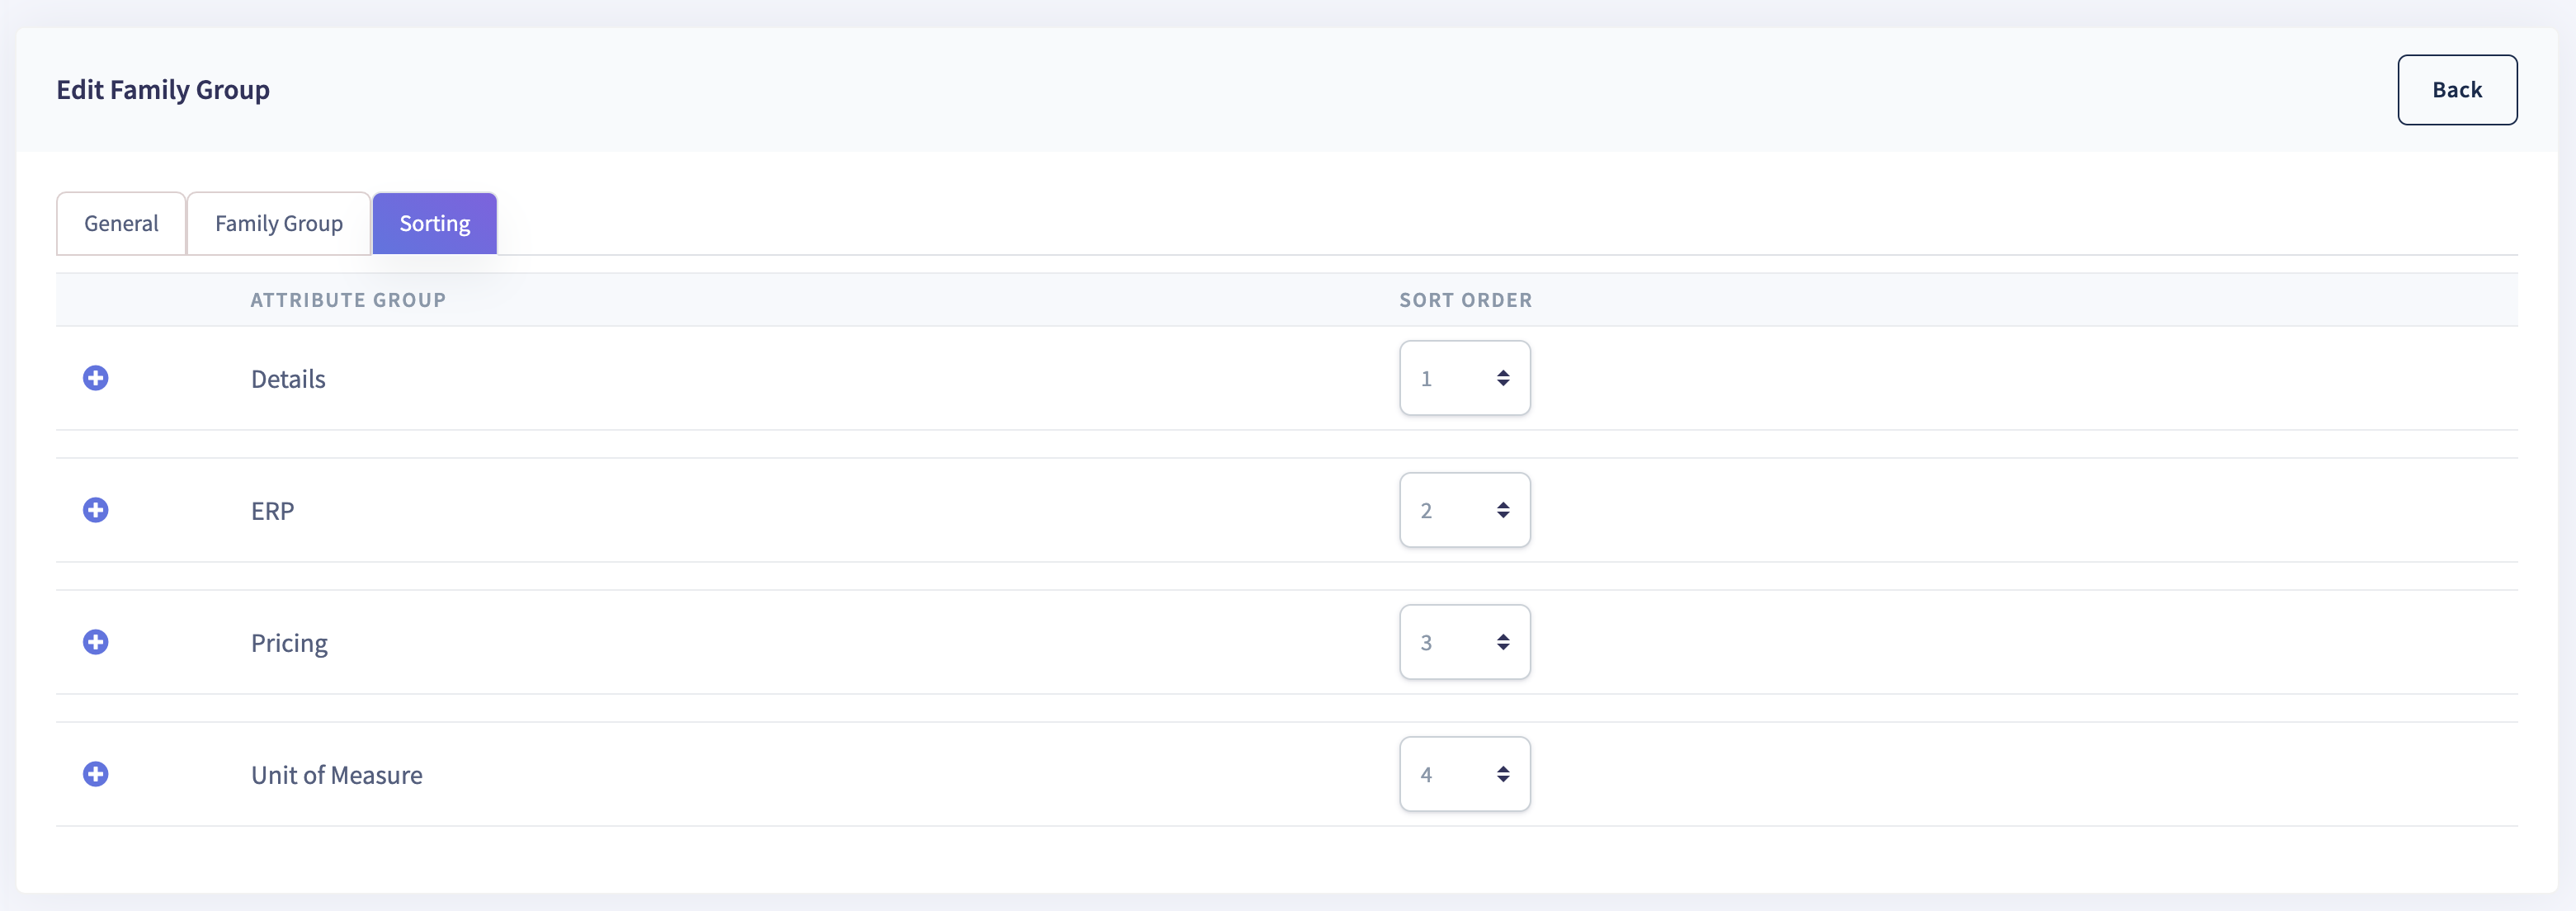
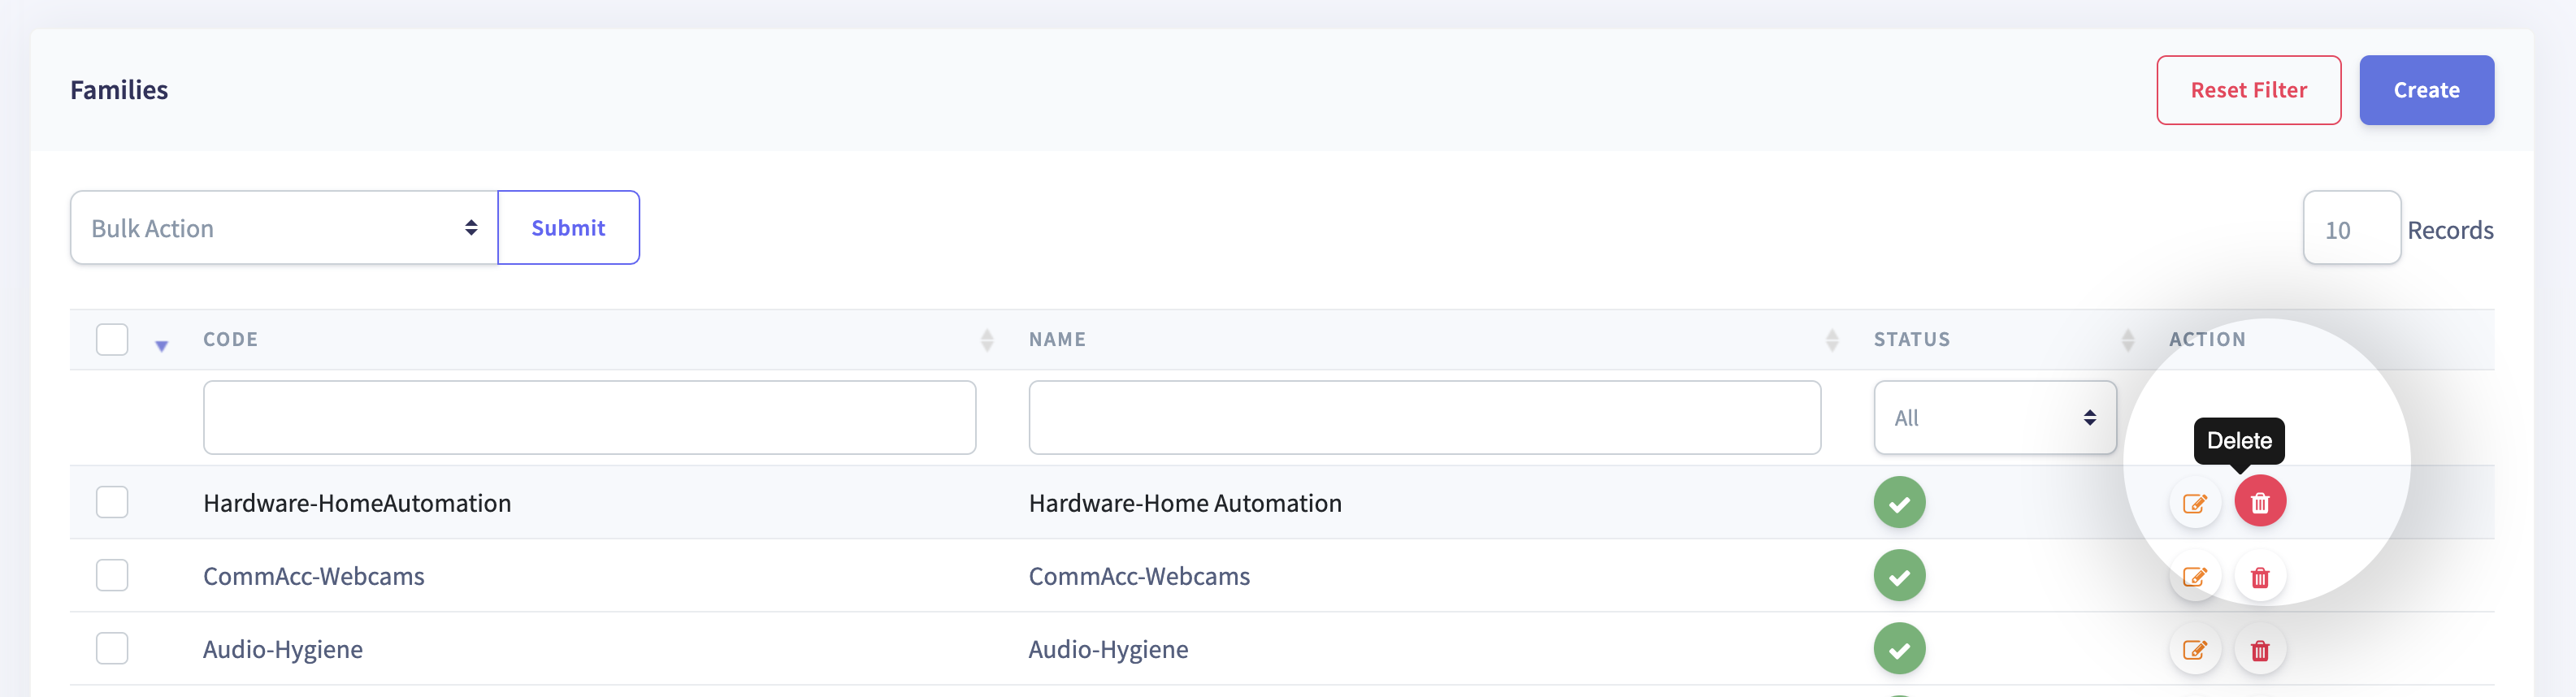
How to delete a mapped family in flexiPIM?
Step 1: Delete the 'Family/Families' of your choice, from the 'Families'
        page by clicking on the 'Trash' icon (refer image below).
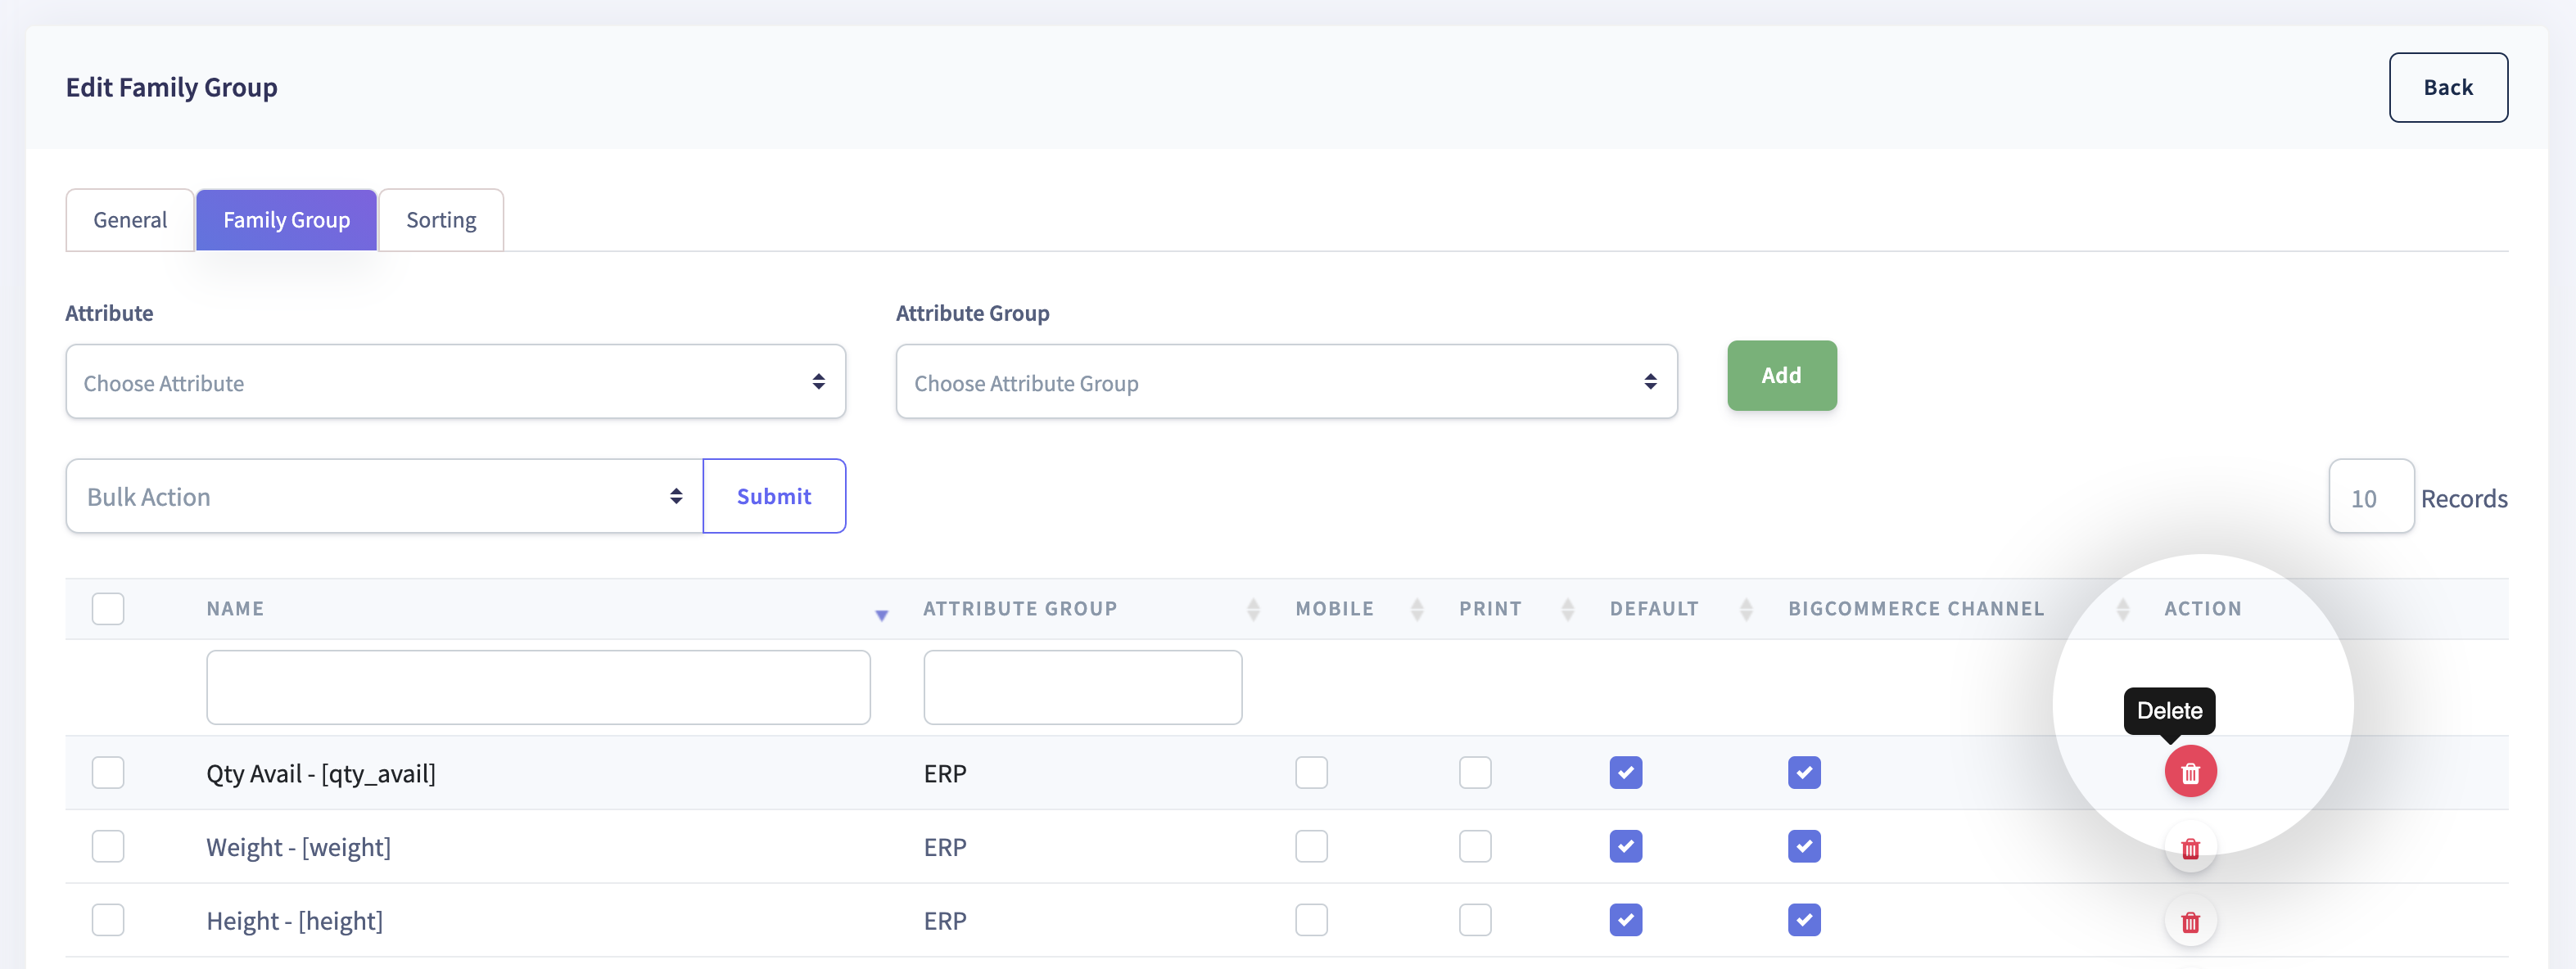
How to delete a mapped attribute from a family in flexiPIM?
Step 1: On the 'Edit Family Group' page, click on the 'Trash' icon in the Attribute and
        Attribute Group tabular view to delete the entity of your choice.
{info}
Note:The deletion of attributes from a family will delete it from all products associated with that family.